12 Knitting Tips for Beginners + Free Knitting Classes Online
If you're just learning how to knit, these tips can help you from making some common mistakes.
If there's anything that all knitters have in common, it's that we were all beginners once. Maybe some were children and have no lasting recollection of being a beginner, but more people now than ever before are learning how to knit in their twenties and beyond as knitting grows ever more trendy and popular. Personally, I taught myself how to knit here on AllFreeKnitting with a ton of video tutorials, but always wished I'd had a mentor in my life who knit regularly that could bestow upon me her knowledge of knitting tips and trade secrets.
PLUS! We're sharing two exclusive knitting classes online free to you! Learn basic beginner information you'll need to start with Knitting 101 and then dive a little deeper in your knitting journey with Knitting 201. Both beginner knitting classes are taught by the amazing Marly Bird, crochet expert and Red Heart Yarns ambassador extraordinaire!
Let me be that mentor for you. Having been a beginner only a few years ago, I'm in a unique place where I can complete many advanced patterns, but still remember very clearly sitting cross-legged on my bed with my laptop by my side, pausing the instructional video I'd pulled up every second-and-a-half to study exactly where the instructor's needles were poking and in what direction the yarn was wrapping. If you keep trying to start knitting but keep getting discouraged, or you're scouring the Internet for wisdom before you finally take the plunge, these ten tips that I wish were told to me when I began knitting should help.
If you love these patterns, be sure to subscribe to our newsletter to get amazing knitting patterns like these delivered to your inbox every day!
EXCLUSIVE: Knitting 101 Free Online Video Course
Are you a visual learner who wants to learn to knit? Well, you are in luck. Our sister crafting site, FaveCrafts, has created this fantastic Knitting 101 video course for beginners. This video goes over the absolute basics, from how to hold your needles to your first few movements and stitches.
This is the ultimate beginner course and we're offering it to you for free as an exclusive for being a reader and follower of AllFreeKnitting. We hope you enjoy and learn a lot with these amazing tips from well-known knitting instructor, Marly Bird. Once you watch this one, scroll down and watch the continuation video course, Knitting 201.
Click the play button to watch.
EXCLUSIVE: Knitting 201 Free Online Video Course
Now that you've mastered the basics, watch the exclusive continuation, Knitting 201! This knitting class for beginners offers the next set of information and new stitches you'll need to learn on your knitting journey. Marly is back with her expertise and easy-to-follow instructions, all in visual form.
This class is just as informative as if you were taking a class in person. But it's free and you can rewatch as many times as needed. Be sure to bookmark this page until you complete all of these amazing skills you're going to learn here.
Click the play button to watch.
1. Buy Cheap, Plain Yarn
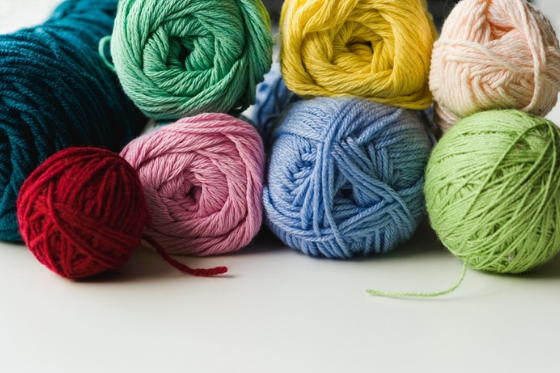
It's easy to be tempted by all the pretty, unique, soft yarns out there, but the truth is that the first couple of things you knit are not going to be worth the nice yarn. Besides, it's gentler on your wallet to start off cheap and then move onto the luxurious stuff when you know you can do it some justice.
What do I mean by plain yarn? No loopy yarn, no furry yarn, no bulky yarn. You're going to want to pick up a skein of 100% acrylic worsted weight yarn. You can find the information on the yarn label itself; the fiber contents will read "100% acrylic" or something similar, and a little picture of a yarn ball should have the number 4 on it, which signifies that the yarn is worsted weight, or medium weight. This is the most common yarn weight. Red Heart Super Saver yarn in your favorite color is a great, cheap, easy place to start.
2. Strategically Buy Your Needles
Needles aren't like yarn where you can use them up. Your needles need to carry you through all of your future projects, and therefore should be sturdy and comfortable. In an ideal world, you could go to your local yarn store and ask to hold a few pairs of needles in your hands before deciding on the brand and material you prefer, but if you don't have access to anything like that, we recommend size 8 single-pointed bamboo needles.
My personal needle preference is aluminum, because I like it when the yarn can easily slip off of the needles, but that's dangerous territory to be in when you're a beginner and you're dropping stitches like hot cakes.
Here's the key: once you've decided whether or not you like this pair of size 8 bamboo needles (preferably after knitting your first swatch), and you've decided that you like knitting and want to keep going, spring for an interchangeable needle set. These sets are a bunch of needle tips with cords that connect them. Technically, they are all circular needles, but a fun tip I learned early on in my knitting career is that you can knit flat on circular needles! Many people find them easier to hold than single-pointed needles, as well. Choose a set of bamboo interchangeable needles if you liked your first pair, or aluminum if you did not. Now, you'll have every knitting needle size under the sun to play with in your future endeavors, and you'll only need to worry about double-pointed needles... but we won't get into that now.

3. Learn to Knit Continental Style
If you're learning to knit in modern day America, you're typically learning one of two styles out of many: English or Continental. Personally, I learned English style: in this technique, you hold your yarn in your right hand as you knit, and pause to wrap it around your working needle each stitch.
With Continental style, by contrast, you hold the yarn in your left hand and "scoop" at it with your right needle. If there are any crocheters reading this article, this may sound familiar, and it's true: it's often easier for crocheters to learn how to knit Continental style rather than English.
Why do I recommend you learn how to knit Continental? Continental style is faster and (arguably) easier on your joints. If you've already learned to knit English style, that is fine, and you can either switch things up and learn to knit Continental or just keep merrily knitting English style. There's no rule here, but I wish I'd learned to knit Continental style, because now I have trouble learning any style of knitting other than English, and I'm a real slowpoke when it comes to my knitting.
4. Learn the Knit Cast On
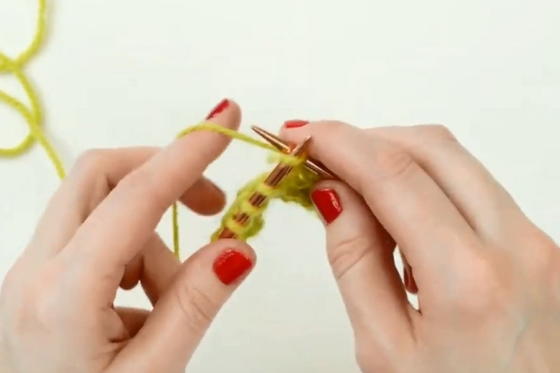
Many instructors begin with teaching their pupils how to cast on with the much-more-often-used longtail cast on method. We do recommend trying out the longtail cast on method before all else, but if you find it just confuses and frustrates you, try learning the knit cast on method instead!
This is the cast on method I personally learned with, and while I never use it anymore, it was insanely helpeful to me in the beginning. While this cast on method isn't usually specifically called for in a pattern (but can certainly be used if no other method is specifically called for), it's simpler to get the hang of, and teaches you both how to cast on and how to complete a knit stitch in one. This may not make much sense to you yet, but after you've cast on and you start learning how to knit a stitch, you'll find that you've already learned how to do this, minus one small step.
5. Start With a Swatch
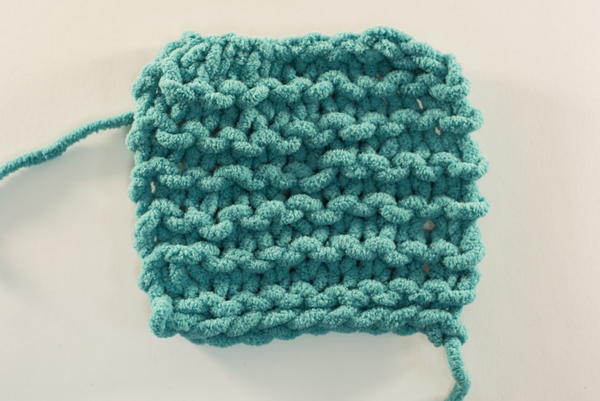
Now, you have your yarn, needles, and a grand idea of the very first scarf you'll knit, but I'm here to hold up the "yield" sign in your face and recommend that you start off a bit smaller. Rather than jumping right into a scarf, knit up a swatch instead: that is, when you learn how to cast on and knit, just knit a small square of fabric in garter stitch (psst... garter stitch is simply knitting every stitch)! This way, you can address any issues you encounter without worrying about ruining a lovely scarf or, heaven forbid, a gift for a friend.
I jumped straight into a scarf myself, and I don't even wear it to this day because the beginning is just so hideous. That's because I hadn't quite perfected my knit stitch yet. This brings us to tip #6.
6. Your Tension Will Be Terrible... Ignore It
Knitting tension is something even seasoned knitters (like myself!) struggle with to this day, but not quite to the same magnitude as beginning knitters. You'll find that your rows are drastically uneven, your stitches seem to be hanging at the edges, and your swatch looks more like a piece of mesh than a sample of fabric.
Mark my words: you will grow out of this. Be like Dory from Finding Nemo and just keep swimming... er, knitting. Keep working on your swatch, and continue to knit onward until you see your stitches start to even up. Learning how to even up your tension truly comes down to understanding how tightly you should be wrapping your yarn, which is something you can only learn through feeling and practicing. Heck, you may even find that you're no longer adding or subtracting random stitches anymore by the time you've knit up a few inches!
Speaking of... check out these tutorials for fixing tension problems and preventing rowing out!
7. Use Basic Math
Remember how many stitches you cast on with. Every row for the first thirty rows or so that you knit, count how many loops are on your needle when you've finished up. If you seem to have gained or lost a stitch, something went wrong. Don't panic! It's okay, and completely normal for beginners to find themselves with more or fewer stitches than when they started out. This kind of thing isn't usually acceptable in a finished project, but that's why we started with a swatch instead of a scarf!
Later on in your knitting career, you can learn how to identify these knitting mistakes and correct them so it never looks like you made a mistake in the first place. This means picking up dropped stitches, or tinking (knitting backwards) to find where you accidentally added a stitch. For now, you should only be focused on knitting each stitch slowly and carefully and making sure no additions or subtractions have occurred. If a stitch slips off of your needle, catch it as quickly as possible before it begins unraveling, and stick your needle back through the loop. You'll know whether or not you knit the stitch already if your yarn is coming out of it, or coming out of a stitch to the left of it; if the yarn is coming out of the stitch before it (to the right), you have not knit that stitch yet.
So, what do you do if you find yourself with too many stitches and couldn't spot your problem as it occurred? If you're feeling confident enough to try something beyond the knit stitch, now is a great time to learn K2tog (knit two stitches together). Rather than put your needle into just the next stitch, keep poking until it also goes through the stitch to the left of it.
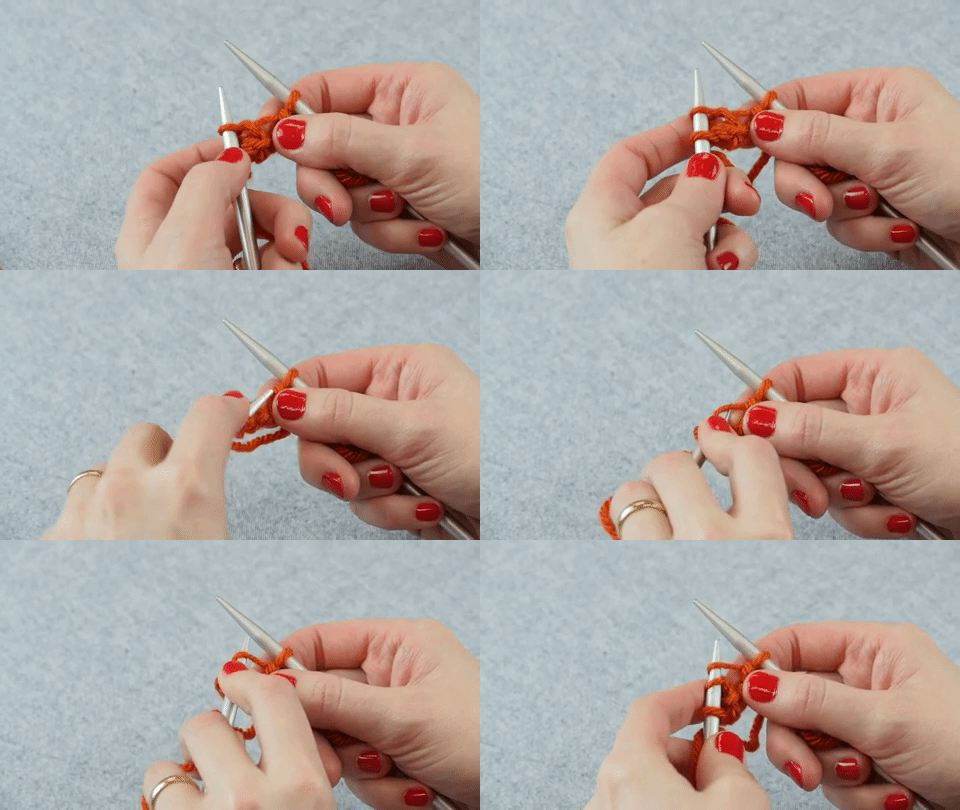
What if you have too few stitches? Try the M1 method. Knit to approximately the middle of your work. Do you see a horizontal bar of yarn connecting the stitch on your right needle to the stitch on your left? This is called the ladder. Scoop up the ladder with your left needle. It will make a sort of pseudo-loop on your left needle. Treat that loop like any other stitch and knit it with your right needle. You've just increased a stitch!
WARNING: Do not try these things if you're still struggling with the knit stitch. Just keep knitting, ignoring your mistakes, much like in other areas of life.
8. Don't Move Onto the Purl Stitch Before You've Mastered the Knit Stitch
Just as you shouldn't try these easy, corrective increase and decrease methods until you're fully confident that you could complete the knit stitch with your eyes closed, don't move onto the purl stitch until you're suitably prepared. Heck, you could even knit up an entire scarf in garter stitch before moving onto the purl stitch just to be extra sure that you're ready for that next step. You may even be ready to try the purl stitch after just a few rows of the knit stitch. Everybody learns differently. That said, you don't want to confuse yourself by moving onto a new technique and find yourself confusing knit and purl down the line.
This was a mistake of mine. I tried stockinette stitch first before relegating myself to garter stitch. Stockinette stitch, if you don't know, is where you knit one row and purl the other row. I had random blocks of garter stitch in my swatch because I would start knitting instead of purling, or vice-versa, by accident. Not to mention all of the holes in my work because I would forget to move the yarn either backwards or forwards before working the next stitch! There's too much potential for things to get messy if you're not 100% movin' and groovin' with the knit stitch yet.
If you're just getting started, be sure to check out our videos on the knit stitch and purl stitch and refer back to them when you find yourself in a yarny bind!
9. Videos Are Your Best Friend
If you're not in a position where you can be taught in-person by another knitter, or your family is sleeping and so you can't play a video teaching you how to knit, wait to learn until either of these are possible. Sure, pictures can be helpful, but knitting is such a motion-based craft that it's so important that you can pick apart the minute movements in your instructor's hands and learn from that.
Don't even bother with tutorials that offer only written instructions. These will be easier to follow and super helpful once you already have the basics down-pat, but you won't understand any of the terminology or be able to translate into concrete actions the abstract instructions you're receiving.
I must reiterate: videos, videos, videos. We have an extensive collection here at AllFreeKnitting of videos you can watch if you're ever stuck or want to learn a new technique, and I can't recommend them enough.
10. Try Something New With Each Project
Here you are: you can cast on, knit, purl, and bind off, and you're moving and grooving with your first pattern. Here's a challenge for you that you'll benefit greatly from: with every project you start from here on out, learn a new technique. This can be an increase or decrease you've never heard of, or a cast on method you've never tried. Read the instructions, and make sure you understand it almost perfectly—key word being almost—and look up instructions on how to complete what you don't understand.
Don't get stuck in a rut of only knitting plain ol' stockinette or garter stitch rectangles, because you won't be stimulating your brain and knitting will begin to feel like a monotonous chore. If you're always teaching yourself something new with every new pattern, your skillset will balloon dramatically and you'll find yourself unafraid to tackle anything.
11. Learn Common Knitting Abbreviations
Knitting patterns are full of abbreviations that can be confusing to beginners. Try keeping this Common Knitting Abbrevations cheat sheet (pictured) handy so you can begin memorizing what the abbreviations mean.

12. Join a Knitting Group for Support
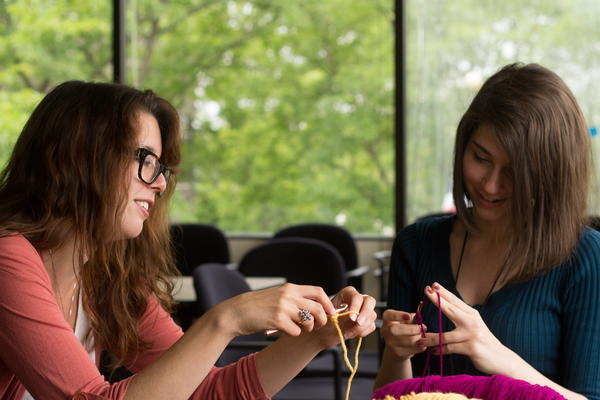
Joining a local knitting group, or creating one with your knitting friends, can be one of the best ways to stay motivated and get help when you’re stuck or want to learn a new skill.
Having a group of knitters around you will also keep you accountable, and you'll be more likely to knit everywhere you go! Knitting wherever you go can help you work on your speed and keep your fingers nimble. Bring along a lightweight project when you’re leaving the house and pull it out whenever you have some downtime.
Check out this guide for starting your own knitting group:
What's something you wish you knew when you started knitting?

