How to Join a New Skein of Yarn: 3 Methods
Learn three different ways to add yarn to your knitting and which one will work best for your pattern!

When joining a new skein of yarn, may beginners worry that they aren't doing it the right way. After all, the basic way most beginners learn to add yarn in knitting is so easy that it almost seems wrong!
In fact, I'm not afraid to admit it. I avoided projects that required more than one skein of yarn for a while because I was worried that I wouldn't do it properly. But eventually, we all figure out our own personal method for joining new yarn, and we open up a whole new world of giant, colorful knitting patterns.
We've gathered together three of our favorite techniques for how to join yarn in knitting and weighed their pros and cons! Let us know in the comments what method is your personal favorite.
Option 1: Start Knitting With the New Yarn
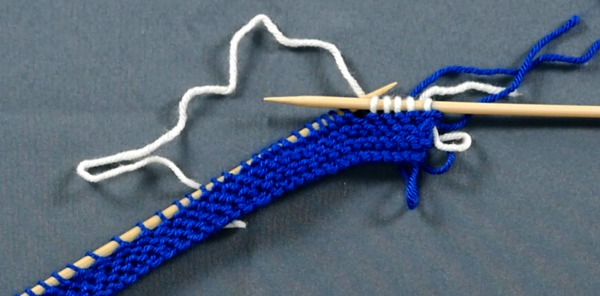
The easiest option for joining a new skein of yarn is simply picking up the tail of yarn from a new skein, just like you would if you were to start knitting with a different color of yarn to make stripes. Of course, this is definitely the easiest method, but there the downside is that this join will be less secure. Plus, you'll have more ends to weave in when you're done knitting!
Pros:
- Starting a new skein this way is the quickest method.
- It's also the easiest! Simply give yourself enough of a tail and wrap the yarn around the working needle, like normal.
- This method allows you to join at the end of a row or in the middle.
Cons:
- You now have more ends to weave in.
- This kind of join is less secure and might create a small but noticeable gather in your fabric.
- If your tail isn't long enough, it could come undone.

Option 2: The Magic No-Ends Knot
Your next option is the magic no-ends knot, and it really has earned that name.
This method involves tying your yarn together in a way that is super secure and essentially makes the two strands of yarn work as one. Even some yarn manufacturers will use this kind of knot when yarn breaks in the factory.
Pros:
- This style of joining will be much easier to knit with that simply starting with a new skein.
- It's super sturdy.
- No ends to weave in!
Cons:
- Takes a little bit of time to do.
- It also takes a few tries to master (but don't give up).
- You might get a tiny bump on the front end of your work from the knot.
Option 3: The Russian Join
If you thought the magic no-ends knot was magical, wait until you hear about the Russian join!
This is my personal go-to method for joining a new skein of yarn. It might seem, at first, like it wouldn't work or that the yarn would slip out, but it's still more secure of a join than simply picking up a new end of yarn. Plus, over time the yarn will felt into itself, making it even more secure.
Pros:
- The Russian join doesn't take much time to do.
- This method is great for joining both a new skein of the same color or a new color entirely.
- Absolutely no wasted yarn with an unnecessarily long tail.
- Will eventually felt into itself, making it completely invisible on both the right and wrong sides.
Cons:
- Might create a small bump in your work right around the spot where the join is; this will disappear after a couple of rows and will be undetectable in the finished product.
- Works better for thicker yarns than thinner yarns.


