How to Knit the Coin Stitch
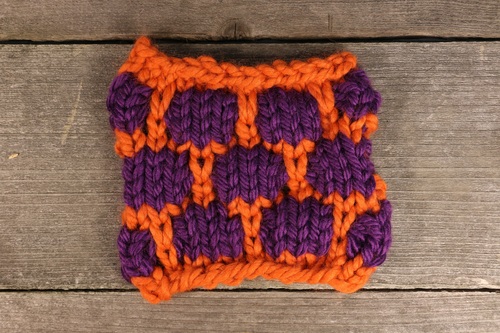
Sometimes called the blister check stitch, this stitch is a fun and easy way to try your hand at colorwork!

The stunning honeycomb pattern of the coin stitch is only truly achievable with two colors of yarn. Its best to choose contrasting colors so the shades can really stand out. This stitch is perfect for knitting a cowl or fingerless gloves that you really want to pop, but would also look wonderful around your mug as a cozy to keep your coffee or tea warm.
Sometimes also called the blister check stitch, this stitch is great for beginners and advanced knitters alike. The colorwork might look advanced, but its actually quite simple because the color is transferred vertically by slipping stitches instead of through stranded colorwork.

Gauge1 stitches, 2 rows, 3 inches. stockinette stitch
Materials List
- Knitting needles
- Two different colors of yarn
Instructions
-
CO (Color A) a multiple of 4 plus 1
-
Row 1: (Color A) Purl across
-
Row 2: (Color B) Knit across
-
Row 3: (Color B) Purl across
-
Row 4: (Color B) Knit across
-
Row 5: (Color B) Purl across
-
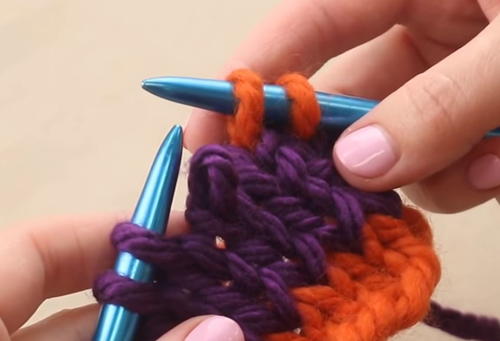
Row 6: (Color A) K2, drop the next stitch from your needle and pull the stitch out all the way down to your last row of color A.
-
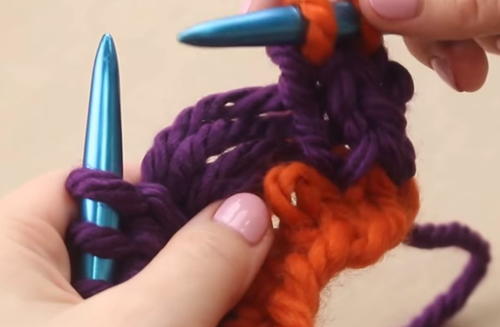
Pick up the live stitch from your color A row and bring it behind the loose bars of your color B rows. Then pass this stitch over to your non-dominant hand needle.
-
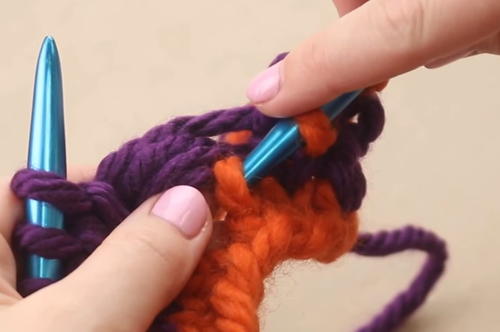
Knit through this stitch and bring that loop under the bars of color B and back to the front.
-
Repeat steps 7-9 across row 6.
-
Repeat steps 2-10, staggering your dropped stitches as you continue through your pattern.
In what colors would you knit this hat?


