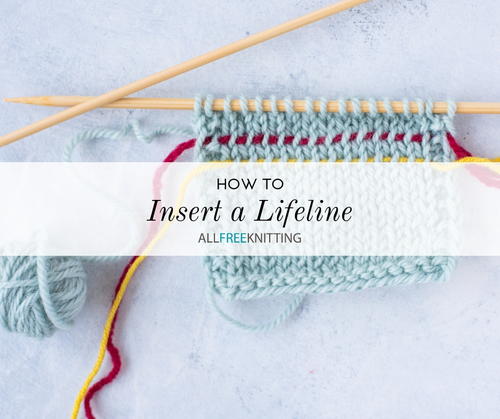
How to Insert a Lifeline
Don't panic! This tutorial for how to insert a lifeline will save you from your knitting mistakes!

They call it a lifeline for a good reason -- this knitting technique is great for when you're starting out knitting or if you're working on a particularly complicated pattern where you think you might make a mistake. It's essentially a "save" button for your knitting!
For knitters (like the AllFreeKnitting staff) who are particularly paranoid about making mistakes, you have the option to insert lifelines as you go. This can be done to give yourself the option of frogging back at a later point in your work or simply to help you keep track of the number of rows you've done. And for those of you who knit by the seat of your pants, then you can also insert what's called an "afterthought lifeline."
While it doesn't matter which method you choose, it should be noted that one downside to inserting lifelines as you go is that it can change the tension of your work. Inserting a lifeline before you complete the subsequent row will often expand your stitches slightly and will make that row stand out a bit once you remove the lifeline. This can be fixed with blocking, but who has the time for that!
What You'll Need:
- A tapestry needle
- Something to use as a lifeline. We recommend using a contrasting color of yarn.
How to Insert a Lifeline as You Go
- Thread your lifeline (or contrasting yarn) through the eye of your tapestry needle.
- Insert the needle into the last stitch of the row you've just finished.
- Continue picking up stitches across your needle, working towards the end of your row.
- At some point, you might need to bring the needle up and in between two stitches in order to make threading the rest of the row a little easier.
If you do this, just pull the slack through the stitches that you've already fed your needle through (leaving a short tail) and then reinsert your needle into the row where you left off.
- Continue this until you've reached the end of your row or round.
How to Insert an Afterthought Lifeline
Normal lifelines are easy and helpful when you've planned ahead, but let's say, hypothetically, that you've made a mistake in your knitting and you need to frog back to a previous row. In order to do this without losing more work than necessary, there is a way to insert a lifeline into a previous row of your work -- called an afterthought lifeline.
Note: One other benefit to inserting an afterthought lifeline is that it won't affect the tension of your work, as a regular lifeline would. This makes it good for projects like lace, where tension is very important.
Here's how to do it:
- Identify the row where you want to insert your lifeline.
- Thread your tapestry needle with the lifeline.
- Insert your needle into the first V of the row, picking up the right side of the V stitch.
- Continue picking up the right side of your stitches across the row.
- At some point, you might need to bring the needle up and in between two stitches in order to make threading the rest of the row a little easier.
If you do this, just pull the slack through the stitches that you've already fed your needle through (leaving a short tail) and then reinsert your needle into the row where you left off.
- Continue this until you've reached the end of the row.
How to Frog Your Work and Re-Insert Your Needle
Now that you've got your lifeline inserted where it needs to go, it's time to frog your work back to fix that dreaded mistake.
Make sure you've made a note of where you've inserted the lifeline in your pattern so that you know where to resume knitting!
Once your work has been frogged back to the lifeline, simply begin slipping those stitches back onto your working needle purlwise!
Up Next:
How to Fix Knitting Mistakes
What sorts of things have you used as a lifeline?


