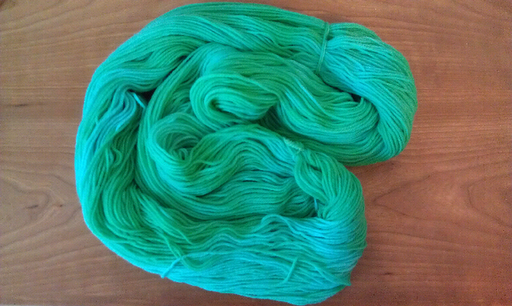
How to Dye Yarn in a Tonal Kettle
By: Rebecca Roush from Chemknits

There is something really special about hand dyed yarns. The result is always special, whether done by a professional dyer or by someone in their own home. Some knitters prefer to knit with subtle color changes so they will not obscure complex stitch patterns. The following tutorial will help you create a subtle kettle dyed effect using Easter Egg Dyeing kit dyes. (The effect can still be achieved using any type of food coloring or Kool Aid dye.) Make sure you check out the video at the bottom of this post for more information!
Materials:
- Fiber - In this tutorial, the base yarn is 100 g of KnitPicks Bare Stroll (75% wool, 25% Nylon)
- A container - A lidded pot large enough to hold the yarn covered by water.
- Heat - In this tutorial we are using stovetop methods.
- Dye - Tablets from an Easter egg dyeing kit. The Easter Egg dye tablets used in this tutorial came from a R.J. Rabbit Presents Easter Unlimit It’s Time to Color Eggs Easter Egg Coloring Kit.
- Acid - The Easter Egg Dyeing it contains some citric acid, but I am supplementing that with 1 tablespoon of white vinegar per 8 cups water.
- Water (8 cups)
- Utensil - A slotted spoon, tongs, something to help you safely submerge the yarn.
- Rubber Gloves (Optional) - Keep your hands color free by wearing gloves!

Instructions:
- Set up your dyebath as follows: Put 8 cups of water, 1 Tablespoon of vinegar and your desired quantity of dye into the pot on the stove. (I used two tablets from the Easter Egg dyeing kit)
- Cover the pot and turn on the heat until the dyebath comes to a soft boil.
- Add the DRY yarn to the dyebath, using a slotted spoon or other utensil to help submerge the yarn in the dye.
- Recover the pot and reduce the heat to a light simmer. Allow the yarn to cook in the dyebath until desired color has been reached or the dye has been exhausted (leaving a clear dyebath.)
- Turn off the heat, and let the yarn cool until you can handle it comfortably. Be careful when moving the yarn around, too much agitation can felt the yarn.
- Once the yarn is cool, rinse with lukewarm water and mild soap until the water runs clear.
- Hang the yarn to dry.
- Wind the yarn into a hank and/or ball of yarn
- Knit or crochet a fabulous project!
