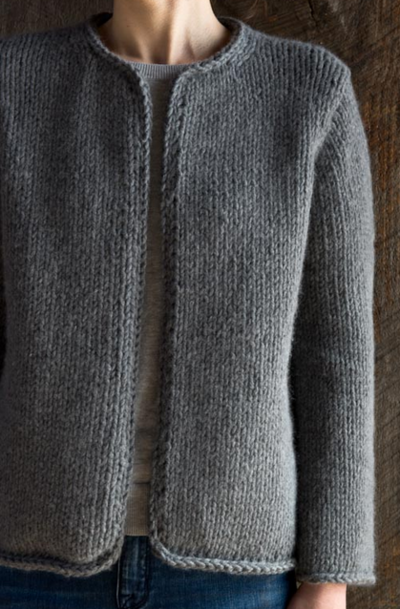
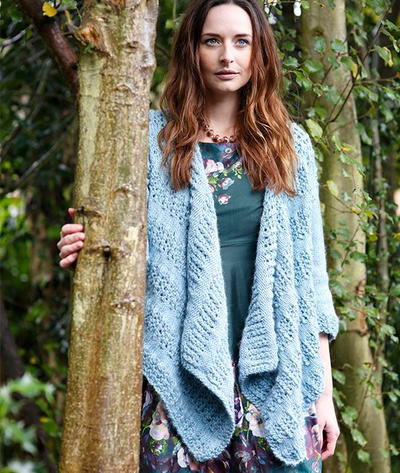
Ocean Tides at Night Cardigan
This free knitting pattern has us dreaming of a long stroll along a beach on a summer night, and we're simply swimming in the gorgeous details of this Ocean Tides at Night Cardigan pattern. Whether it's the raglan sleeves or the deep rib edgings, we definitely want this cardigan to be a new addition to our wardrobe. Learn how to knit a cardigan with this free full pattern, and you won't be disappointed! You'll want to top off your favorite tee with this cardigan on a chilly night or layer it over a dress for a put-together and effortlessly stylish look.

Knitting Needle Size6 or 4 mm, 7 or 4.5 mm, Circular Knitting Needles, Double-Pointed Knitting Needles (DPNs)
Yarn Weight(4) Medium Weight/Worsted Weight and Aran (16-20 stitches to 4 inches)
Gauge1 stitches, 2 rows, 3 inches. stockinette stitch
Materials:
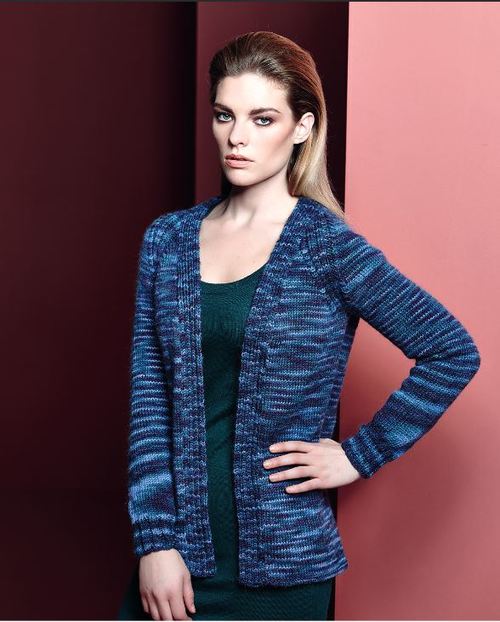
- Fine Art Aran: 6 (6, 7, 8, 9 x 100gm) *photographed in Flamenco 549
- 1 pair 4mm (no 8) (US 6) needles
- 4mm (no 8) (US 6) circular needle, 80 cm long
- 41/2mm (no 7) (US 7) circular needle, 80 cm long
- Set of 4 double-pointed 4mm (no 8) (US 6) needles
- Set of 4 double-pointed 41/2mm (no 7) (US 7) needles
Measurements:
To fit bust
S: 81-86 cm/32-34 in
M: 91-97 cm/36-38 in
L: 102-107 cm/40-42 in
XL: 112-117 cm/44-46 in
XXL: 122-127 cm/48-50 in
Length
64 [66: 68: 70: 72] cm
25 [26: 27: 27 1/2: 28 1/2] in
Width (2.5 cm below armhole)
47.5 [51.5: 58: 64: 70.5] cm
18 1/2 [20 1/2: 23: 25: 28] in
Sleeve seam
46 [47: 48: 48: 48] cm
18 [18 1/2: 19: 19: 19] in
Gauge:
19 sts and 25 rows to 10 cm measured over st st using 41/2mm (US 7) needles.
Abbreviations:
Alt = Alternate(ing)
Beg = Beginning
Cont = Continue(ity)
Dec = Decrease(ing)
Foll = follow(s)(ing)
G st = garter stitch (knit every row)
Inc = Increase(ing)
K = Knit
K2tog = Knit next 2 stitches together
P = Purl
P2sso = pass 2 slipped stitches over
P2tog = Purl next 2 stitches together
P2togtbl = Purl next 2 stitches together through back loops
Patt(s) = pattern(s)
Psso = pass slip stitch over
Rem = Remaining
Rep = Repeat
RS = Right side
Sl2tog = slip 2 together
Ssk = Slip next 2 stitches knitwise one at a time, pass them back onto left-hand needle, then knit through back loops together.
St(s) = Stitch(es)
WS = Wrong side
Yfwd = yarn forward
SPECIAL ABBREVIATIONS
DecL = sl 1 (dropping extra loop from previous row), K2, lift slipped st over these 2 knitted sts and off needle
DecR = slip next 3 sts (dropping extra loop on 3rd st), then slip these 3 sts back to left needle, lift 3rd st on left needle over first and 2nd sts and off needle, K2.
Instructions:
SLEEVES
Using set of 4 double-pointed 4mm (US 6) needles cast on 40 [44: 44: 44: 48] sts.
Distribute sts evenly over 3 of the 4 needles.
Using 4th needle, now work in rounds as folls:
Round 1 (RS): *K2, P2, rep from * to end.
This round forms rib.
Cont in rib for a further 15 rounds, inc 2 [0: 2: 2: 0] sts evenly across last round. 42 [44: 46: 46: 48] sts.
Change to set of 4 double-pointed 41/2mm (US 7) needles.
Next round (RS): Knit.
This round forms st st.
Cont in st st for a further 5 [5: 5: 3: 3] rounds.
Next round (RS): K1, M1, K to the last st, M1, K1. 44 [46: 48: 48: 50] sts.
Working increases as set by last round, inc 1 st at each end of 8th [6th: 6th: 6th: 6th] and 8 [1: 3: 10: 14] foll 8th [6th: 6th: 6th: 6th] rounds, then on 1 [9: 8: 3: 0] foll 10th [8th: 8th: 8th: -] rounds. 64 [68: 72: 76: 80] sts.
Cont straight until sleeve meas 46 [47: 48: 48: 48] cm.
Break yarn and leave sts on holders - slip first and last 3 sts onto one holder (6 sts in total) for underarm and rem 58 [62: 66: 70: 74] sts onto another holder (or spare circular needle or length of yarn) for yoke.
BODY
Using 4mm (US 6) circular needle cast on 162 [178: 202: 226: 250] sts.
Working backwards and forwards in rows, work in g st for 4 rows, ending with RS facing for next row.
Change to 41/2mm (US 7) circular needle.
Beg with a K row, now work in st st until body meas 44 [45: 46: 47: 48] cm, ending with RS facing for next row.
Shape front slope
Dec 1 st at each end of next and foll alt row.
158 [174: 198: 222: 246] sts.
Work 1 row, ending with RS facing for next row.
Break yarn and leave sts on a holder.
YOKE
With RS facing, using 41/2mm (US 7) circular needle, work across sts of body and sleeves as folls: K first 31 [35: 41: 47: 53] sts of body, dec 1 [0: 1: 0: 0] st at beg of row - these 30 [35: 40: 47: 53] sts form right front section, place marker, slip next 6 sts of body onto a holder (for right underarm) and, in their place, K across 58 [62: 66: 70: 74] sts of first sleeve, place marker, K next 84 [92: 104: 116: 128] sts of body - these sts form back section, place marker, slip next 6 sts of body onto a holder (for left underarm) and, in their place, K across 58 [62: 66: 70: 74] sts of second sleeve, place marker, K rem 31 [35: 41: 47: 53] sts of body, dec 1 [0: 1: 0: 0] st at end of row - these 30 [35: 40: 47: 53] sts form left front section. 260 [286: 316: 350: 382] sts.
Slipping markers as you go, cont as folls:
Next row (WS): *P to 8 sts before marker, P1 wrapping yarn round needle twice, P2, (K2, P2) 3 times, P1 wrapping yarn round needle twice, rep from * 3 times more, P to end.
Note: Double wrapped sts formed on last row count as 1 st.
Next row: (Sl 1, K1, psso) 0 [1: 0: 1: 1] time, *K to 8 sts before marker, DecL, P2, (K2, P2) twice, DecR (to work armhole decreases), rep from * 3 times more, K to last 0 [2: 0: 2: 2] sts, (K2tog) 0 [1: 0: 1: 1] time.
Next row: *P to 9 sts before marker, P1 wrapping yarn round needle twice, P2tog tbl, P1, K2, (P2, K2) twice, P1, P2tog, P1 wrapping yarn round needle twice (to work armhole decreases), rep from * 3 times more, P to end. 244 [268: 300: 332: 364] sts.
Last 2 rows cont front slope shaping, set the sts and set raglan decreases - 5 sts in rib at each raglan edge (at each side of markers), with st st between.
Note: When no decreases are to be worked at armholes on WS rows, then work by “P to 8 sts before marker” (instead of 9) and wrap as before, but work a P1 to replace the P2togtbl (and P2tog when required), thus keeping rib and raglan patt correct.
Cont as set, dec 1 st at raglan edges on fronts and back of next 5 [11: 19: 29: 34] rows, then on foll 9 [7: 4: 0: 0] alt rows, and at same time dec 1 st at raglan edges on sleeves of next 5 [7: 9: 11: 11] rows, then on foll 9 [9: 9: 9: 11] alt rows, and at same time dec 1 st at front slope edges of next [3rd: next: 3rd: 3rd] and every foll 4th row. 120 [120: 122: 122: 124] sts
Work 1 [1: 1: 1: 0] row, working wrapping sts on sleeves and back only, but not on fronts and ending with RS facing for next row. (8 sts rem in each front, 26 sts rem in each sleeve and 52 [52: 54: 54: 56] sts rem in back).
Next row (RS): K3tog, rib to marker, P1, K2, P2, DecR, *K to 8 sts before marker, DecL, P2, (K2, P2) twice, DecR, rep from * once more, K to 8 sts before marker, DecL, rib to last 3 sts, K3tog tbl. (10 sts decreased).
Work 1 row, working wrapping sts on sleeves and back only.
Next row (RS): K2tog, rib to marker, P1, K2, P2, DecR, *K to 8 sts before marker, DecL, P2, (K2, P2) twice, DecR, rep from * once more, K to 8 sts before marker, DecL, rib to last 2 sts, K2tog tbl. (8 sts decreased).
Work 1 row, working wrapping sts on sleeves and back only.
Rep last 4 rows once more. 84 [84: 86: 86: 88] sts.
Remove first and last markers (these are between fronts and sleeves).
Dec 1 st at each end of next 7 rows, then on foll alt row and at same time dec 1 st as before at each side of rem 2 markers on next and foll 4 alt rows. 48 [48: 50: 50: 52] sts.
Work 1 row, but do not wrap sts.
Cast off.
MAKING UP
Press.
Join each underarm seam by grafting tog the 2 sets of 6 sts left on holders.
Front bands (make 2)
Using 4mm (US 6) needles cast on 16 sts.
Row 1 (RS): K3, *P2, K2, rep from * to last st, K1.
Row 2: K1, P2, *K2, P2, rep from * to last st, K1.
These 2 rows form rib.
Cont in rib until band, when slightly stretched, fits up front opening edge, from cast-on edge, along front slope to centre back neck, ending with RS facing for next row.
Cast off in rib.
Sew bands into place and join cast-off edges at centre back.
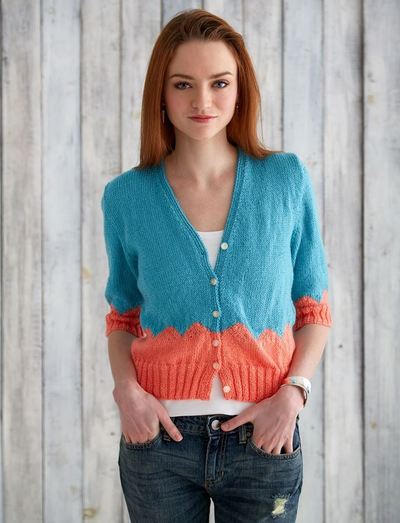
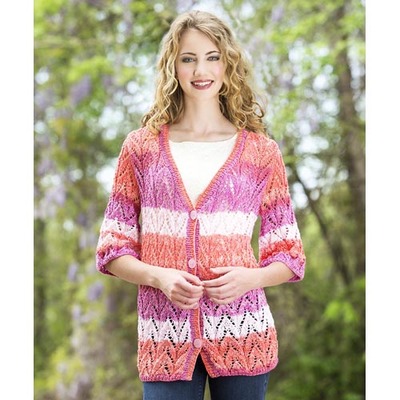
Read NextWaterfall Cardigan Knitting Pattern
Your Recently Viewed Projects

Thanks for your comment. Don't forget to share!
debbieannmilford 9 926392
May 07, 2021
I am making this sweater now. It is probably the most confusing pattern I have ever used. I have ripped out the yoke part several times. Either I am making the same mistake over and over or the pattern is incorrect in regards to the sleeve ribbing. I am adjusting the pattern as I go so the ribbing lines up. As far as I can tell from my research, there has been no pattern correction published. My daughter in law chose this pattern and asked me to knit it, otherwise, I would have scrapped this project and done something else. Thank God for lifelines!
Tricia108
Jul 16, 2017
I like the basic over all look of the cardigan but the pattern is confusing. Why two stitch holders to hold the sleeves? I have to work it up and come up with a better way to hold those stitches. It is not for beginners because you have to be knowledgeable about the basic construction of a cardigan. I like the fact it is knitted on a circular needle. I would use a circular needle and the "magic loop" concept for the sleeves since I don't care for double pointed needles. I am saving the pattern but will have to adjust it a bit.
auntie1879 3035846
Dec 20, 2015
most confusing pattern I've ever tried to follow - not for beginners
mabartlett82 29498 82
Apr 02, 2017
Hi I like the look of this cardigan was going to print it out then saw your comment. Can you tell my why its confusing. I might find your answer helpful. Many thanks Margaret
Lisa
Apr 06, 2018
You are correct, this is definitely not a beginner pattern, it's rated intermediate and does take some substantial experience to make it successfully.
rooscar
Jun 11, 2015
I have never knit a sweater but would love, love, love to make this. It would be great if you would do a knit-along for it!
Report Inappropriate Comment
Are you sure you would like to report this comment? It will be flagged for our moderators to take action.
Thank you for taking the time to improve the content on our site.