Emily Summer Sweater
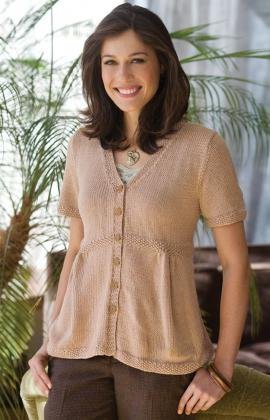
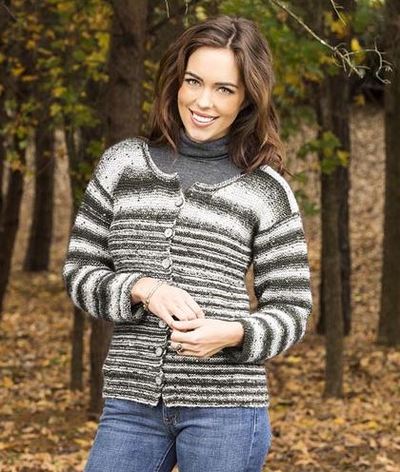
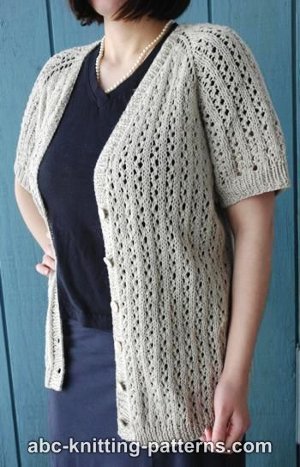
This simple cardigan is meant to be worn all spring and summer long. Whether you wear the Emily Summer Sweater by itself or as a coat over a sundress, you'll love how the seed stitch edging complements the rest of the stockinette stitch sweater. If you're a beginner knitter, you can easily learn how to knit a sweater too. This is an easy pattern that makes an ideal garment to practice on.

Knitting Needle Size6 or 4 mm
Yarn Weight(4) Medium Weight/Worsted Weight and Aran (16-20 stitches to 4 inches)
Directions are for size Small; changes for sizes Medium, Large, X-Large, and XX-Large are in parentheses.
MATERIALS:
- RED HEART® Soft™: 5 (6, 7, 8, 8) balls 9388 Wheat
- Knitting Needles: 4mm [US 6]
- Circular Knitting Needle: 4mm [US 6] – 29”
- Yarn needle; stitch holders; six ¾” buttons (JHB #42316 Ridgeway Lt. Brown shown)
GAUGE: 20 sts = 4”; 28 rows = 4” in St st. CHECK YOUR GAUGE. Use any size needles to obtain the gauge.
Finished Bust: 36 (40, 44, 48, 52)”; Length: 24 (25, 26, 27, 28)”.
Special Stitches
Seed St (worked over an odd number of sts)
Row 1 (Right Side): K1, * K1, P1; repeat from * to last 2 sts, K2.
Row 2: P1, * K1, P1; repeat from * across.
One Row Buttonhole
Bind off 2 sts, replace last st worked to left needle. Cast on 3 sts to right needle. Slip worked st to right needle. Pass 1 cast on st over worked st.
SWEATER INSTRUCTIONS
Back
Cast on 133 (153, 169, 189, 205) sts. Work in Seed st for 1”, end Row 2. Change to St st, begin Knit row, and work even until back measures 11” from cast-on, ending after a Purl row.
Empire Shaping
K17 (19, 20, 22, 23), [K3tog] 11 (13, 15, 17, 19) times, K33 (37, 39, 43, 45), [K3tog] 11 (13, 15, 17, 19) times, K17 (19, 20, 22, 23) – 89 (101, 109, 121, 129) sts. Work in Seed st for 1”, begin Row 2, end Row 2. Change to St st and work even until 5½ (6, 6½, 7, 7½)” above empire shaping, end Purl row.
Shape Armholes
Bind off 5 (7, 7, 9, 10) sts at beginning of next 2 rows.
Dec 1 st at each edge every right side row 5 (7, 8, 8, 10) times – 69 (73, 79, 87, 89) sts. Work even until armhole measures 7½ (8, 8½, 9, 9½)”. Place sts on holder for back neck and shoulders.
Left Front
** Cast on 67 (77, 85, 95, 103) sts. Work same as for back until Empire Shaping.
Empire Shaping
K17 (19, 20, 22, 23), [K3tog] 11 (13, 15, 17, 19) times, K17 (19, 20, 22, 23) – 45 (51, 55, 61, 65) sts. Work in Seed st for 1”, begin Row 2, end Row 2. Change to St st and work even until 5½ (6, 6½, 7, 7½)” above empire shaping, end Purl row. **
Shape Armhole and Neck
Bind off 5 (7, 7, 9, 10) sts at beg of next row for armhole and dec 1 st at end of row for neck. Dec 1 st at armhole edge every right side row 5 (7, 8, 8, 10) times AND AT THE SAME TIME dec 1 st at neck edge every 4th and 2nd row alternately 16 more times – 18 (20, 23, 27, 28) sts. Work even until front measures same as back to shoulder. Place all sts on holder for shoulder.
Right Front
Work same as for left front from ** to **.
Shape Armhole and Neck
Dec 1 st at neck edge at beginning of next Knit row. Bind off 5 (7, 7, 9, 10) sts at beginning of next Purl row. Dec 1 st at armhole edge every right side row 5 (7, 8, 8, 10) times AND AT THE SAME TIME dec 1 st at neck edge every 4th and 2nd row alternately 16 more times – 18 (20, 23, 27, 28) sts. Work even until front measures same as back to shoulder. Place all sts on holder for shoulder.
Join Shoulders
Place sts from back and fronts on needles with needle points at arm edge. Hold pieces with right sides together and beginning at arm edge, insert needle as if to knit into first st on needle in front and then into first st on needle in back, yarn over and draw yarn through both sts at the same time; * insert needle into next st on needle in front and into corresponding st on needle in back, yarn over and draw yarn through both sts, slip first st on right needle over 2nd st and off the needle – one st bound off. Repeat from * until 18 (20, 23, 27, 28) sts are bound off for shoulder.
Repeat on opposite shoulder leaving center 33 sts on holder for back neck.
Neck and Front Edging
Mark positions for 6 buttonholes along right front edge.
With right side facing and circular needle, pick up and K82 (85, 88, 90, 92) sts up right front to beginning of neck shaping, 37 (40, 43, 45, 48) sts up right neck edge, K33 sts across back neck holder, 37 (40, 43, 45, 48) sts down left neck edge, and 82 (85, 88, 90, 92) sts down left front from beginning of neck shaping to lower edge – 271 (283, 295, 303, 313) sts. Work in Seed st for ½”.
Keeping continuity of Seed st, work One Row Buttonhole at each marker. Continue in Seed st for ½”. Bind off.
Sew buttons to left front.
Sleeves
Cast on 65 (71, 75, 81, 85) sts. Work in Seed st for 1”, end Row 2. Continue in St st, begin Knit row, until sleeve measures 3” from beginning, end Purl row.
Shape Armholes
Bind off 5 (7, 7, 9, 10) sts at beginning of next 2 rows. Dec 1 st at each edge every right side row 19 (20, 22, 23, 24) times – 17 sts. Bind off.
Finishing
Sew side seams. Sew sleeve seams. Set in sleeves.
Read NextCute and Casual Cardigan
Your Recently Viewed Projects
lcarr
Mar 01, 2017
I really like this cardigan, simple yet elegant. The empire style waist really adds to it. It looks to be a fairly easy pattern to follow. This is one for my closet this summer. I may even make it with extended sleeves for fall. Worsted would be a bit heavy for summer. I wonder how difficult it would be to adjust the pattern for use with a lighter yarn.
The Designing Peng uin
Jun 15, 2016
This is delightful and the directions are complete - just have to pay attention to my delight, no charts to follow lol
quanahs 5032097
Mar 15, 2016
This pattern creates a perfect summer sweater to wear to the office or out to dinner. You can wear it on its own or over a camisole. The empire waist is flattering and the short sleeves are ideal for air conditioned areas.
xanntaylor23x 8893 213
Jan 03, 2016
How do I send this pattern to my printer
KathrynAllison
Jan 04, 2016
Hello! There is a "Print" button at the top and bottom of the pattern. Once you click the button, a printer-friendly version of the pattern should display. Hope this helps! -Kathryn, Editor of AllFreeKnitting
djdavis63 8850478
Apr 13, 2015
I understand the instruction to decrease at the armhole edge every right side row 5 (size S) times and dec 1 st at neck edge every 4th row, but not - every 2nd row alternately 16 more times. Am I decreasing the neck edge every 4th row (16 more times) and the armhole edge every 2nd row 16 more times? I'm confused!
forareason68 22309 65
Nov 23, 2015
had a question about the yarn and guage did you use the recommended yarn and needle size and if not what did you use?
Lisa
Jul 06, 2018
It's unlikely your question will be answered when you post if as a response to someone else's question. I've made 2 of these sweaters and used the exact yarn and needles to achieve gauge.
Lisa
Feb 28, 2023
The instructions read-dec 1 st at neck edge every 4th and 2nd row alternately 16 more times, those instructions only apply to the neck edge not the sleeve. The sleeve instructions are already specified in the same paragraph before this instruction. I know this is really late, hope it helps someone. Happy knitting.
jmarneman 0384867
Jul 15, 2014
Can you explain what "dec 1 st at neck edge every 4th and 2nd row alternately" means in this pattern? It is in the instructions for shaping the armhole and neck. Thank you!
Lisa
Jul 26, 2014
you are decreasing for the neck and sleeve at the same time. one of the decrease instructions is for the neck the other for the arm hole-you are working two sets of instructions at the same time-pretty standard in a knitting pattern. hope this helps.
cass42
May 29, 2015
I'm not sure that's right - this phrase seems to be just for the neck edge (the sleeve edge decrease is described in the previous phrase, before 'AT THE SAME TIME'). I would interpret this as decrease at neck edge on 4th row, then on next 2nd row, then next 4th row, then next 2nd row, until you have the right number of stitches. meanwhile, you are decreasing at the sleeve edge on all the right side rows. Would be good if the writer of the pattern could clarify what they meant.
Lisa
Jul 06, 2018
Speaking with the designer is not necessary if you understand and can read the pattern effectively.
dessiep 2924620
Apr 08, 2014
The seed stitch instructions as written don't really work, do they? Am I missing something?
Lisa
May 13, 2014
The seed stitch instructions are written correctly. Seed stitch means you purl the knit and knit the purls on the 2nd row of the work, if you don't it will come out ribbed. hope this helps.
Report Inappropriate Comment
Are you sure you would like to report this comment? It will be flagged for our moderators to take action.
Thank you for taking the time to improve the content on our site.

