Sandhurst Sweater
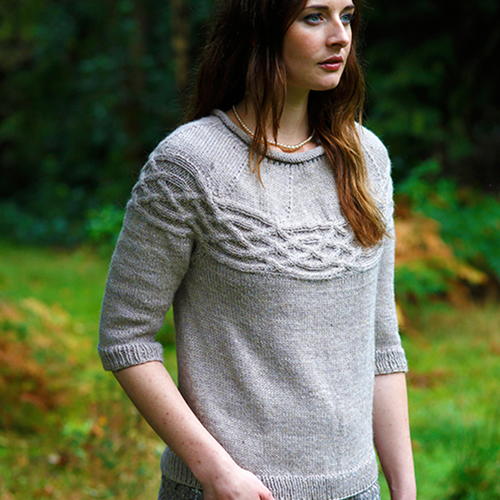
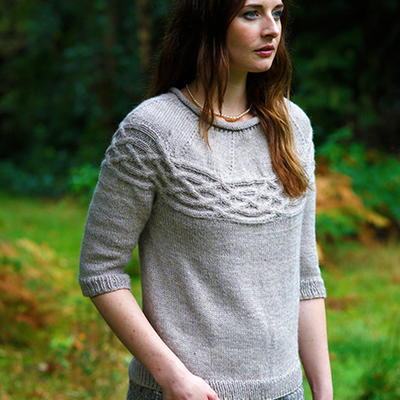
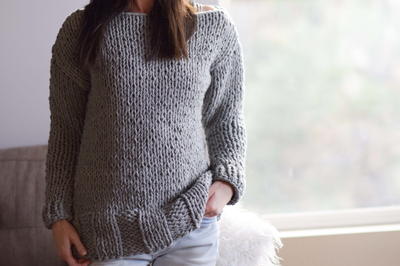
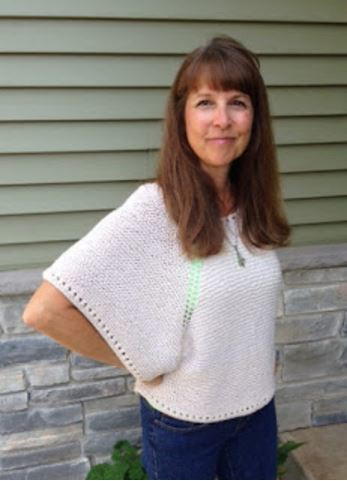
The Sandhurst Sweater really stands out due to its unique, yet versatile design. The neutral gray color of the yarn will work with practically anything and everything in your wardrobe. You won't be able to resist this free knitting pattern. In fact, as soon as you work it up, you'll want to wear it out and about right away. Worked from the top down, this beauty will be a great addition to your closet. One can never have too many sweaters and the cable band across the front really makes this piece stand out. Whether you make one for yourself or for a loved one, you can't go wrong with such a beautiful free knit sweater pattern.
NotesThis sweater is worked in sections starting from the cable band which is worked in a strip. Stitches are then picked up on either side of the band and the rest of the jumper is worked from there.

Knitting Needle Size4 or 3.5 mm, 6 or 4 mm, Circular Knitting Needles
Yarn Weight(3) Light/DK (21-24 stitches to 4 inches)
Gauge22 sts and 30 rows to 10 x10cm in st st using 4mm needles. 26 st cable patt is 10cm wide.
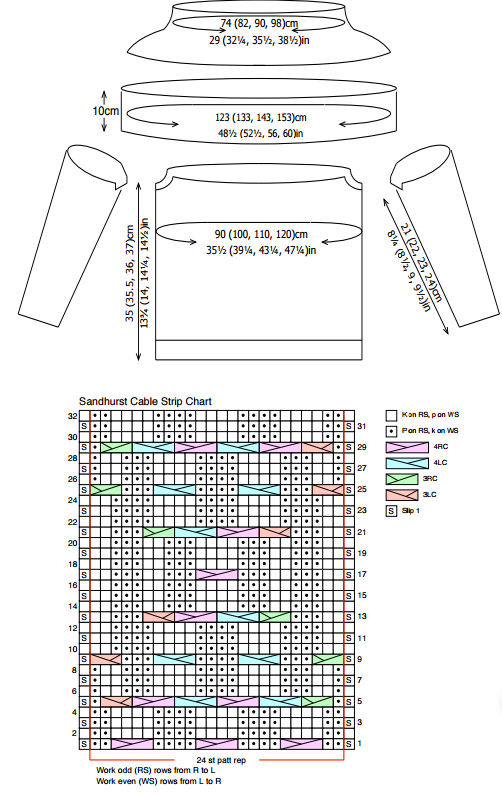
Finished SizeTo Fit: S (M, L, XL) Finished bust approx: 90 (100, 110, 120)cm 35½ (39¼, 43¼, 47¼) in Length to shoulder: 54 (54.5, 55, 56)cm 21¼ (21½, 21¾, 22)in Neck width: 74 (82, 90, 98)cm 29 (32¼, 35½, 38½)in
Materials List
- Alpaca Heather DK - C873 Stone - 9 (9, 10, 10) skeins
- 1 pair of 4mm needles
- 1 each 3.5mm and 4mm circular needle (or dpns)
- Cable needle
- Stitch holder
- Stitch markers
Instructions
-
Cable Strip
With 4mm needle and waste yarn cast on 26 sts.
Knit 4 rows.
Change to main (Stone) yarn.
Work Cable Chart working 1 edge st at beg and end of each row as folls:
Set up row (WS): S1, k2, p4, k4, p4, k4, p4, k2, k1 (edge st).
This row sets position of cable patt.
Rep 32 row Cable Chart 10 (11, 12, 13) times ending last rep on Row 31. 319 (351, 383, 415) rows and 123 (133, 143, 153)cm.
Cast off on Row 32 by working 1 st from LH needle together with corresponding st from first cable patt row worked in Stone to create an invisible ‘seam’. Once sts have been cast off remove waste yarn. -
Body And Sleeves
With 4mm circular needle and RS of Cable Strip facing, starting at seam point, pick up and k264 (290, 320, 346) sts around strip (approx 5 sts for every 6 rows worked). There will be 82 (89, 96, 103) sts for Back, 50 (56, 64, 70) sts for each Sleeve, 82 (89, 96, 103) for Front. -
Back
With WS facing work back across first 82 (89, 96, 103) sts for Back only as folls:
Row 1 (WS): Purl to end, turn.
Row 2 (inc) (RS): Cast on 2 sts, k to end, cast on 2 sts, turn. 86 (93, 100, 107) sts.
Rep last 2 rows once more. 90 (97, 104, 111) sts.
Row 5 (WS): Purl to end, turn.
Row 6 (RS): Inc 1 st at each end of row, turn. 92 (99, 106, 113) sts.
Rep last 2 rows twice more. 94 (103, 110, 117) sts.
Purl one row.
Leave these sts on a holder. -
First Sleeve
With WS facing, rejoin yarn to rem sts and work back across next 50 (56, 64, 70) sts for first Sleeve only.
Row 1 (WS): Purl 50 (56, 64, 70), turn.
Row 2 (inc) (RS): Cast on 2 sts, k to end, cast on 2 sts, turn. 54 (60, 68, 74) sts.
Rep last 2 rows once more. 58 (64, 72, 78) sts.
Row 5 (WS): Purl to end, turn.
Row 6 (RS): Inc 1 st at each end of row, turn. 60 (66, 74, 80) sts.
Rep last 2 rows twice more. 64 (70, 78, 84) sts.
Purl one row.
Leave these sts on a holder. -
Front
With WS facing, rejoin yarn and work as for Back over next 82 (89, 96, 103) sts only. -
Second Sleeve
With WS facing, rejoin yarn and work as for First Sleeve over last 50 (56, 64, 70) sts only. -
Body
With RS facing, knit across 94 (103, 110, 117) Front sts and 94 (103, 110, 117) Back sts only. 188 (206, 220, 234) sts. Join into a rnd placing marker to indicate start of rnd.
Knit in rnds without shaping until work measures 31 (31.5, 32, 33)cm from join.
Change to 3.5 mm needles.
Rib rnd: [K1, p1] to end.
Rep last rnd until rib measures 4cm.
Cast off. -
Sleeves (both alike)
With RS facing Rejoin yarn to Sleeve.
Rnd 1: K64 (70, 78, 84) sleeve sts. Place marker at centre of underarm to indicate beg of rnd.
Work 6 rnds without shaping.
Next rnd (dec): Work to 1 st before marker, sk2po. 62 (68, 76, 82) sts.
Work 7 rnds without shaping.
Rep last 8 rnds 5 (5, 6, 6) more times. 52 (58, 64, 70) sts. Work in rnds without shaping until Sleeve measures 21 (22, 23, 24)cm
Work in rib as for Body for 4cm.
Cast off.
Rep for second Sleeve. -
Round Yoke
With 4mm circular needles and RS of Cable Strip facing, starting at seam point, pick up and k264 (290, 320, 344) sts around top side of strip (approx 5 sts for every 6 rows worked)
Knit 2 rnds.
Shape Neck
Sizes 1 & 4 only
Next Rnd: K81 (101), k2tog, k48 (68), k2tog, k80 (100), k2tog, k48 (68), k last st tog with first st of next rnd. 260 (340) sts
Next rnd: Knit.
Sizes 2 & 3 only
Knit 2 rnds.
All sizes
Rnd 1: [K24 (27, 30, 32), k2tog] x 10. 250 (280, 310, 330) sts.
Next and every alt rnd: Knit.
Rnd 3: [K23 (26, 29, 31), k2tog] x 10. 240 (270, 300, 320) sts.
Rnd 5: [K22 (25, 28, 30), k2tog] x 10. 230 (260, 290, 310) sts.
Rnd 7: [K21 (24, 27, 29), k2tog] x 10. 220 (250, 280, 300) sts.
Rnd 9: [K20 (23, 26, 28), k2tog] x 10. 210 (240, 270, 290) sts.
Rnd 11: [K19 (22, 25, 27), k2tog] x 10. 200 (230, 260, 280) sts.
Rnd 13: [K18 (21, 24, 26), k2tog] x 10. 190 (220, 250, 270) sts.
Rnd 15: [K17 (20, 23, 25), k2tog] x 10. 180 (210, 230, 260) sts.
Rnd 17: [K16 (19, 22, 24), k2tog] x 10. 170 (200, 220, 250) sts.
Rnd 19: [K15 (18, 21, 23) , k2tog] x 10. 160 (190, 210, 230) sts.
Rnd 21: [K14 (17, 20, 22), k2tog] x 10. 150 (180, 200, 220) sts.
Rnd 22: Knit.
Sizes 2, 3 & 4 Only
Next rnd: [K16 (19, 21), k2tog] x 10. 170 (190, 210)sts. Next rnd: Knit.
Sizes 3 & 4 only
Next rnd: [K18 (20), k2tog] x 10, 180 (200) sts.
Next rnd: Knit.
Size 4 only
Next rnd: [K19, k2tog] x 10. 200 sts.
Next rnd: Knit.
All sizes
Next rnd: [K2tog, yo] to end.
Next rnd: [K13 (15, 17, 18), k2tog] x 10. 140 (160, 180, 190) sts.
Sizes 2, 3 & 4 Only
Next rnd: [K14 (16, 17), k2tog] x 10. 150 (170, 180) sts. Next rnd: Knit.
Sizes 3 & 4 only
Next rnd: [K15 (16), k2tog] x 10. 160 (170) sts.
Next rnd: Knit.
All Sizes
Change to 3.5mm needles.
Knit 6 rnds.
Change to 4mm needles.
Knit 6 rnds.
Cast off. -
To Finish
Block pieces to measurements.
Sew armholes.
Darn in loose ends.
See larger image of the sweater diagram.
See larger image of the sweater chart.
Abbreviations
- cn
- cable needle
- 4RC
- cable 4 right: sl next 2 sts onto cn and hold at back, k2 then k2 from cn
- 4LC
- cable 4 left: sl next 2 sts onto cn and hold at front, k2 then k2 from cn
- 3RC
- cable 3 right: sl next st onto cn and hold at back, k2 then k1 from cn
- 3LC
- cable 3 left: sl next 2 sts onto cn and hold at front, k1 then k2 from cn
- sk2po
- slip 1, knit 2 together, pass slipped st over (decrease by 2 sts)
Up Next
Read NextClassic Vintage Pullover
Your Recently Viewed Projects
mildapiktyte 24196 99
Jul 27, 2021
I have made it and it is my most beautiful self made sweater. I fell in love with the pattern so much that I learned a thousand things to knit it ) thank you) from the patern I couldn't figure out how to actually do the reducing in the neckline, so I made my own version.
bgh58
Mar 11, 2019
I do get more compliments on this sweater, and I think it is one of my best. I made it in a baby blue. I made the cable just long enough to hug my shoulders and then knitted the bottom part. After that, knitting the top did present some problems. The first attempt was too bulky and didn't work properly. I pulled out that part and started over on the top. This time, I worked the pattern for maybe two sizes smaller than the lower part, and it was a perfect solution since my shoulders are narrow but my hips are wide. It's really a beautiful sweater, but you probably need to customize it.
hofwoman 2783672
Jan 03, 2019
I made this sweater twice. The second time I changed a few things, yes, the cable section should be cast-on provisionally. Slip first stitch each row and purl/knit last stitch. I had to totally revamp the top as it looked like the dude's neckline in the commercial - "and you look amazingly comfortable." The neckline wasn't comfortable, extended past my bra steps and would slip one or the other falling off my shoulder. A neckline of 150 to 180 stitches is very, very large. Since my second sweater neckline turned out so well, I ripped out the first neckline and redid it with my reconfiguration. Think it looks pretty good. Posting on-line. You can see on my web page Kathy Hoffman.
Miriam17au
Feb 09, 2019
Hi Kathy, I'd like to use your alternation, but I can't work out how to find your website. Thanks
judywood 2914535
Jun 28, 2018
The graphics are out of focus. Nothing works to make them readable.
Kristina K
Jun 29, 2018
Hi, judymaewood! In order to see larger versions of the graphics, click the links right above them that read "See larger image of the sweater diagram" or "See larger image of the sweater chart." We hope this helps! -Editors of AllFreeKnitting
junebugernie 12180 58
Jun 08, 2018
How many yards to the skein of yarn? I have an over abundance of yarns that I would like to use to make this sweater.
Kristina K
Jun 11, 2018
Hi junebugernie, there are 109 yards per skein of yarn used in this project. We hope this helps! -Editors of AllFreeKnitting
cdtrim 3944454
Feb 18, 2018
I believe the knitted rows at the beginning of the cable strip could be replaced with a provisional cast on edge and then joined as in a mobius. Then the yoke and body sections are just picked up along the edge of the cable strip.
erwiner 0551150
Feb 07, 2018
Pattern is very confusing and frustrating and I've knitted for more than 40 years. The chart...no problem. Connecting the cable pattern is torture. Why use waste yarn? Use a stitch holder instead of trying to find corresponding stitches with the beginning of the pattern. Ripped it apart and will make something else.
erwiner 0551150
Jan 17, 2018
How much yarn in a skein?? Better to specify in linear measurement or weight!
KathrynAllison
Jan 17, 2018
Hi erwiner, you can find more specific information about the yarn used in this pattern by following this link: https://www.ravelry.com/yarns/library/artesano-alpaca-heather. Hope this helps! -Editors of AllFreeKnitting
naynago 4405752
May 08, 2017
Hello. Can someone help me with the Sandhurst sweater instructions? I have already completed the cable pattern. The instructions then say Cast off on Row 32 by working 1 st from LH needle together with corresponding st from first cable patt row worked in Stone to create an invisible seam. Once sts have been cast off remove waste yarn. I do not know how to do this and have looked online and am unable to find help. Please advise. Thanks.
3cats2love
May 08, 2017
Hi naynago 4405752, you asked about the cast off on row 32. I am not sure but I think the designer is referring to using kitchener bind off, where you seam two rows together to get a seamless look. You can google this, there are lots of instructional videos online to help you with it.
schiebet
Feb 23, 2017
I think this is a really classy sweater. I am surprised it's seamed the way it is, but it makes sense. I like that the pieces are at least knit in the round because I hate seaming!
cguterres 6988834
Jul 15, 2016
I would love to knit this sweater but cannot see the chart. I've tried enlarging but it gets all fuzzy. Please advise what can be done.
KathrynAllison
Jul 15, 2016
Hello cguterres 6988834! If you click on the image, the chart will enlarge. Once enlarged, you can also use your browser's zoom feature to read it easier. Hope this helps! - Editors of AllFreeKnitting
cguterres 6988834
Jul 15, 2016
Thank you. Is there a trick to print it that way? If not I can try and use it this way.
The Designing Peng uin
Jun 28, 2016
Beautiful! tailored enough to wear with skirt or dress pants yet could be casual attire - the cable band reminds one of the Gaelic knots seen on jewellery in Scotland... and the list gets longer!!
Report Inappropriate Comment
Are you sure you would like to report this comment? It will be flagged for our moderators to take action.
Thank you for taking the time to improve the content on our site.

