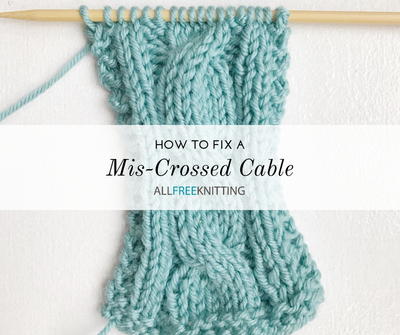
How to Fix a Mis-Crossed Cable
When it comes to fixing cables that were crossed the wrong way, you have a couple of options!

When it comes to fixing knitting mistakes, it seems like someone has thought of some kind of ingenious solution to just about any problem. But fixing cables that were twisted in the wrong direction isn't really one of those.
Unfortunately, there's no single solution to fixing every cabling issue. But if you understand the basics of how to undo columns of stitches and how to reknit those columns, fixing mis-crossed cables is doable, even for beginners.
If you've found yourself in this particular knitted predicament, there are basically two different routes you can take.
Option 1: Insert a Lifeline and Frog Back
While no one likes to do this, frogging back your work to a spot before the mistake happened is the most straight-forward way to fix this.
The pros to frogging back a mistake like this are that it's a less complicated maneuver to complete, and you're less likely to make further mistakes while doing this. The downside is that it's going to add a lot more time to your project overall because you will essentially have to reknit several rows.
One other thing to keep in mind is that this method is better for mistakes that you've made a long ways back in your knitting. For mistakes that you can catch within the last few rows, we recommend option 2 below.
If you're lucky enough to have never had to insert a lifeline and frog back your work, you can watch the video tutorial below to learn how, or you can see our written instructions here:
Option 2: Dropping the Individual Cables
Materials:
- Double pointed knitting needles of the same or similar size to the ones used for knitting your pattern.
Note: You could also use cable needles for this.
- A crochet hook.
Step 1
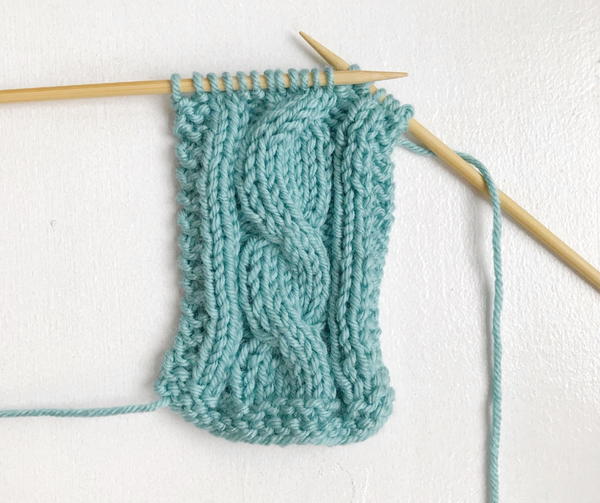
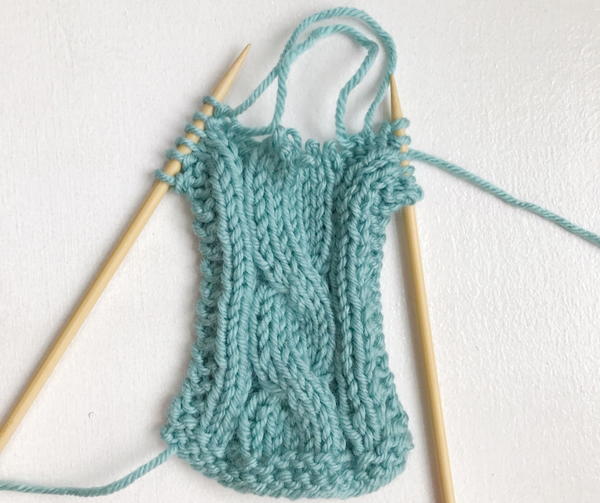
Work in pattern until you've reached the first stitch of the cable you want to fix.
Note: These instructions are for fixing a mis-crossed cable on a right side row. We recommend doing this on a right side row because doing the same maneuvers on a wrong side row would be much more difficult.
Step 2
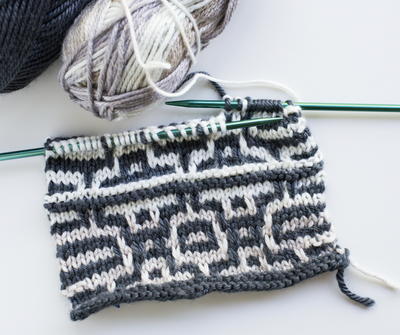
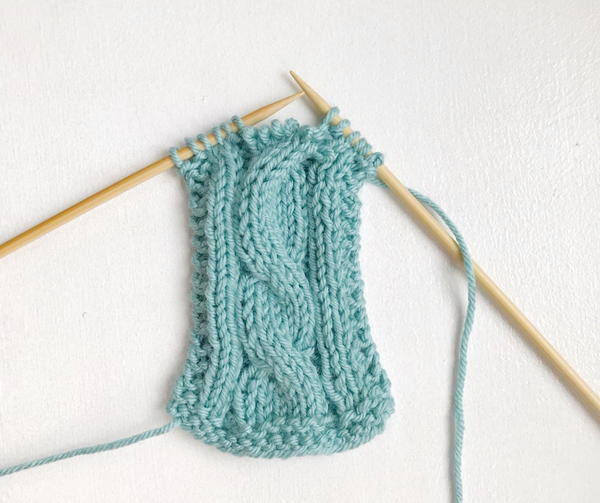
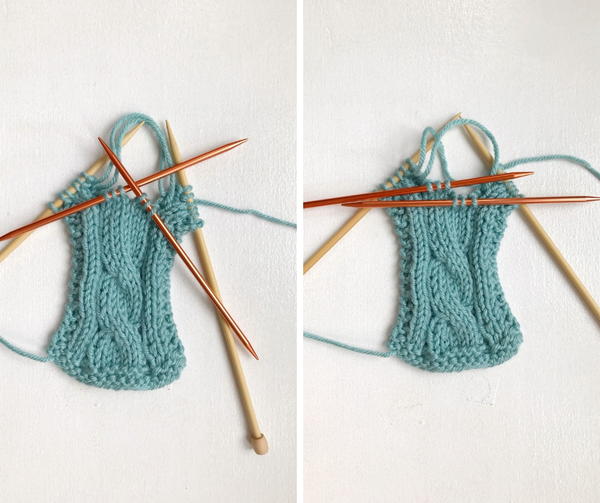
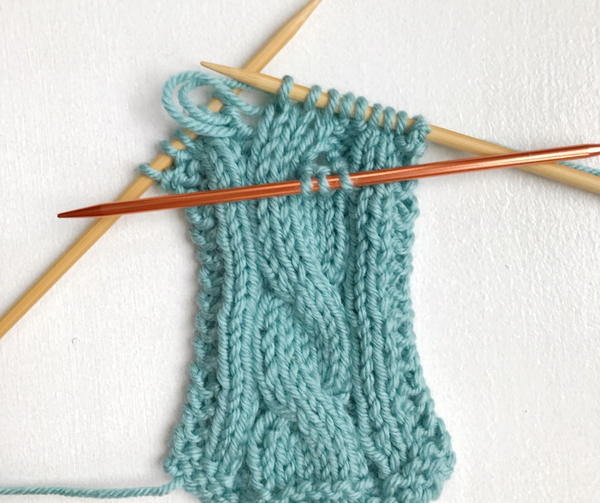
Drop all of the stitches that make up your cable. In the example below, the cable is supposed to be a C6F, so we would drop six stitches.
Some knitters start to panic when they have to drop stitches intentionally. Don't worry, though! You will eventually be picking these stitches back up and reknitting them.
Step 3
Using a double pointed needle or crochet hook, pull out these stitches until you get to your mis-crossed cable. In the example below, this is only two rows below. You will be able to tell when you've reached the cable row because the cable twist will release.
Let the ladders of yarn rest above your work; you will use a crochet hook to pick up these ladders in a later step.
Step 4
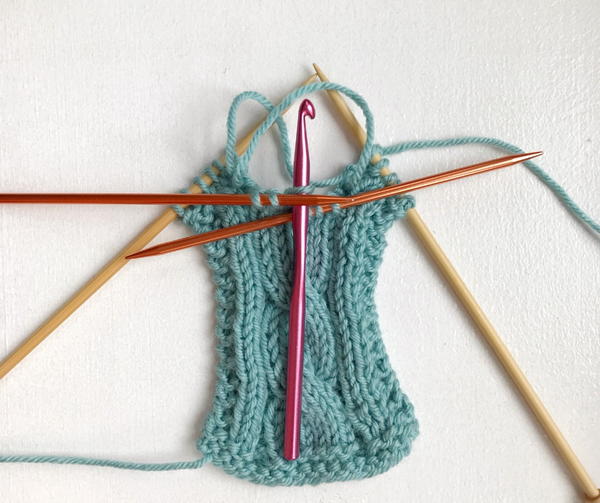
Using two double pointed needles or cable needles of the same or similar size to your regular needles, pick up all stitches of your cable that you've dropped. Divide these stitches according to how they should be cabled; in the example below, this means three stitches on each needle.
Use the double pointed needles to correct the orientation of your cable. In the example below, the three stitches on the right-hand needle should be going in the front of the work.
Step 5
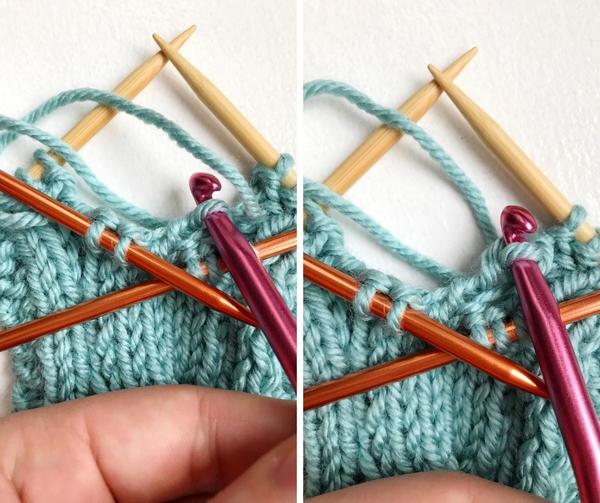
Identify your left-hand needle. In the example below, this is the needle that contains the stitches that should be in the back.
Pick up your crochet hook, insert it into the first stitch on that needle, and take this stitch off of the needle.
Step 6
Use the crochet hook to pick up the first ladder of yarn (the one closest to the bottom). Pull this strand of yarn up and through the stitch to complete it.
Repeat this step until you've reached the top of your work. Once you're out of ladders to pick up, you've reached the top, and you can place this stitch back on your working needle.
Take a minute to tighten your stitches so your fixed cable doesn't have a particularly loose gauge.
Step 7
Repeat step 6 for all of the stitches on the left-hand needle.
Step 8
Repeat steps 6 and 7 for all of the stitches on the right-hand needle.
Step 9
All of your stitches should now be properly twisted.
Note: You might notice that your gauge for these stitches is slightly different around this mistake area. We recommend knitting through your pattern for a few more rows and then dry blocking it with your hands to even out the tension of the yarn.

Step 10
If you placed your stitches onto your working needle, you will notice that your working yarn is at the wrong end of your cable stitches.
In order to fix this, simply slip all of the stitches you just fixed to your left-hand needle, until you've reached the spot with your working yarn. Knit back over these stitches, and then you will have successfully completed fixing your mis-crossed cable!
Up Next:
How to Fix More Common Knitting Mistakes
Have you ever had to fix a miscrossed cable?
Let us know in the comments below!