Prim and Proper Shrug
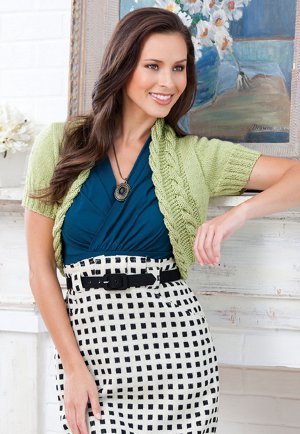
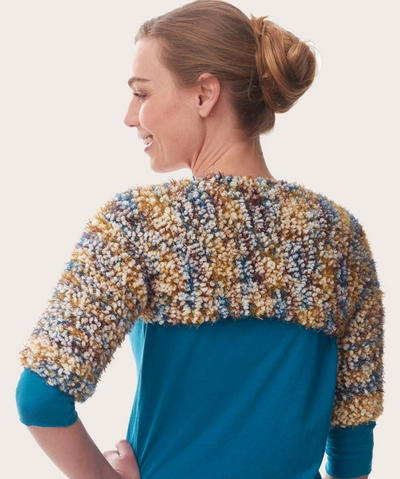
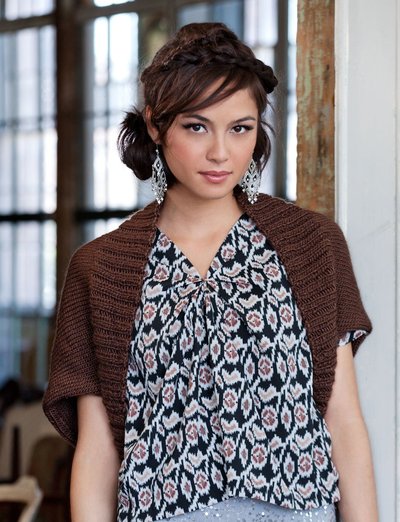
Great for work wear as well as weekend attire, the Prim and Proper Shrug is the ultimate layering piece for your year-round wardrobe. This knit shrug pattern is perfect for covering bare shoulders during spring and summer and layering over long sleeve t-shirts during autumn and winter. An elegant row of cabling along the front makes this stylish shrug pattern a must-knit.

Knitting Needle Size6 or 4 mm, 7 or 4.5 mm
Yarn Weight(2) Fine (23-26 stitches to 4 inches)
Gauge22 stitches, 30 rows, 4 inches. stockinette stitch
Materials:
- RED HEART® Luster Sheen® (E794 available in 3.5 oz (100 g), 307 yd (281 m) solid color and 3 oz (85 g), 261 yd (239 m) multicolor balls) : 4 (4, 5, 5, 6) balls 620 Lime
- Needles: 4mm [US 6], and 5.5mm [US 7]
- Stitch holders
- yarn needle
GAUGE: 22 sts = 4”; 30 rows = 4” in Stockinette stitch (knit on Right Side, purl on Wrong Side) with smaller needles and single strand of yarn; cable band = about 4” wide worked with larger needles and 2 strands of yarn held together, and slightly stretched. CHECK YOUR GAUGE. Use any size needles to obtain the gauge.
Directions are for size Small. Changes for sizes Medium, Large, 1X, and 2X are in parentheses.
To Fit Bust: 34 (38, 42, 46, 50)”
Finished Length: 18½ (18½ , 19½ , 20, 21)”, including cable band.
ABBREVIATIONS
k = knit; k2tog = knit next 2 sts together; p = purl; p2tog = purl next 2 sts together; st(s) = stitch(es); St st = Stockinette st; [ ] = work directions in brackets the number of times specified; * = repeat whatever follows the * as indicated
Special Stitches
C8L (8-stitch left leaning cable) = Slip 4 sts to cable needle and hold to front, k4, then k4 from cable needle.
C8R (8-stitch right leaning cable) = Slip 4 sts to cable needle and hold to back, k4, then k4 from cable needle.
kfb (Knit into front and back) = Knit next st but do not remove from needle, knit into back loop of same st and remove from needle.
ssk (slip, slip, knit) = Slip next two stitches as if to knit to right needle, insert point of left needle through front of sts, knit these sts together through back loop.
Special Technique
3-Needle Bind-Off = Hold needles of stitches to be seamed parallel and with Right Sides together, with 3rd needle knit together first stitch from each needle, *knit together next stitch from each needle, pass first stitch over 2nd stitch and off right needle; repeat from * until all stitches have been knit from the 2 parallel needles and only one stitch remains on the right needle. Fasten off.
Pattern Stitch
2x2 Rib (multiple of 2 sts + 2)
Row 1 (Right Side): K2, *p2, k2; repeat from * to end of row.
Row 2: P2, *k2, p2; repeat from * to end of row.
Repeat Rows 1 and 2 for 2x2 Rib.
NOTES
1. Body of shrug is worked with a single strand of yarn. Cable bands are worked with 2 strands of yarn held together.
2. Back, fronts, and sleeves are worked first and seamed. The cable bands are then sewn around the outer edges of the shrug. The fronts may seem a bit small and the back a bit short. The cable bands provide the additional width and length.
SHRUG
Prim and Proper Shrug Chart
Back
With smaller needles and one strand of yarn, cast on 94 (104, 116, 126, 138) sts.
Work in St st (knit on Right Side, purl on Wrong side) until piece measures 6 (6, 6½, 6½, 7)” from beginning, end with a Wrong Side row.
Shape Armholes
Row 1 (Right Side): Bind off 6 (7, 8, 9, 10) sts, knit to end of row—88 (97, 108, 117, 128) sts.
Row 2: Bind off 6 (7, 8, 9, 10) sts, purl to end of row—82 (90, 100, 108, 118) sts.
Row 3 (decrease): K1, k2tog, knit to last 3 sts, ssk, k1—80 (88, 98, 106, 116) sts.
Row 4: Purl.
Repeat last 2 rows 4 (6, 7, 8, 10) more times—72 (76, 84, 90, 96) sts.
Work even in St st until armholes measure 7½ (7½, 8, 8½, 9)”. Bind off.
Left Front
Notes
1. For most sizes, the front edge shaping will not be completed before the armhole shaping begins.
2. If when left front measures 6 (6, 6½, 6½, 7)” there are still more front edge increases to be worked, begin the armhole shaping at the beginning of Right Side rows and continue the front edge shaping at the end of the same
Right Side rows.
3. If all front edge increases have been completed before the left front measures 6 (6, 6½, 6½, 7)”, work even in Stockinette st to the correct length and then begin the armhole shaping as instructed.
4. Read all instructions through carefully before beginning. With smaller needles and one strand of yarn, cast on 2 sts.
Row 1 (Right Side): K1, kfb—3 sts.
Row 2: Purl.
Row 3 (front edge increase): Knit to last st, kfb—4 sts.
Repeat last 2 rows 20 (26, 32, 38, 42) more times and AT THE SAME TIME, when piece measures 6 (6, 6½, 6½, 7)”, end with a Wrong Side row and begin armhole shaping while continuing to work any remaining front edge increases at the end of every Right Side row.
Shape Armhole
Row 1 (Right Side): Bind off 6 (7, 8, 9, 10) sts, knit to end of row AND increase at end of row if any front edge increases have not yet been completed.
Row 2: Purl.
Row 3 (decrease): K1, k2tog, knit to end of row AND increase at end of row if any front edge increases have not yet been completed.
Repeat last 2 rows 4 (6, 7, 8, 10) more times—13 (16, 20, 24, 25) sts when all front edge increases and armhole shaping are complete.
Work even in St st until armhole measures same as back armhole. Bind off.
Right Front
With smaller needles and one strand of yarn, cast on 2 sts.
Row 1 (Right Side): Kfb, k1—3 sts.
Row 2: Purl.
Row 3 (front edge increase): Kfb, knit to end of row—4 sts.
Repeat last 2 rows 20 (26, 32, 38, 42) more times and AT THE SAME TIME, when piece measures 6 (6, 6½, 6½, 7)”, end with a Right Side row and begin armhole shaping while continuing to work any remaining front edge increases at the beginning of every Right Side row.
Shape Armhole
Row 1 (Wrong Side): Bind off 6 (7, 8, 9, 10) sts, purl to end of row.
Row 2 (decrease): Increase at front edge if any front edge increases have not yet been completed, AND knit to last 3 sts, ssk, k1.
Repeat last 2 rows 4 (6, 7, 8, 10) more times—13 (16, 20, 24, 25) sts when all front edge increases and armhole shaping are complete.
Work even in St st until armhole measures same as back armhole. Bind off.
Sleeves (Make 2)
With smaller needles and one strand of yarn, cast on 82 (82, 86, 90, 94) sts.
Work in 2x2 Rib until piece measures 2½” from beginning.
Work even in St st for ½(½, 1, 1½, 2)”, end with a Wrong Side row.
Shape Cap
Row 1 (Right Side): Bind off 6 (7, 8, 9, 10) sts, knit to end of row—76 (75, 78, 81, 84) sts.
Row 2: Bind off 6 (7, 8, 9, 10) sts, purl to end of row—70 (68, 70, 72, 74) sts.
Row 3 (decrease): K1, k2tog, k to last 3 sts, ssk, k1—68 (66, 68, 70, 72) sts.
Row 4: Purl.
Repeat last 2 rows 4 (6, 7, 8, 10) more times—60 (54, 54, 54, 52) sts.
Next Row (decrease – Right Side): Repeat Row 3—58 (52, 52, 52, 50) sts.
Next Row (decrease – Wrong Side): P1, p2tog, purl to last 3 sts, p2tog through back loops, p1—56 (50, 50, 50 48) sts.
Repeat last 2 rows until 16 sts remain.
Bind off 2 sts at the beginning of next 4 rows.
Bind off remaining 8 sts.
Left Front Cable Band
With larger needles and 2 strands of yarn held together, cast on 26 sts.
Row 1 (Right Side): Knit.
Row 2: P8, k6, p8, k4.
Rows 3–6: Repeat Rows 1 and 2 twice.
Row 7: K4, C8L, k6, C8L.
Row 8: P8, k6, p8, k4.
Repeat Rows 1–8 until piece measures 27 (27, 28, 29, 30)” from beginning. Slip sts to a holder.
Right Front Cable Band
With larger needles and 2 strands of yarn held together, cast on 26 sts.
Row 1 (Right Side): Knit.
Row 2: K4, p8, k6, p8.
Rows 3–6: Repeat Rows 1 and 2 twice.
Row 7: C8R, k6, C8R, k4.
Row 8: K4, p8, k6, p8.
Repeat Rows 1–8 until piece measures 27 (27, 28, 29, 30)” from beginning. Slip sts to a holder.
FINISHING
Sew shoulder seams. Set in sleeves. Sew sleeve and side seams. Beginning at center back neck with ends of cable bands on holders, pin cable bands in place along back neck, front, and lower edges, easing in fullness. Sew in place. Join seam at center back neck with 3-needle bind-off. Sew cast on edges of bands together at center lower back. Weave in ends. Block.
Read NextSilver Moon Shrug
Your Recently Viewed Projects
emiliaashby 045509 5
Feb 09, 2021
I have a question regarding the cap. Is the 8 stitches that (for the size I chose) that I need to bind off from the cable band? Otherwise, I am lost!!! Thank you for answering!
Lisa
Feb 15, 2021
Not according to the instructions printed here, they are being cast off the sleeve not the band, the band instructions occur after the cap is completed.
Report Inappropriate Comment
Are you sure you would like to report this comment? It will be flagged for our moderators to take action.
Thank you for taking the time to improve the content on our site.


