Spring Morning Baby Cardigan Pattern
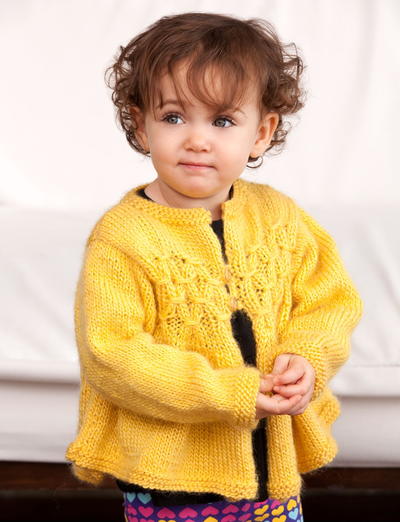
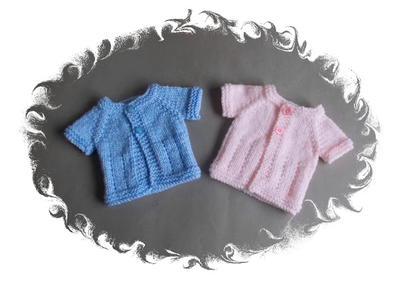
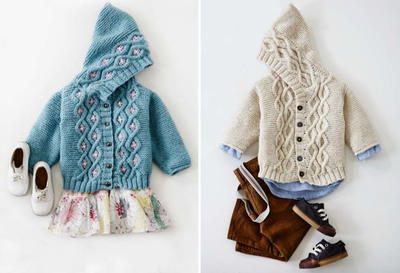
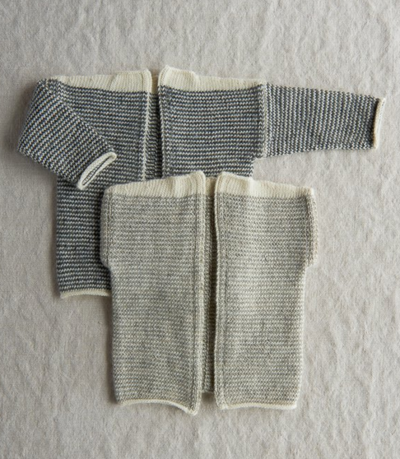
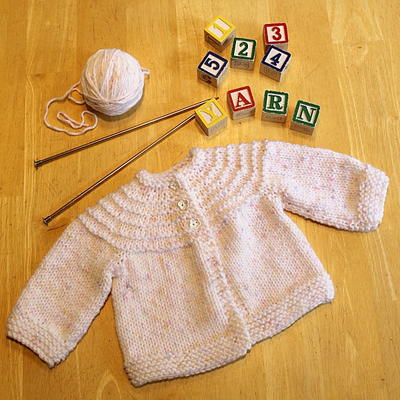
This precious spring cardigan pattern makes a great, handmade gift for the newest member in your family!
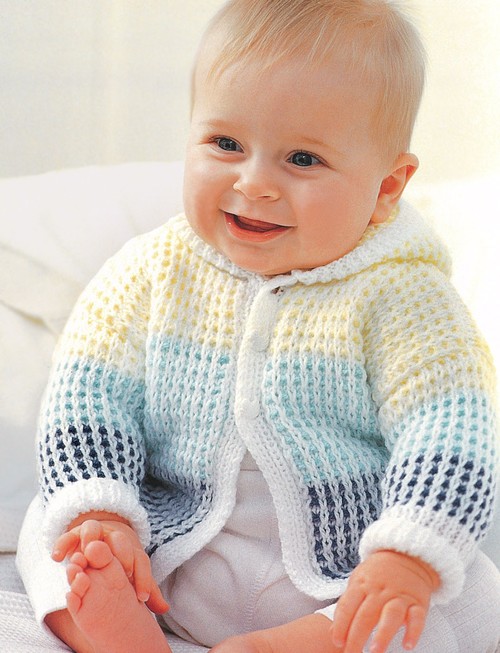
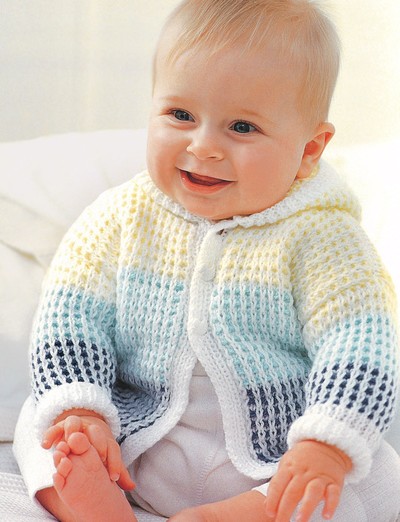
There's nothing sweeter than a cozy baby on a rainy day. Wrap your little one up in this Spring Morning Baby Cardigan, one of the cutest free knitting patterns you'll ever come across. Knitting for baby has never been more fun; this pattern utilizes four different colors of yarn, and has instructions on four different age ranges so no baby is left out.
Beginning knitting can be a confusing time, but not when patterns are this thorough. Whether you're expecting or raising a beautiful baby already, this is the pattern for you.

Knitting Needle Size3 or 3.25 mm, 6 or 4 mm
Yarn Weight(3) Light/DK (21-24 stitches to 4 inches)
Gauge22 sts and 30 rows = 4 ins [10 cm] in stocking st with larger needles.
Materials List
-
Patons® Astra (50 g/1.75 oz) Main Color (MC): (White)
- 0-6 months: 2 balls
- 6-12 months: 3 balls
- 12-18 months: 3 balls
- 18-24 months: 4 balls
- Patons® Astra (50 g/1.75 oz) Contrast A: (Blue) - 1 ball
- Patons® Astra (50 g/1.75 oz) Contrast B: (Green) - 1 ball
- Patons® Astra (50 g/1.75 oz) Contrast C: (Yellow) - 1 ball
- Sizes 3¼ mm (U.S. 3) and 4 mm (U.S. 6) knitting needles or size needed to obtain gauge
- 3 buttons
Spring Morning Baby Cardigan Pattern
Measurements:
Chest measurement
0-6 months: 16 ins [41 cm]
6-12 months: 18 ins [46 cm]
12-18 months: 20 ins [51 cm]
18-24 months: 22 ins [56 cm]
Finished chest
0-6 months: 18½ ins [47 cm]
6-12 months: 20 ins [51 cm]
12-18 months: 22 ins [56 cm]
18-24 months: 24 ins [61 cm]
Instructions
The instructions are written for smallest size. If
changes are necessary for larger sizes, the
instructions will be written thus ( ).
BACK
With smaller needles and MC, cast on 63 (69-75-83) sts.
1st row: (RS). K1. *P1. K1. Rep from * to end of row.
2nd row: P1. *K1. P1. Rep from * to end of row.
These 2 rows form (K1. P1) ribbing.
Work a further 3 (3-5-5) rows in ribbing, thus ending with WS facing for next row.
Change to larger needles and proceed in pat as follows:
1st row: (WS). With MC, purl.
2nd row: With A, K1. *Sl1P. K1. Rep from * to end of row.
3rd row: As 2nd row.
4th row: With MC, knit.
These 4 rows form pat.
Work a further 28 (32-36-40) rows in pat.
Using B in place of A, work 32 (36-40-44) rows in pat.
Using C in place of A, cont in pat until Back from beg measures 10 (11-11¾-12½) ins [25.5 (28-30-32) cm], ending with RS facing for next row.
Cast off, placing markers either side of center 25 (27-29-33) sts to mark back neck edge.
LEFT FRONT
With smaller needles and MC, cast on 30 (34-36-40) sts.
1st row: (RS). *K1. P1. Rep from * to last 2 sts. K2.
2nd row: *K1. P1. Rep from * to end of row.
These 2 rows form (K1. P1) ribbing.
Work a further 3 (3-5-5) rows in (K1. P1) ribbing, inc 1 st at center of last row and ending with WS facing for next row. 31 (35-37-41) sts.
Change to larger needles and proceed in pat as given for Back until 17 (17-21-21) rows less than Back have been worked to shoulder cast-off, ending with WS facing for next row.
Shape neck: Keeping cont of pat, cast off 6 (8-8-10) sts at beg of next row. 25 (27-29-31) sts.
Dec 1 st at neck edge on next and following alt rows 5 times. 19 (21-23-25) sts. Work 4 (4-8-8) rows even in pat, ending with RS facing for next row.
Cast off.
RIGHT FRONT
With smaller needles and MC, cast on 30 (34-36-40) sts.
1st row: (RS). K2. *P1. K1. Rep from * to end of row.
2nd row: *P1. K1. Rep from * to end of row.
These 2 rows form (K1. P1) ribbing.
Work a further 3 (3-5-5) rows in (K1. P1) ribbing, inc 1 st at center of last row and ending with WS facing for next row. 31 (35-37-41) sts.
Change to larger needles and proceed in pat as given for Back until 16 (16-20-20) rows less than Back have been worked to shoulder cast-off, ending with RS facing for next row.
Shape neck: Keeping cont of pat, cast off 6 (8-8-10) sts at beg of next row. 25 (27-29-31) sts.
Work 1 row even in pat.
Dec 1 st at neck edge on next and following alt rows 5 times. 19 (21-23-25) sts.
Work 4 (4-8-8) rows even in pat, ending with RS facing for next row.
Cast off.
SLEEVES
With smaller needles and MC, cast on 35 (37-39-41) sts.
Work 2½ ins [6 cm] in (K1. P1) ribbing as given for Back, ending with WS facing for next row.
Change to larger needles and proceed in pat as given for Back, shaping sides by inc 1 st at each end of 4th and every following 6th (4th-4th-6th) row until there are 41 (45-45-49) sts, taking inc sts into pat.
Size 12-18 months only: Inc 1 st at each end of every following 6th row until there are 49 sts.
All Sizes: Work 4 (4-0-2) rows even in pat, thus ending on a 4th row of pat.
Using B in place of A, cont in pat, inc 1 st at each end of 2nd (2nd-6th-4th) and every following 6th row until there are 47 (53-57-57) sts.
Work 6 (0-0-2) rows even in pat, thus ending with a 4th row of pat.
Sizes 0-6, 6-12 and 12-18 months only: Using C in place of A, cont even in pat until Sleeve from beg measures 6¼ (6¾-7½) ins [16 (17-19) cm], ending with RS facing for next row.
Size 18-24 months only: Using C in place of A, cont in pat, shaping sides by inc 1 st at each end of every following 6th row from previous inc until there are 61 sts.
Cont even in pat until Sleeve from beg measures 8¼ ins [21 cm], ending with RS facing for next row.
All Sizes: Cast off.
HOOD
With smaller needles and MC, cast on 109 (117-125-133) sts.
Work 5 rows in (K1. P1) ribbing as given for Back, ending with WS facing for next row.
Change to larger needles.
Beg with 1st row of pat and using C in place of A, proceed in pat as given for Back until Hood from beg measures 5 (5½-6¼-7) ins [12.5 (14-16-18) cm], ending with RS facing for next row.
Keeping cont of pat, cast off 4 sts beg next 22 (24-26-28) rows.
Cast off rem 21 sts.
FINISHING
Sew shoulder seams.
Button Band:
With smaller needles and MC, cast on 7 sts.
1st row: (RS). K2. P1. K1. P1. K2.
2nd row: K1. (P1. K1) 3 times.
Rep these 2 rows until band, when slightly stretched, fits up front opening edge (left front for girl, or right front for boy) to beg of neck shaping, sewing in place as you work and ending with RS facing for next row. Cast off.
Mark positions for 3 buttons on this band with first to come 6 ins [15 cm] up from cast-on edge, last to come ½ inch [1 cm] below beg of neck shaping and rem button evenly spaced between.
Buttonhole Band: Work to match Button Band with the addition of 3 buttonholes to correspond to button markers as follows:
Make buttonhole (RS): (Rib to marker. Cast off 2 sts) 3 times. Rib to end of row and back, casting on 2 sts over cast off sts on previous row.
Fold Hood in half and sew cast-off center back seam. Matching cast-on edge of Hood to edge of front Borders, sew Hood to neck edge. Place center of cast-off edge of Sleeves to shoulder seams, then sew Sleeves to Back and Fronts. Sew side and sleeve seams, reversing sleeve seam for turn-back cuff. Sew buttons to correspond to buttonholes.
Benefits of Knitting Your Own Baby Clothes
If you have children or grandchildren, you know babies grow very quickly, so free knitting patterns for babies are a lifesaver. In fact, you may buy an outfit for your little one and he or she may outgrow it within a matter of weeks! In a sense, it's quite hard to tell how fast your baby will grow or what size she will be wearing at what point in her young life.
Due to such rapid changes within the first few months of life, it can be a bit wasteful to spend a lot of money on store-bought baby clothes.
Instead, go the economical route and opt for free knitting patterns for babies. With so many adorable patterns, such as the Spring Morning Baby Cardigan, you certainly can't go wrong. Although knitting a cardigan is a time investment, it will most likely not cost as much as buying a cardigan from the store.
Plus, you can customize a knitting pattern to fit your exact taste and style. The benefits of knitting your own baby clothes are numerous, so this knitting pattern is perfect for any little bundle of joy in your life.
Abbreviations
- Sl1P
- slip next st purlways, with yarn at WS of work.
Read NextSpring Day Baby Jacket
Your Recently Viewed Projects
rosieb19 4706082
Mar 15, 2023
I am having trouble getting the 4 rows that complete the pattern to look like the picture. Is there a video on how to do this colour pattern?
Lisa
Mar 21, 2023
Sorry, I don't know of a video for that stitch pattern. I did make this project about 10 or so years ago and I remember that it did not really look like the picture until it was completed, while it was on the needles it looked like it wasn't lining up. Is it possible that is what is happening with you?
Faye
Sep 04, 2021
Hi can someone help me please ? I am on the left frt "shape neck" I have cast off the 8 sts for the size i'm making and have 29 sts left. Then I decreased 1 st at the neck edge (the bind off side). I then kept con of pattern but decreased 1 st every other row and then worked 8 more rows keeping pattern but it is coming up short and only 3 rows of that particular color. The other 2 colors have 10 color rows. What am I not reading right? Do I just keep the cont of the pattern until I get the length or did I decrease too fast?
fayeroper 6151430
Sep 06, 2021
I figured it out! ) I didn't count down 21 rows correctly! Lines up correctly now! )
Lisa
Sep 11, 2021
The neck shaping is 19 rows, not 21. Work the first row with the initial bind off of 8 sts, work 10 rows while binding off 1 stitch at neck edge every other row, then work the 8 rows even as instructed. So, the numbers work out as 1 plus 10 plus 8 equal 19 rows.
paulinepmorris 793 7136
Apr 04, 2021
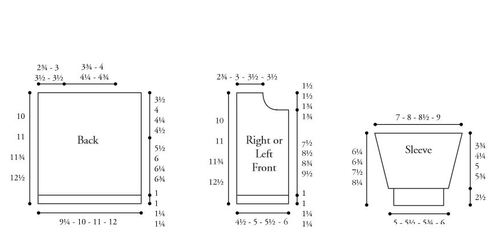
Could you make the measurements pictures bigger so that the sizes can be read, or write the measurements in the pattern, as I am struggling to work out the lengths of each piece of the garment is supposed to be.
Lisa
Apr 06, 2021
They're not going to do that for you on this website, they do not own the pattern, so they do not have the ability to modify or change the layout of the pattern provided, you can do it by clicking on the photo with the pieces and measurements near the bottom of the page and enlarge it yourself.
mdcfarms 0213406
Feb 14, 2021
Is there a video somewhere that shows how to do this stitch pattern? I am a continental knitter but I cannot get this stitch pattern to look like the photos, perhaps it's the way I am picking up my stitches? I have tried several ways but to no avail. I've knitted for years, so it's not inexperience, but something isn't working correctly.
Kathryngerace 0455 520
Jul 22, 2017
My knitting skills are intermediate/advanced. I am just starting this and I find the pattern confusing in places. I see a variety of opinions on how "easy" or "difficult" it really is. Can anyone give helpful advice or clarification to help? Thank you.
3cats2love
Jul 23, 2017
Hi Kathryngerace, I was wondering if you could be more specific about the places you find the pattern confusing? I sometimes find that once I start working on a pattern and follow the instructions carefully that it actually works out fine, it was that I couldn't visualize it when just reading the pattern.
lorigen500 6756301
Oct 14, 2020
Hi, I had a question on the sleeves, the directions are fine,but then right below in bold it says size 12-18 months onlyinc 1 st at each end of every following 6th row until 49 st .what will I be doing different from the above directions, omit the 4th row and only do every 6th row, thanks!
Lisa
Jan 08, 2021
The directions say to increase on the 4th row and every following 6th row to 45 stitches, so you will work row 1-4 and do the increase on the 4th row the first increase, then you will work rows 1-6 and increase on the 6th row until you reach the required 45 stitches for that size sleeve. The stitch requirement for that size is actually 45 stitches, not 49 stitches, the 49 stitches is for the 18-24 months size. Hope this helps, happy knitting.
redkelly
Jun 16, 2017
Have already knitted this twice, in the same color combination, and it comes out really beautiful. Easier to knit than it looks. Sorry, no photo. Already enjoyed by lovely babies.
The Designing Peng uin
Mar 28, 2017
I have kept a list of delightful baby and toddler sweaters from allfreeknitting.com, and thought there could be nothing nicer than the ones on that list then found this one - have two babies to knit for and now am forced to make a choice among the sweaters listed. It would be easier if these were babies for whom I would knit many sweaters ) The wonderful patterns with clear directions as well as suggestions from other knitters add such pleasure to my knitting time. I no longer look anywhere else
rbanjostring 84116 36
Aug 08, 2016
I am working on the buttonhole band for this sweater and don't understand the directions. There are 7 sts. and the directions say to bind off 2 sts. three times??? Please help, the sweater is almost done, but this has me stumped.
dufocar 3657376
Jul 21, 2018
When they say three times, they mean for three different buttonholes. Read the paragraph above for the placement. Hope this helps
brendaunwin
May 30, 2016
I loved knitting this sweater for my new grandson (he looks adorable in it!) Theonly problem I had was the hood until it was pointed out to me that the cast off edge when swing it up is the whole of the casts off not just the last row but all the side cast of 4sts aswell. Then it fit perfectly. Did have a little trouble working out how to keep all the colours in the hood looking the same width as rest of sweater. The pattern tells you only to do one colour in the hood, but it was worth it. Love the sweater thanks for the pattern. Hope you like the photo I posted with the others of it finished xxxxx b
almg63
May 01, 2016
This pattern is a nightmare I have followed the instructions exactly and I've had to take it apart about or times because it doesn't come out right The instructions for the right front side pieces came out longer than the back and the left side so I had to improvise I've taken the first sleeve apart times already because the way you increase is so confusing and does not go with the pattern and the length of the stripes is not correct at all The first color is very long the second color only takes up about rows before you switch to the last color and when I did it said to knit the pattern in that last color until it was a certain length before I even switched to the last color the sleeve measured past the length that it said to knit to The instructions for the pattern aren't…Read More right either When knitting the two front pieces it says to knit rows less than the back before you start the decrease for the sleeve but when you finish the back it tells you to measure the length in inches not by rows So I had to measure one of the stripes that I knew took rows according to the instructions and figure out what half was in inches and measure the front pieces that amout less than the back It really should be kept in measuring by inches or number of rows not both To keep the white vertical stripes on the row back you have to move your yarn to the front before you slip purlwise then move the yarn back to knit the next stitch and that is not calrified Luckily i just made something using a similar technique so I was abke to figure that out myself after taking it apart once You have to make separate pieces in total block them and sew them together I'm really disappointed with this piece
Lisa
Jan 08, 2021
Sorry, nothing you stipulate as being an "error" in the pattern actually is, all the issues you are having are to do with the person knitting the project, not the pattern. This pattern is written in standard format for a knit sweater and works out beautifully, if the directions are followed correctly.
franlannom 3034826
Apr 27, 2016
I love everything about it EXCEPT the Siize 3 needles. I knit for charity and can make two or three sweaters with Sizes 6 to 8 in the length of time it would take to make this beauty. So sad...
Helenmhb
Nov 07, 2015
My stitch gauge in stockinette stitch matches what is required, but in the pattern stitch, the resulting garment would be much larger than the pattern says. I have had to go to a 4 needle and make the smallest size in order to end up with a sweater that is the 6-12 month size. What should the gauge in the pattern stitch be?
Dnb
Oct 26, 2015
Just finished this cardigan. Was a fun stitch pattern and the hood was a bit of a challenge but I did it!
johnson566 5968660
Aug 03, 2015
I love this pattern. I have made quite a few now. I really like the effect when I use 'random wool' for the contrast colour. It looks great.
Burt088 2490956
May 03, 2015
I Have started knitting this pattern, when it reads ws I'm on rs. It is not looking like the picture. Can you help. I uploaded a picture of what it looks like.
etsbaby527 7858597
May 25, 2016
I started this pattern and I am having the same problem as Janice Markey. It is very frustrating-I've done the back and half of the left front with the bumps-looks nothing like the picture.
barbthompson36 269 9183
Apr 28, 2015
Thank you Janice Markey for your help. I had the same problem as Fran Hammond, and followed your instructions which made perfect sense. The jumper is looking great.
bje46 4721475
Apr 23, 2015
Everything is coming together great except the hood. The hood seems way too big for the neck shaping area. I cast on 133, knitted in pattern for 7" and then started the cast off 4sts. I can't figure this out. Help please.
Jadwiga
Mar 18, 2015
I love this pattern. It comes up exactlty as on a photo. One suggestion if you are not using exact sizes. Make gauge in pattern to check how much to cast on. This pattern makes the cardigan thicker and smaller. If you take it under consideration it ends up perfect.
franhammond 394375 1
Mar 16, 2015
Am trying this pattern and it looks nothing like the photo... what am I doing wrong? It looks like this white background with contrasting colour loops (from knitting st after slip one). Photo shows colour in background with vertical lines of white sts. Nothing like what I am getting!!! Please help.
janicemarkey 95079 92
Mar 16, 2015
I have just started this pattern and had the same issues as you - on the 3rd row of the pattern when you are using the contrast colour you are on the wrong side of your work and the pattern says to have the yarn on the wrong side when slipping the stitch in purl - knit stitch then bring yarn to front of work (WS) slip stitch in purl - take yarn to back to knit next stitch and continue moving the yarn from back to front for each alternate stitch - knit and then slip purl stitch - i hope this makes sense.
Report Inappropriate Comment
Are you sure you would like to report this comment? It will be flagged for our moderators to take action.
Thank you for taking the time to improve the content on our site.

