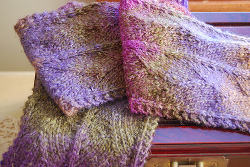
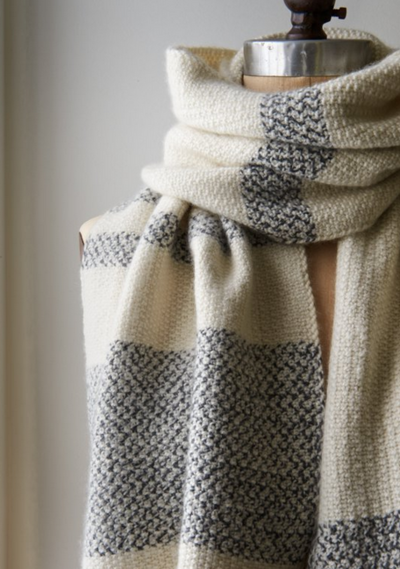
Honeycomb Stitch Scarf

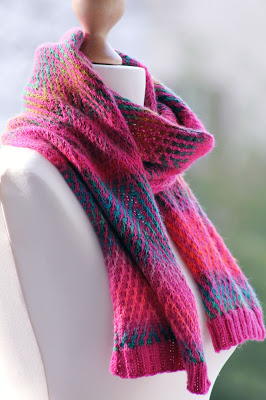
The Honeycomb Stitch Scarf combines an interesting stitch pattern with a longer length for a truly stunning scarf. This knitting scarf pattern is incredibly versatile, because you can wear it as a long scarf, as a shawl, or wrapped around your head when you need extra warmth. The days between winter and spring are always quite unpredictable. One day it could be freezing and the next it could be warm. You need free scarf knitting patterns like this one to keep you prepared no matter what the thermometer says. The cream color is clean and classic, so it will go with anything currently in your transitional weather wardrobe.
NotesSPECIAL ABBREVIATIONS
C2F (Cross 2 Front) = knit into front of 2nd
st on needle, then knit into first st, slip both
sts off needle at the same time.
C2B (Cross 2 Back) = knit into back of 2nd
st on needle, knit first st, slip both sts off
needle at the same time.
Knitting Needle Size10.5 or 6.5 mm
Yarn Weight(4) Medium Weight/Worsted Weight and Aran (16-20 stitches to 4 inches)
Gauge18 sts = 4” [10 cm]; 21 rows = 4” [10 cm] in Honeycomb Stitch Pattern. CHECK YOUR GAUGE. Use any size needle to obtain the gauge.
Finished SizeScarf measures: 17 in x 72 in (43 cm x 183 cm)
Materials List
- RED HEART® Comfort®: 1 ball 3240 Cream
- Susan Bates® Knitting Needles: 6.5mm [US 10½]
- Yarn needle
Pattern Stitches
Garter Stitch
Knit every row
Honeycomb Stitch Pattern
Row 1 (Right Side): *C2F, C2B; repeat from * to end.
Row 2: Purl.
Row 3: *C2B, C2F; repeat from * to end.
Row 4: Purl.
Repeat Rows 1-4 for Honeycomb Stitch Pattern.
Scarf
Cast on 78 sts.
Row 1 (Right Side): Work in Garter st for 1” (2.5 cm) ending with a WS row. Next row (RS): Work first 5 sts in Garter st, work center 68 sts in Honeycomb Stitch Pattern, work last 5 sts in Garter st.
Continue working in established pattern until 71” (180 cm) from beginning. Work in Garter st for 1” (2.5 cm).
Bind off all sts knitwise.
Finishing
Weave in ends.
Abbreviations
- BO
- bind off
- K
- knit
- mm
- millimeters
- P
- purl
- RS
- right side
- *
- repeat whatever follows the * as indicated
- WS
- wrong side
Read NextHoneycomb Stitch Scarf
Your Recently Viewed Projects
Thanks for your comment. Don't forget to share!
Alysanne
Jan 19, 2017
What a beautiful pattern. The stitch looks easy enough to quickly settle into a rythum and finish before you know it. A perfect addition to any outfit or just a cover when you get cool sitting outside. I haven't used this yarn but it certainly looks like it has a lovely drape in the picture. Another great pattern to add to my que.
craftedbyfox
Jan 19, 2017
I love the look of this scarf as it is so different from anything that I have knitted before, I also like the size as it is much bigger than a normal scarf and so is more like a shawl. The C2B and C2F take a bit of getting use done to as I kept accidentally pushing the first stitch off the needle whilst trying to knit into the second but once I got the hang of it it got easier. I found that keeping the gauge looser made it easier to do this type of stitch.
The Designing Peng uin
Jun 07, 2016
this is a lovely scarf or stole/shawl not sure about the crochet part, but then I don't find any crochet directions in the actual pattern, other than instructions to use the necessary size of hook for the gauge, so I am not going to worry about it - crochet defeats me totally sigh shall knit the pattern and make the scarf and enjoy it (I hope). If I have missed something, would appreciate someone explaining it ...
Susan S
Dec 14, 2016
Are you talking about the C2B and C2F? The C stands for cross, not crochet. Crochet totally defeats me, too. -) I love how big this scarf is because I've recently joined a prayer shawl ministry - it's perfect to make for that.
Lisa
Oct 21, 2022
There is no crochet in this pattern, it's entirely knit. the "C" instructions are cross stitches, which are completed the same as cable stitches, you can use a cable needle to slip and hold front or back as instructed.
Report Inappropriate Comment
Are you sure you would like to report this comment? It will be flagged for our moderators to take action.
Thank you for taking the time to improve the content on our site.