Center Fan Knit Pullover

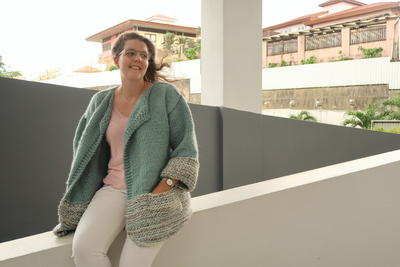
The Center Fan Knit Pullover is made using simple garter stitch in a soft and chunky tubular yarn. The design is brightened up by a delicate fan detail down the center. This free knit sweater pattern will stitch up quickly and look stunning. The gray color is neutral and pleasing to the eye, and the bulky weight of the yarn ensures you will stay warm and comfortable all day long. You don't need to be a knitting expert in order to master this sweater knitting pattern. The straightforward instructions will ensure success in no time. Choose your size and get to work on this fashionable piece.

Knitting Needle Size10.5 or 6.5 mm, 11 or 8 mm
Yarn Weight(5) Bulky/Chunky (12-15 stitches for 4 inches)
Gauge12 sts and 24 rows = 4" [10 cm] in garter st with larger needles.
Finished SizeTo fit bust measurement: XS/S 28-34" [71-86.5 cm], M 36-38" [91.5-96.5 cm], L 40-42" [101.5-106.5 cm], XL 44-46" [112-117 cm], 2/3 XL 48-54" [122-137 cm], 4/5 XL 56-62" [142-157.5 cm], Finished bust: XS/S 38" [96.5 cm], M 42" [106.5 cm], L 46" [117 cm], X
Materials List
-
Bernat® Maker Fashion™ (3.5 oz/100 g; 126 yds/115 m) Gray (06008)
Sizes XS/S - 8 balls or 1000 yds/910 m
Size M - 9 balls or 1060 yds/965 m
Size L - 10 balls or 1200 yds/1100 m
Size XL - 11 balls or 1370 yds/1250 m
Size 2/3XL - 13 balls or 1600 yds/1460 m
Size 4/5XL - 15 balls or 1850 yds/1685 m - Sizes U.S. 10½ (6.5 mm) and U.S. 11 (8 mm) knitting needles or size needed to obtain gauge.
- 2 stitch holders
- 2 stitch markers
Instructions
The instructions are written for smallest size. If changes are necessary for larger size(s) the instructions will be written thus ( ). Numbers for each size are shown in the same color throughout the pattern. When only one number is given in black, it applies to all sizes.
Center Panel (worked over 15 sts)
Note: St count will vary throughout Center Panel. Place markers at beg and end of Panel and count Panel sts consistently as 15 sts during shaping rows.
-
1st row: (RS). yo. (K1. P1) 7 times. K1. yo.
2nd row: K1. (P1. K1) 8 times.
3rd row: K1. yo. (K1. P1) 7 times. K1. yo. K1.
4th row: K2. (P1. K1) 7 times. P1. K2.
5th row: K2. yo. (K1. P1) 7 times. K1. yo. K2.
6th row: K3. (P1. K1) 7 times. P1. K3.
7th row: K3. yo. (K1. P1) 7 times. K1. yo. K3.
8th row: K4. (P1. K1) 7 times. P1. K4.
9th row: K4. (ssk) 3 times. Sl1. K2tog. psso. (K2tog) 3 times. K4. 15 sts.
10th row: K15.
These 10 rows form Center Panel.
Front
With larger needles, cast on 57 (63-69-75-83- 95) sts.
Knit 7 rows (garter st), noting first row is WS and inc 2 sts evenly across last row. 59 (65- 71-77-85-97) sts.
-
Place Center Panel: 1st row: (RS). K22 (25- 28-31-35-41). PM. Work 1st row Center Panel across next 15 sts. PM. K22 (25-28-31-35-41).
2nd row: K22 (25-28-31-35-41). SM. Work 2nd row Center Panel. SM. K22 (25-28-31-35-41).
Center Panel is now in position.
Cont working garter st at sides and Center Panel pat between markers until work from beg measures approx 16" [40.5 cm], ending on a 10th row of Center Panel pat. -
Shape armholes: Keeping cont of pat, cast off 4 (4-6-6-8-8) sts at beg of next 2 rows. 51 (57-59-65-69-81) sts.
Cont even in pat until armhole measures approx 5" [12.5 cm], ending on a 10th row of Center Panel. -
Shape neck: Next row: (RS). K17 (20-21-24- 26-32) (neck edge). Turn. Leave rem sts on a spare needle.
**Knit 1 row.
Dec 1 st at neck edge on next row and following RS rows 3 (3-3-4-4-5) times more. 13 (16-17-19-21-26) sts rem. Cont even until armhole measures 8 (8½-9- 9-9½-10)" [20.5 (21.5-23-23-24.5-25.5) cm], ending on a WS row. Cast off.**
With RS facing, slip center 17 sts onto a st holder. Rejoin yarn to rem sts and knit to end of row.
Work from ** to ** as given above.
Back
With larger needles, cast on 57 (63-69-75-83- 95) sts.
Proceed in garter st (knit every row), noting first row is WS, until work from beg measures same length as Front to armholes, ending on a WS row.
-
Shape armholes: Keeping cont of pat, cast off 4 (4-6-6-8-8) sts at beg of next 2 rows. 49 (55-57-63-67-79) sts.
Cont even until armhole measures 4 rows less than Front to shoulder cast off, ending on a WS row. -
Shape neck: Next row: (RS). K15 (18-19-21- 23-28) (neck edge). Turn. Leave rem sts on a spare needle. Dec 1 st at neck edge on next 2 rows. 13 (16- 17-19-21-26) sts. Work 1 row even. Cast off.
With RS facing, slip center 19 (19-19-21-21- 23) sts onto a st holder. Rejoin yarn to rem sts and knit to end of row. Dec 1 st at neck edge on next 2 rows. 13 (16- 17-19-21-26) sts.
Work 1 row even. Cast off.
Sleeves
With larger needles, cast on 29 (31-31-31-33- 33) sts. Proceed in garter st, noting first row is WS, until work from beg measures 3" [7.5 cm], ending on a WS row.
Inc 1 st each end of next row and following 8th (8th-6th-6th-6th-6th) rows until there are 47 (51-53-53-57-59) sts.
Cont even until work from beg measures 18" [45.5 cm], ending on a WS row. Place markers at each end of last row.
Work 6 (6-8-8-10-10) rows even. Cast off.
Finishing
Block all pieces to measurements. Cover with a damp cloth leaving cloth to dry. Sew right shoulder seam.
Neckband: With RS facing and smaller needles, pick up and knit 10 (12-14-14-16- 16) sts down left front neck edge. K17 from front st holder. Pick up and knit 10 (12-14-14- 16-16) sts up right front neck edge and 3 sts down right back neck edge. K19 (19-19-21- 21-23) from Back st holder, dec 1 st at center. Pick up and knit 3 sts up left back neck edge. 61 (65-69-71-75-77) sts.
1st row: (WS). *K1. P1. Rep from * to last st. K1.
2nd row: K2. *P1. K1. Rep from * to last st. K1. Rep last 2 rows (K1. P1) ribbing for 2¼" [5.5 cm], ending on a WS row. Cast off in ribbing.
Sew left shoulder and neckband seam. Sew in sleeves placing sides of sleeves above markers along cast off sts of Front and Back to form square armholes. Sew side and sleeve seams.
-
Click image to enlarge
Abbreviations
- K2tog
- Knit next 2 stitches together
- PM
- Place marker
- Psso
- Pass slipped stitch over
- RS
- Right side
- Sl1
- Slip next stitch knitwise
- SM
- Slip marker
- Ssk
- Slip next 2 stitches knitwise. Place back onto left-hand needle and knit stitches together.
- WS
- Wrong side
- Yo
- Yarn over
What do you love most about knitting a sweater?
Read NextFavorite Fashion Sweater Pattern
Your Recently Viewed Projects
paver2
Dec 21, 2016
This is certainly an interesting sweater! I would be tempted to try it except for the holes along side the "fan," and that's probably just me. The plain garter stitch is amazingly pretty in a pattern like this, or maybe it's the color. I wonder what it would be like to run small ribbon or just yarn through the holey part?
Report Inappropriate Comment
Are you sure you would like to report this comment? It will be flagged for our moderators to take action.
Thank you for taking the time to improve the content on our site.


