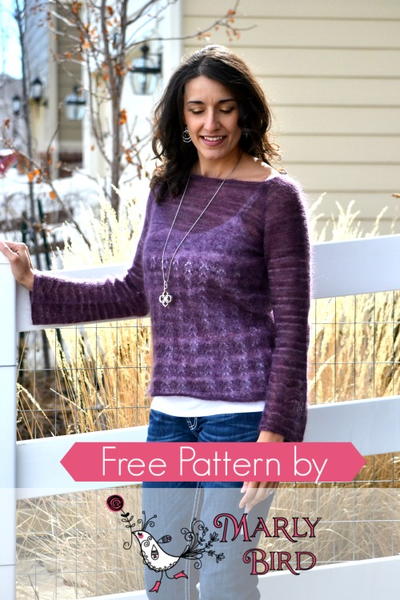
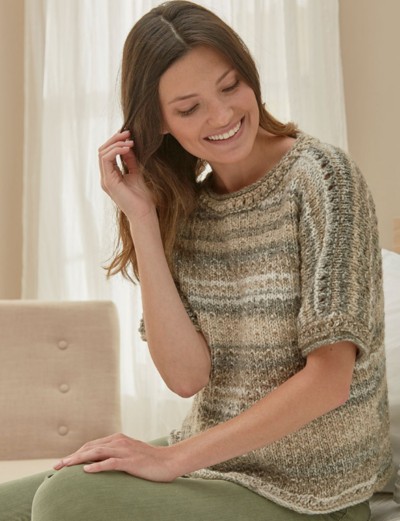
Eyelet Banded Sweater

The Eyelet Banded Sweater is designed for a relaxed fit. The comfortable t-shirt styling is accented with bands of simple eyelet lace at the neckline, hemlines, and shoulder seams. The pattern takes on just the right amount of texture due to the dot stitch pattern highlighted by the shaded yarn. You're going to love wearing this short sleeve knit sweater during the spring when the temperature is in an in-between phase and you need a heavier layer without all the bulk. Give this intermediate knitting pattern a try today and you will love the final result.
NotesDirections are for size small. Changes for sizes medium, large, extra large, 2X large and 3X large are in parentheses.

Knitting Needle Size9 or 5.5 mm, Circular Knitting Needles
Yarn Weight(4) Medium Weight/Worsted Weight and Aran (16-20 stitches to 4 inches)
Gauge15 sts = 4" (10 cm); 22 rows = 4" (10 cm) in Dot Stitch pattern. CHECK YOUR GAUGE. Use any size needles to obtain the gauge.
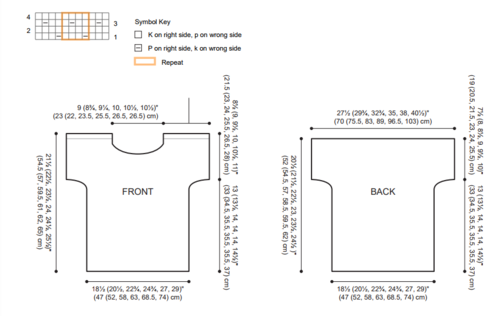
Finished SizeSweater measures 37 (41, 45½, 49½, 54, 58)" (94 (104, 115.5, 125.5, 137, 147.5) cm) around bust and 21 (22, 23, 23½, 24, 25)" (53.5 (56, 58.5, 59.5, 61, 63.5) cm) in length.
Materials List
- RED HEART® Hopscotch™: 3 (4, 4, 5, 5, 6) balls 7961 Somersault
- Susan Bates® Knitting Needles: 5.5mm [US 9]
- Susan Bates® Circular Knitting Needles: 5.5mm [US 9] 16" (40.5 cm)
- Susan Bates® split lock stitch markers
- Stitch holders
- Yarn needle
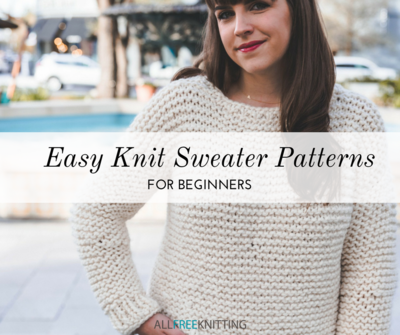
Looking for more lightweight sweater patterns for spring? Take a look at these
Instructions
NOTES
1. Cast on using cable cast-on throughout.
2. When binding off sts for front neck shaping, slip the first stitch instead of knitting or purling it.
Special Technique
Three-Needle Bind-off: Hold both pieces to be joined in your left hand, needles parallel to each other, one in front of the other, with RS facing each other. Hold a third, empty needle in your right hand. Insert right needle knitwise into the first st on both front and back needles, and knit them together. Work the next pair of sts the same way, then pass first st on right needle over second st. Continue in this manner until all sts have been bound off
Dot Stitch Pattern
Worked over a multiple of 4 sts + 3.
Row 1 (right side): K3, * p1, k3; repeat from * to end.
Row 2: Purl.
Row 3: K1, * p1, k3; repeat from * to last 2 sts, p1, k1.
Row 4: Purl.
Repeat Rows 1-4 for Dot Stitch Pattern.
Back
Cast on 71 (79, 87, 95, 103, 111) sts.
Knit 1 row, then purl 3 rows.
Next row (eyelet row, right side): K1, * yo, k2tog; repeat from * to end. Purl 3 rows, knit 1 row, then purl 1 row.
Work in Dot Stitch pattern until piece measures 13 (13½, 14, 14, 14, 14½)" (33 (34.5, 35.5, 35.5, 35.5, 37) cm), ending after a wrong side row.
Shape Sleeves
Cast on 4 sts at beginning of next 8 (8, 4, 4, 0, 0) rows, then 5 sts at beginning of next 0 (0, 4, 4, 8, 8) rows, working all new sts into Dot Stitch pattern – 103 (111, 123, 131, 143, 151) sts.
Work evenly until piece measures 7½ (8, 8½, 9, 9½, 10)" (19 (20.5, 21.5, 23, 24, 25.5) cm) from beginning of sleeve shaping, ending after a wrong side row.
Place all sts on holder.
Front
Work as for back until piece measures 5½ (6, 6½, 7, 7½, 8)" (14 (15, 16.5, 18, 19, 20.5) cm) from beginning of sleeve shaping, ending after a wrong side row.
Divide for Neck
Next Row (right side): Work 45 (49, 54, 58, 63, 67) sts in established pattern, bind off center 13 (13, 15, 15, 17, 17) sts, work remaining 45 (49, 54, 58, 63, 67) sts in established pattern.
Continue across last 45 (49, 54, 58, 63, 67) sts only for right shoulder, leaving left shoulder sts on needle unworked.
Shape Right Shoulder and Neck
Next row (wrong side): Purl.
Working in established pattern, bind off 3 sts at beginning of next 2 (2, 2, 3, 3, 3) right side rows, then 2 sts at beginning of next 2 (2, 2, 1, 1, 1) right side rows – 35 (39, 44, 47, 52, 56) sts.
Next row (wrong side): Purl.
Shoulder Band
Purl 2 rows.
Next row (eyelet row, right side): K1, * yo, k2tog; repeat from * to end.
Purl 2 rows, then place all sts on a holder.
Shape Left Shoulder and Neck
With wrong side facing, join yarn to left shoulder sts still on the needle, and purl 1 row.
Next row (right side): Work evenly in pattern.
Working in established pattern, bind off 3 sts at beginning of next 2 (2, 2, 3, 3, 3) wrong side rows, then 2 sts at beginning of next 2 (2, 2, 1, 1, 1) wrong side rows – 35 (39, 44, 47, 52, 56) sts.
Work shoulder band same as for right shoulder.
Finishing
Join Shoulders
With right sides of Front and Back facing together, join 35 (39, 44, 47, 52, 56) left shoulder sts using three-needle bind off, bind off 33 (33, 35, 37, 39, 39) back neck sts, then join 35 (39, 44, 47, 52, 56) right shoulder sts using threeneedle bind off.
Sleeve Bands
With right side facing, pick up and knit 49 (53, 57, 61, 63, 67) sts evenly spaced along sleeve edge, and purl 3 rows.
Next row (right side): K1, * yo, k2tog; repeat from * to end.
Purl 3 rows, then knit 1 row.
Bind off all sts purlwise.
Neckband
With right side facing and using circular needle, and beginning at either shoulder seam, pick up and knit 76 (76, 80, 84, 88, 88) sts evenly spaced around neckline.
Join round and mark first st.
Purl 1 round, then knit 1 round.
Next round: * Yo, k2tog; repeat from * around.
Knit 1 round, purl 1 round, then knit 2 rounds.
Bind off all sts knitwise.
Sew side and sleeve seams.
Weave in all loose ends.
-
Click image to enlarge
-
Click image to enlarge

Abbreviations
- k
- knit
- k2tog
- knit next 2 sts together
- p
- purl
- st(s)
- stitch(es)
- yo
- yarn over
- * or **
- repeat whatever follows the * or ** as indicated
Read NextMorning Stroll Knit Sweater
Your Recently Viewed Projects

Thanks for your comment. Don't forget to share!
Tink
Apr 01, 2025
I love this sweater pattern and the sweater turned out lovely! I've made it several times because I like it so much. ) If you are looking for an alternate yarn since the one called for is discontinued, I used Caron One Pound and it worked out perfectly. You can also check out YarnSub for more alternate yarns. )
Tricia108
Jan 18, 2018
I love the look of this sweater and the eyelet detail. I am familiar with the yarn used and it should work up nicely. Also you can also do the eyelet trim in another color. The instructions look easy to follow. Thank you.
Report Inappropriate Comment
Are you sure you would like to report this comment? It will be flagged for our moderators to take action.
Thank you for taking the time to improve the content on our site.