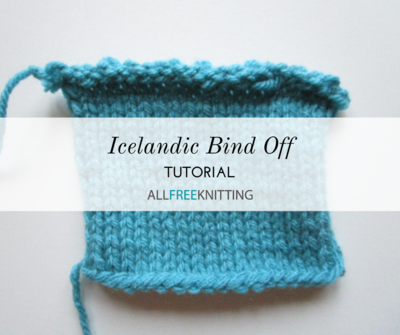
Icelandic Bind Off Tutorial
This stretchy bind off method also offers a decorative edge to your knitting.

There is no shortage of stretchy bind off methods in the knitting universe, but we don't always love the way that they look, if they even have a distinctive look at all. The Icelandic Bind Off is unique in that it leaves your project with a cord-like finish, making it a cute option for sweater sleeves, sock cuffs, or cowls—any wearable that you'd like to show off. While it's a neat-looking way to finish your projects, it's also a rather quick bind off method compared to other stretchy bind offs, which can involve ten steps or more. This makes it a great first bind off to learn after the standard knit bind off, which offers little more than its ease of completion.
Step 1
On the right side of your knitting, with your yarn to the right, knit the first stitch.


Step 2
Slip the stitch you just knit back to the left needle purlwise.


Step 3
Insert your right needle back into the stitch as if to purl, and then insert your needle knitwise into the next stitch.


Step 4
Pull the loop of the second stitch through the first stitch, and knit it.


Step 5
Pull both stitches off the lefthand needle.

Step 6
Repeat steps 2-5 until you've reached the last two stitches.

Step 7
Remove your lefthand needle from the last stitch. Cut your yarn and thread it through the live needle on your right stitch. Pull to tighten.


Up Next:
6 Bind Off Methods
What's your favorite decorative bind off method?
Read NextHow to Knit a Hat