How to Knit Intarsia
When you learn how to carry your yarn when changing colors, learning to knit intarsia is a piece of cake.
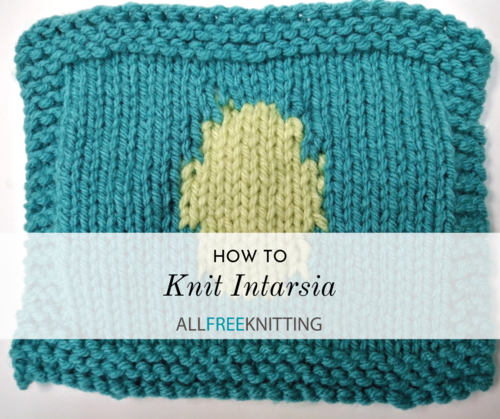
There are a lot of ways to make your knitting interesting, from cool stitch patterns to unique shaping, but my all-time favorite is to use colorwork. Colorwork in knitting is the process of creating multicolored knits through the use of two or more differently-colored skeins of yarn, and there are a bunch of different ways to include colorwork, including intarsia.
Intarsia knitting is a technique that looks deceptively simple, but if it's not completed quite correctly, you'll find yourself with a completed project that is, quite literally, in pieces. Those who are familiar with stranded colorwork, or fair isle knitting, will be used to simply dropping one color before picking up another, but there are some key differences between these two types of colorwork that make it impossible to complete intarsia in the same way.
Intarsia Knitting vs. Fair Isle
Unlike stranded knitting, one of the more popular forms of colorwork, where you frequently switch between two (or more) colors in one row, intarsia knitting involves one or more big "blocks" of color which are knitted separately from the surrounding colors. Essentially what you have is a panel of a color interrupting a background color. Therefore, this technique works best when you have a single (or a small few) motif or shape occurring in an otherwise singularly-colored design. Intarsia can help you spice up just about any project with a colored heart, flower, or even a vertical stripe; the world is your oyster!
Learning How to Knit Intarsia
If you were to simply drop the first color and begin knitting the second color, you will have two separate projects on your needles, since the two pieces won't be interconnected in any way with the yarn. For this reason, every time you switch colors in intarsia knitting, you must first wrap the new color around the old color. For a step-by-step demonstration, see below.
Setting Up Intarsia Knitting
Step 1
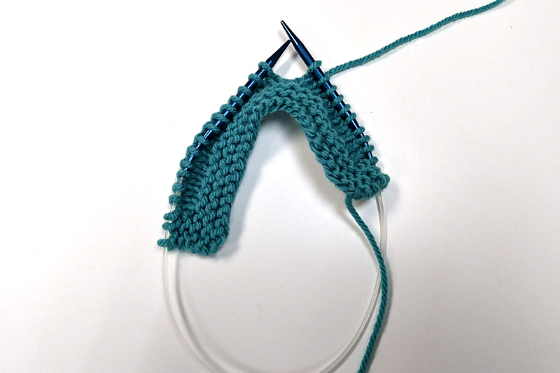
Knit using your main color to the point in the chart where the contrast color begins.
Step 2
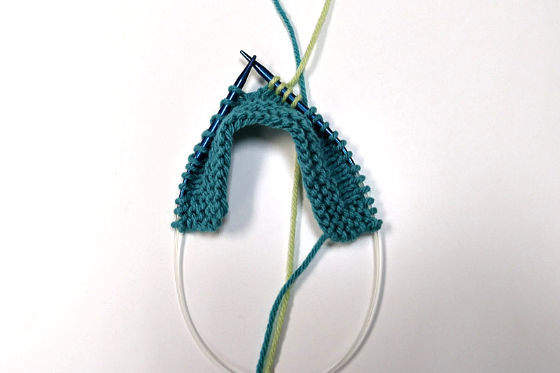
Attach the new skein of yarn the way you would join any other new ball of yarn and knit the number of stitches indicated in the chart with the new color.
Step 3
If your chart indicates that you return to your original color before the end of the row, attach a new ball of yarn (or work with the other end of your initial ball of MC yarn) the way you would attach any other yarn, and knit as indicated to the end of the chart.
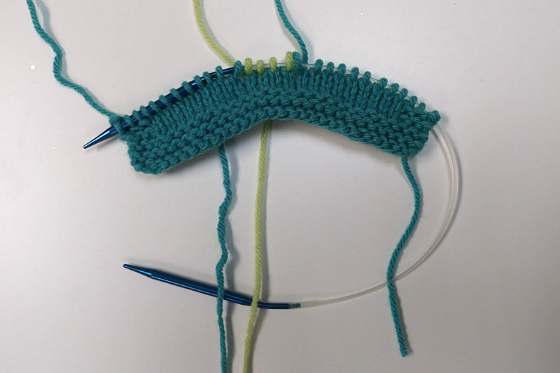
Note that while this example was done on the right side, you may also begin intarsia knitting on the wrong side of your work; the only difference is that you will purl the stitches rather than knit them.
Intarsia Knitting on the Right Side
Step 1
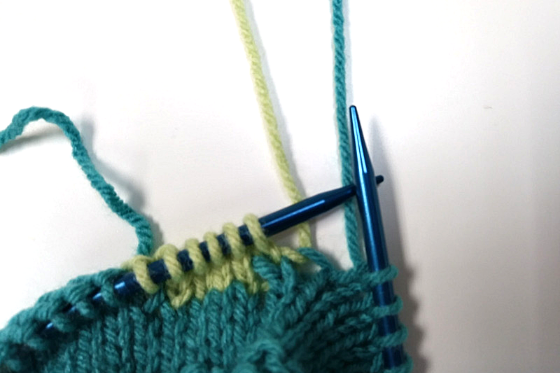
Work up until the color change in the chart.
Step 2
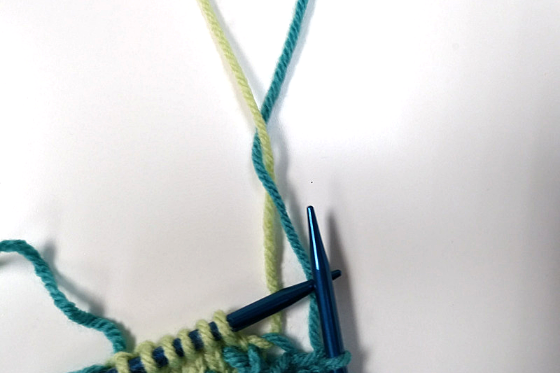
Since we'll be switching to the contrasting color (green in this example), wrap the contrasting color around the main color (blue in this example) from back-to-front, taking care to make sure the contrasting color ends up closest to your next stitches to knit.
Step 3
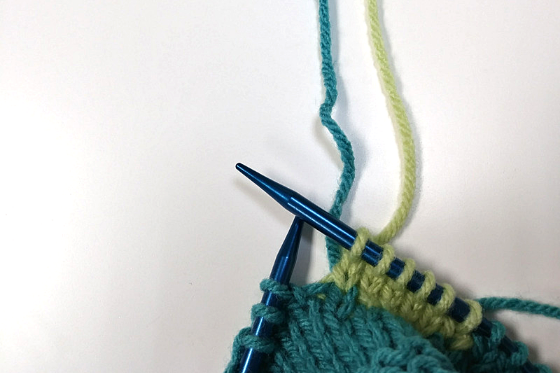
Knit the number of stitches indicated in the chart with the contrasting color.
Step 4
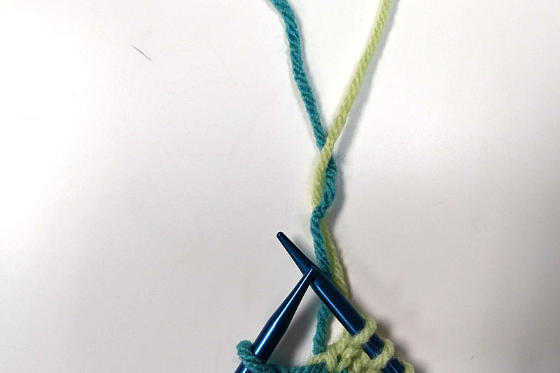
If you must return to the main color before the end of the row, wrap the main color around the contrasting color from back-to-front, taking care to make sure the main color ends up closest to your next stitches to knit.
Intarsia Knitting on the Wrong Side
Knitting intarsia on the wrong side utilizes the exact same method of wrapping your new color around your old color as in the right side.
Step 1
Work up until the color change in the chart.
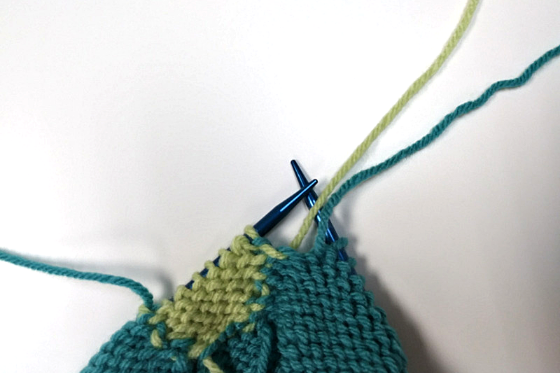
Step 2
Since we'll be switching to the contrasting color (green in this example), wrap the contrasting color around the main color (blue in this example) from back-to-front, taking care to make sure the contrasting color ends up closest to your next stitches to purl.
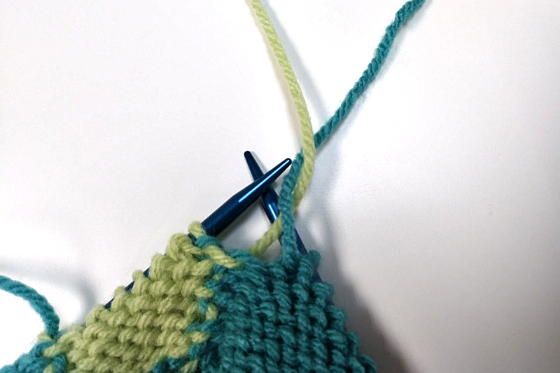
Step 3
Knit the number of stitches indicated in the chart with the contrasting color.
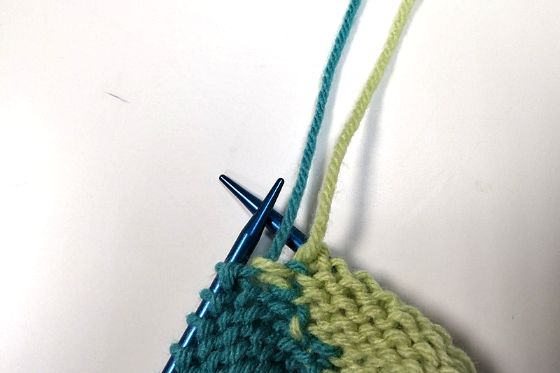
Step 4
If you must return to the main color before the end of the row, wrap the main color around the contrasting color from back-to-front, taking care to make sure the main color ends up closest to your next stitches to purl.
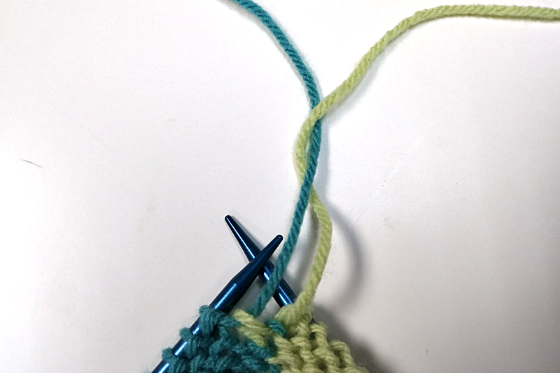
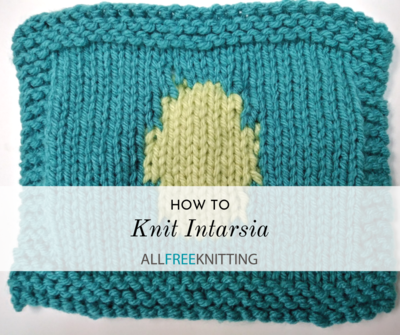
This is what the beginnings of your intarsia knitting will look like from the front side. If your contrasting color block moves independently of your main color block, you may not be properly wrapping your stitches.
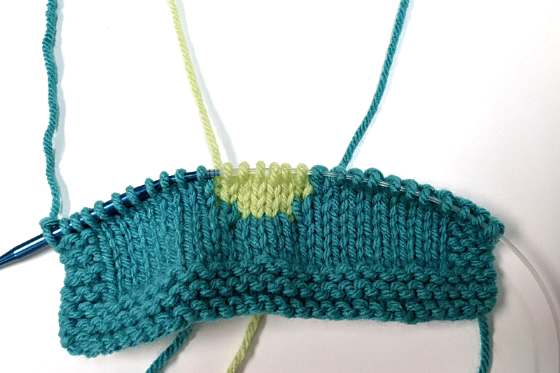
Note that some knitters don't wrap the yarn when working on the right side and choose to only perform this technique while working on the wrong side. Play around with both techniques to determine which one you prefer.
Up Next:
Roositud Knitting 101
What is your favorite colorwork technique?
Read NextHow to Knit a Hat

