Celestial Hand-Painted DK Cardigan/Bolero Free Knitting Pattern
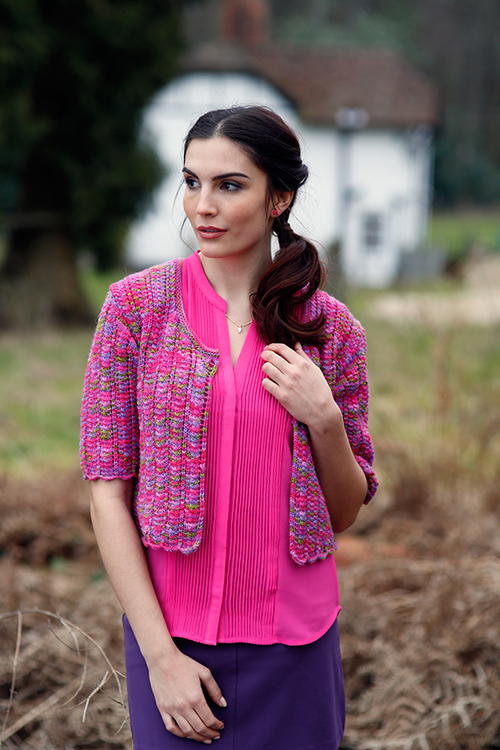
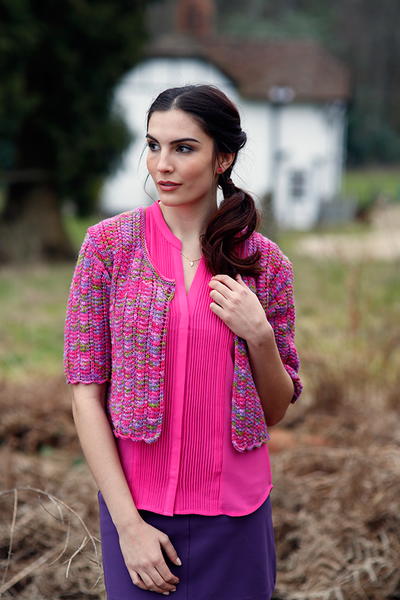
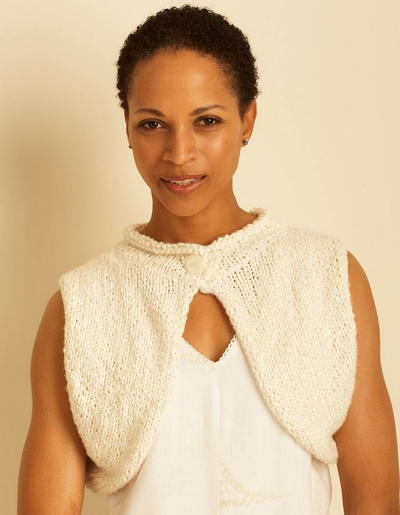
Celestial is a lovely bolero knitting pattern by the internationally acclaimed designer Anniken Allis. This vibrant-colored frock will surely brighten your day. When it comes to free knitting patterns, you can't beat this cardigan's unique styling and sophisticated details.

Knitting Needle Size6 or 4 mm
Yarn Weight(3) Light/DK (21-24 stitches to 4 inches)
Gauge24 sts and 28 rows in pattern stitch to measure 4in (10cm)
Finished SizeSize: 10/12, 14/16, 18/20 - To fit: 86-91, 97-102, 112-117cm, 34-36, 38-40, 44-46 in; Actual bust size: 97, 111, 127 cm 38.25, 43.5, 49 in; Length: 44, 44.5, 45 cm 17, 17.5, 18 in
Materials List
- 8, 8, 9 hanks of Artesano Hand-Painted DK Yarn - EZ92 Fairground
- 4 mm needles
- 2cm button
Instructions
Special Instructions
Short row shoulder shaping:
Wrap & turn (w&t) on RS rows: move yarn to front between ndls, slip st to right ndl, move yarn to back between ndls, slip st back to left ndl, turn.
Wrap & turn on WS rows: move yarn to back between ndls, slip st to right ndl, move yarn to front between ndls, slip st back to left ndl, turn. On last row of shoulder shaping, k or p the wraps together with the st it was wrapped around.
On RS rows: insert ndl into wrap then into st and k both together.
On WS rows: from the back of work, lift wrap onto ndl and p together with st.
Back
Cast on 115 (131, 147) sts.
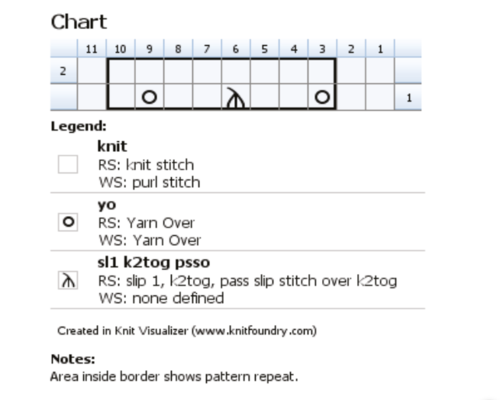
Work chart for 10 (9.5, 9)in (25.5 [24, 23]cm) ending with a WS row.
Shape armholes:
RS: Cast off 4 (5, 6) sts at beg of next 2 rows. 107 (121, 135) sts.
Decrease one st at each end of every row 2 (4, 6) times.
Decrease one st at each end on RS rows only 4 (6, 8) times. 95 (101, 107) sts rem.
Work even until back measures 16.5 (17, 17.5)in (42 [43, 44.5]cm), ending with a WS row.
Shape right neck
RS: Work in patt 31, (34, 37) sts. Place centre 33 sts on a st holder or waste yarn. Turn.
Decrease one st at neck edge of every row 3 times. 28 (31, 34) sts rem.
Shape shoulder
WS: p 19 (21, 23), w&t
RS: patt to end.
WS: p 10 (11, 12), w&t
RS: patt to end.
WS: p across row including wraps.
Place sts on holder
Shape left neck
Re-attach yarn at neck edge.. Work in patt to end of row.
Decrease one st at neck edge of every row 3 times. 28 (31, 34) sts rem.
Shape shoulder
RS: patt 19 (21, 23) sts, w&t
WS: p to end
RS: patt 10 (11, 12) sts, w&t
WS: p to end.
RS: work across row including wraps.
Place sts on holder.
Left front
Cast on 59 (67, 75) sts and work chart until front matches back to armhole shaping ending with a WS row.
Shape armhole
RS: Cast off 4 (5, 6) sts at beg of row. 55 (62, 69) sts.
Dec 1 st at armhole edge on every row 2 (4, 6) times.
Decrease one st at armhole edge on RS rows only 4 (6, 8) times. 49 (52, 55) sts.
At the same time, when front measures 11.5 (11.75, 12)in (29 [29.5, 30]cm) ending with a WS row, begin neck shaping.
Shape front neck
RS: Work in patt to last 5 sts. Place 5 sts on holder, turn.
Decrease one st at neck edge on every row 16 times. 28 (31, 34) sts rem.
Work even until front measures the same as back to shoulder shaping ending with a RS row.
Shape shoulder
WS: p 19 (21, 23) w&t
RS: work in patt to end
WS: p 10 (11, 12) w&t
RS: work in patt to end
WS: p across row including wraps.
Place sts on holder.
Right front
Cast on 59 (67, 75) sts and work chart until front matches back to armhole shaping ending with a RS row.
Shape armhole
WS: Cast off 4 (5, 6) sts at beg of row. Dec 1 st at armhole edge on every row 2 (4, 6) times.
Decrease one st at armhole edge on RS rows only 4 (6, 8) times. 49 (52, 55) sts.
Four rows before right front measures the same as left front to neck shaping, work button hole.
RS: k2, cast off 2 sts, work in patt to end of row.
WS: Work to bound off sts, cast on 2 sts using backward loop cast on, p2.
Work 2 rows in patt.
Shape front neck
RS: Place 5 sts on holder. Re-attach yarn and work in patt rest of row.
WS: Decrease one st at neck edge on every row 16 times. 28 (31, 34) sts rem.
Continue until front measures the same as back to shoulder shaping ending with a WS row.
Shape shoulder
RS: patt 19, (21, 23) sts, w&t
WS: p to end.
RS: patt 10, (11, 12) sts, w&t
WS: p to end.
RS: work across row including wraps.
Place sts on holder.
Sleeves
Cast on 83 (91, 99) sts and commence pattern. Increase one stitch each end of every 2 (5, 7) rows 3 (4, 3) times. 89 (99, 105) sts.
Continue until sleeve measures 6 (5.5, 5.25)in (15 [14, 13.5]cm) ending with a WS row.
Shape sleeve cap
RS: Cast off 4 (5, 6) sts at beg of next two rows. 81 (89, 93) sts.
Decrease one st at each end of every RS row 8 (10, 10) times. 65 (69, 73) sts rem.
Decrease one st at each end of every row 14 (13, 14) times. 37 (43, 45) sts rem.
Bind off 4 (5, 5) sts at beg of next six rows.
Bind off rem 13 (13, 15) sts.
Finishing
Steam press garment.
Join shoulders using 3 needle bind off on the WS.
Sew on button.
-
Neckband:
Starting at right front, k 5 sts from holder. Pick up and k 33 (37, 40) sts between front neck and right shoulder, pick up and k 7 sts between right shoulder and back neck, k 33 from back neck, pick up and k 7 between back neck and left shoulder, pick up and k 33 (37, 40) sts between left shoulder and front neck, k 5 sts from holder.
123 (131, 137) sts.
Work 3 rows garter stitch. Bind off.
Weave in all loose ends.
Read NextSea-Green Simple Shrug
Your Recently Viewed Projects
carolkizner 957869 4
Oct 20, 2019
I think that, with all the complications of this pattern, it should be rated "intermediate," not "easy."
Tricia108
Feb 25, 2018
My only complaints about this pattern are that it is not easy, It requires a chart and wrap and turns. Also it does not give the yardage on the yarn. Otherwise it is a very nice pattern and really not hard to do. I like boleros because they are lighter than a cardigan, faster to work up and a nice extra layer to an outfit. I will do it in a solid color with a bit of shimmer to show off the detail and it will make be good for an evening out. Thank you for the free pattern.
3cats2love
Mar 25, 2017
This is a lovely bolero vest pattern. However, I would not consider it an "easy" pattern because you need to know how to follow a chart, do decreases and wrap stitches. I'm happy that stitch counts are given for different sizes as well as the actual measurements the vest will fit in each size.
The Designing Peng uin
May 06, 2016
I found the pattern on the same page as the original information - right beside and beneath the intro and photo - really like it -- wonder if it would work if I tried lengthening it to sweater length?
gracetarabene 6929 149
Oct 28, 2015
When you click on the button to go to the pattern it says that the price is 36 not free.
Report Inappropriate Comment
Are you sure you would like to report this comment? It will be flagged for our moderators to take action.
Thank you for taking the time to improve the content on our site.

