Little Cutie Cardigan
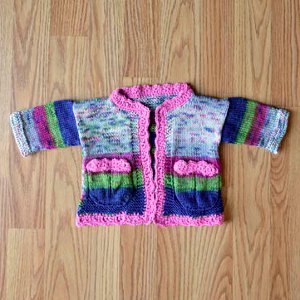
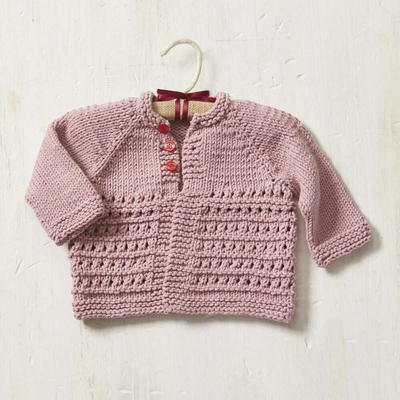
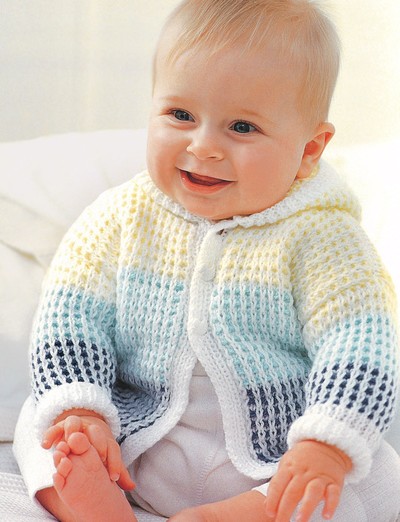
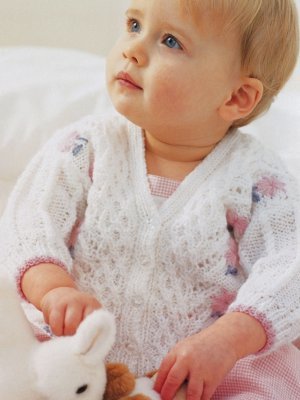
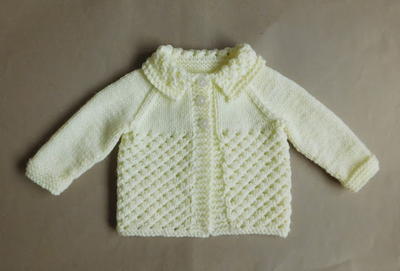
With sizing options from three months to two years old, the Little Cutie Cardigan is a darling pattern you'll love coming back to again and again. This darling knit baby cardigan pattern is a brightly colored beauty your little girl will adore. A fun, multi-colored bodice is adorned with a pretty scalloped edge. Two pockets make this little cardi a functional garment for indoor and outdoor wear.

Knitting Needle Size3 or 3.25 mm, Circular Knitting Needles
Yarn Weight(2) Fine (23-26 stitches to 4 inches)
Materials:
- Universal Yarn Little Bird Colors (100% acrylic; 100g/344 yds)
- 206 Bouncy Ball (MC) – 1 ball, all sizes
- Universal Yarn Little Bird (100% acrylic; 100g/344 yds)
- 104 Pink Parfait (CC) – 1 ball, all sizes
- Needles: US Size 3 (3.25 mm) straight, 16” circular or size needed to obtain gauge
- Hook: US Size D-4 (3.5 mm) or size needed to obtain gauge
- Notions: Stitch markers, tapestry needle
GAUGE
24 sts x 34 rows = 4” in St st; 20 sc x 22 sc rows = 4”
Save time, check your gauge.
SIZES
3 (6, 12, 24) months
Shown in 3 month size.
FINISHED MEASUREMENTS
Chest: 19 (21, 22, 23)”
BACK
With MC, cast on 58 (62, 66, 70) sts. Work in garter stitch for 10 rows (knit every row).
Next row (RS): Knit.
Next row (WS): Purl.
Continue in St st until piece meas 5½ (6½, 7, 8)” from cast-on edge, ending with WS row. Place removable markers at each edge of piece to indicate underarms. Continue in St st until piece meas 4 (4¼, 4½, 5)” from markers, ending with WS row. Bind off all sts.
LEFT FRONT
With MC, cast on 26 (28, 30, 32) sts. Work in garter stitch for 10 rows.
Next row (RS): Knit.
Next row (WS): K4, purl to end.
Rep these 2 rows, working in St st while maintaining 4 sts at opening edge in garter st, until piece meas 5½ (6½, 7, 8)” from cast-on edge, ending with WS row. Place removable markers at each edge of piece to indicate underarms. Continue in patt as set until piece meas 2 (2¼, 2½, 3)” from markers, ending with RS row.
Shape Neck
Bind off 7 (7, 8, 9) sts at beg of next WS row.
Dec row (RS): Knit to last 3 sts, ssk, k1 – 2 sts dec’d. Purl a WS row. Rep these last 2 rows, 2 more times – 16 (18, 19, 20) sts rem. Cont in St st until piece meas (4¼, 4½, 5)” from markers, ending with WS row. Bind off all sts.
RIGHT FRONT
With MC, cast on 26 (28, 30, 32) sts. Work in garter stitch for 10 rows.
Next row (RS): Knit.
Next row (WS): Purl to last 4 sts, k4.
Rep these 2 rows, working in St st while maintaining 4 sts at opening edge in garter st, until piece meas 5½ (6½, 7, 8)” from cast-on
edge, ending with WS row. Place removable markers at each edge of piece to indicate underarms. Continue in patt as set until piece meas 2 (2¼, 2½, 3)” from markers, ending with WS row.
Shape Neck
Bind off 7 (7, 8, 9) sts at beg of next RS row. Purl a WS row
Dec row (RS): K1, k2tog, knit to end – 2 sts dec’d.
Purl a WS row. Rep these last 2 rows, 2 more times – 16 (18, 19, 20) sts rem. Cont in St st until piece meas (4¼, 4½, 5)” from markers, ending with WS row. Bind off all sts.
Sew shoulder seams.
SLEEVES
Note: Stitches are picked up along the body and knit down.
With MC and RS facing, pick up and knit 48 (50, 54, 60) sts along armhole between markers.
Purl a WS row.
Dec row (RS): K1, k2tog, knit to last 3 sts, ssk, k1– 2 sts dec’d. Rep Dec row every 6 (6, 8, 6) rows, 4 (5, 5, 8) more times – 38 (38, 42, 42) sts rem.
Work even in St st, if necessary, until Sleeve meas 3½ (4½, 5½, 6½)” from pick-up edge, ending with RS row. Knit 6 rows. Bind off all sts over the next WS row.
POCKETS (make 2)
With MC, cast on 14 sts. Purl a WS row.
Shape Lower Pocket
Row 1 (RS): K1, m1, knit to last st, m1, k1 – 2 sts inc’d.
Row 2 (WS): P1, m1, purl to last st, m1, k1 – 2 sts inc’d.
Row 3: Rep Row 1.
Row 4: Purl.
Row 5: Rep Row 1 – 22 sts.
Row 6: Purl.
Begin Box Pleat
Row 1 (RS): K11, m1p, k11 – 1 st inc’d.
Row 2 (WS): P11, m1, k1, m1, p11 – 2 sts inc’d.
Row 3: K11, m1p, p3, m1p, k11 – 2 sts inc’d.
Row 4: P11, k5, p11.
Row 5: K11, m1p, p5, m1p, k11 – 2 sts inc’d.
Row 6: P11, k7, p11.
Row 7: K11, m1p, p7, m1p, k11 – 2 sts inc’d.
Row 8: P11, k9, p11.
Row 9: K11, m1p, p9, m1p, k11 – 2 sts inc’d.
Row 10: P11, k11, p11.
Row 11: K11, m1p, p11, m1p, k11 – 2 sts inc’d.
Row 12: P11, k13, p11.
Bind off all sts.
Fold in box pleat so that only the St st portion is showing on the front of the pocket. Pin into place.
Pocket Edging
Row 1 (RS): With CC, work 17 sc along top edge of pocket, working through pleat.
Row 2 (WS): Ch 1, sc in same sc, [dc in next sc, tr in next sc, dc in next sc, sc in next sc] to end, turn.
Row 3: Sk 1st sc, {sc in next dc, [sc, ch 1, sc] in next tr, sc in next dc, sk next sc} to end. Fasten off.
FINISHING
Sew Sleeve and side seams.
Edging
With RS facing, attach CC with sl st to Right corner front.
Rnd 1: Ch 1, work 2 sc in corner, work 37 (41, 45, 53) sc up Right Front to Neck shaping, work 3 sc in corner, 53 (53, 57, 61) sc around neck edge, 3 sc in corner, 37 (41, 45, 53) sc down Left Front, 93 (101, 105, 113) sc along lower edge, work 1 sc in same sp as first 2 sc, join with sl st to beg sc.
Rnd 2: Ch 1, [sc, dc, tr, dc, sc] in same (corner) sc, * [dc in next sc, tr in next sc, dc in next sc, sc in next sc] to 3 sc before corner, dc in next sc, tr in next sc, dc in next sc, [sc, dc, tr, dc, sc] in next (corner) sc; rep from * 2 more times, [dc in next sc, tr in next sc, dc in next sc, sc in next sc] to 3 sc before corner, dc in next sc, tr in next sc, dc in next sc, join with sl st to beg sc.
Rnd 3: Sl st to top of next dc, ch 1, sc in same dc, [sc, ch 1, sc] in next tr, sc in next dc, sk next sc, {sc in next dc, [sc, ch 1, sc] in next tr, sc in next dc, sk next sc} around, join with sl st to beg sc.
Fasten off.
Weave in ends and block
Read NextBaby Wheat Cardigan
Your Recently Viewed Projects
MLou1936
Jan 20, 2017
Little Cutie Cardigan calls for 2 colours in the materials listing - shows 4 colours in the photo, and gives instructions for only a MC - main colour - there is a lot missing in order to attempt this by way of instructions - is there help out there to figure this out?.
JLB
Jan 29, 2017
The MC 'Bouncy Ball' is a multi colored yarn. The second colour is for the pink trim. Hope you post a photo of your finished sweater.
Report Inappropriate Comment
Are you sure you would like to report this comment? It will be flagged for our moderators to take action.
Thank you for taking the time to improve the content on our site.

