Nordic Holiday Centerpiece
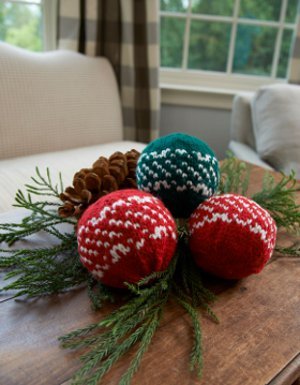
Behold the perfect solution for a boring holiday tablescape. The Nordic Holiday Centerpiece is the one of those DIY holiday decorations that offers timeless elegance, traditional design, and festive cheer to any home. These wintery ball-shaped centerpieces are the perfect accompaniment to a holiday feast or spontaneous winter get-together. The Nordic Holiday Centerpiece is sure to become a fixture in your home for Christmases to come.

Knitting Needle Size8 or 5 mm, Double-Pointed Knitting Needles (DPNs)
Yarn Weight(4) Medium Weight/Worsted Weight and Aran (16-20 stitches to 4 inches)
Materials:
- RED HEART® With Love®: 1 skein (370 yd; 338m) 1621 Evergreen OR 1909 Holly Berry A, and 1 skein 1101 Eggshell B.
- Susan Bates® Knitting Needles: 5mm [US 8] set of 4 double pointed knitting needles.
- One 4” (10 cm) Styrofoam® ball covered with plastic wrap
- Stitch marker
- Yarn needle
GAUGE: 17 sts = 4” (10 cm); 21 rows = 4” (10 cm) in Stockinette st worked in rnds (knit every round) in color pattern.
CHECK YOUR GAUGE. Use any size needles to obtain the gauge.
ABBREVIATIONS
A, and B = Color A and Color B
k = knit
k2tog = knit next 2 sts together
st(s) = sttich(es)
[ ] = work directions in brackets the number of times specified
* = repeat whatever follows the * as indicated.
Holiday ball measures 4” (10 cm) diameter
Special Stitch
M1 = Make 1 (Increase) – Lift strand between needles to left-hand needle and knit strand through the back loop, twisting it to prevent a hole.
Notes
1. Holiday ball cover is worked in rounds on double pointed needles. The pattern is repeated 3 times in each round (once on each needle).
2. Styrofoam® ball is easier to insert into cover if first covered with plastic wrap.
INSTRUCTIONS
NORDIC HOLIDAY BALL COVER
With A, leaving a long beginning tail, cast on 12 sts. Divide sts evenly onto 3 double pointed needles (4 sts on each needle). Place marker for beginning of round. Join to work in the round, being careful not to twist.
Increase Section
Round 1: Knit.
Round 2: [K1, M1, k2, M1, k1] 3 times—18 sts.
Round 3: [K2, M1, K2, M1, k2] 3 times—24 sts.
Round 4: [K3, M1, k2, M1, k3] 3 times— 30 sts.
Round 5: Knit.
Round 6: [K1, M1, k8, M1, k1] 3 times—36 sts.
Round 7: [K2, M1, k8, M1, k2] 3 times—42 sts.
Round 8: [K3, M1, k8, M1, k3] 3 times—48 sts.
Round 9: Knit.
Round 10: [K1, M1, k14, M1, k1] 3 times— 54 sts.
Round 11: Knit.
Charted Color Pattern
Note: Color pattern can be worked by following written instructions or reading chart. Read all rows of chart from right to left.

Round 1: *With B, k1; [with A, k1; with B, k2] twice; with A, k1; with B, k1; repeat from * around.
Round 2: *With A, k1; with B, k1; with A, k1; with B, k3; with A, k1; with B, k1; with A, k1; repeat from * around.
Round 3: With A, knit.
Round 4: *With B, k1; with A, k2; repeat from * around.
Round 5: *With A, k1; with B, k1; [with A, k2; with B, k1] twice, with A, k1; repeat from * around.
Round 6: *With A, k2; with B, k1; repeat from * around.
Round 7: Repeat Round 4.
Round 8: With A, knit.
Round 9: Repeat Round 2.
Round 10: Repeat Round 1. Cut B.
Round 11: With A, knit.
Decrease Section
Continue with A only.
Round 1: [K1, k2tog, k12, k2tog, k1] 3 times—48 sts.
Round 2: Knit.
Round 3: [K1, k2tog, k10, k2tog, k1] 3 times—42 sts.
Round 4: Knit.
Round 5: [K1, k2tog, k8, k2tog, k1] 3 times—36 sts.
Round 6: Knit.
Round 7: [K1, k2tog, k6, k2tog, k1] 3 times—30 sts.
Round 8: Knit.
Cut yarn, leaving a long tail. With yarn needle thread tail through remaining 30 stitches removing the stitches from knitting needle.
Slip cover over Styrofoam® ball and pull on tail to tighten cover and close top opening. With yarn needle, thread beginning tail through base of cast-on stitches and pull on tail to tighten cover and close opening.
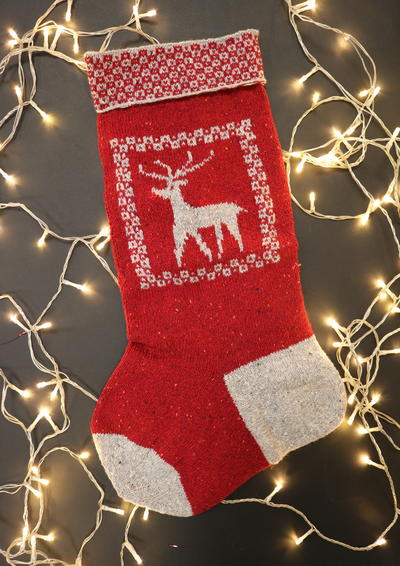
Read NextColorful Keepsake Stocking
Your Recently Viewed Projects
Thanks for your comment. Don't forget to share!
The Designing Peng uin
Aug 25, 2016
I don't see a problem hand-washing the ornaments if the styrofoam ball is enclosed in plastic. Any fibre filling is going to lose its shape when it is washed machine washing is going to damage it, causing the knit balls to lose shape, regardless of what you use to fill them - like a quilt that is not stitched.
magnoliasouth
Dec 19, 2015
Very cute! Only thing is, does anyone have any ideas for other fillings besides styrofoam or polyfill? Mine will need to be washable.
Report Inappropriate Comment
Are you sure you would like to report this comment? It will be flagged for our moderators to take action.
Thank you for taking the time to improve the content on our site.