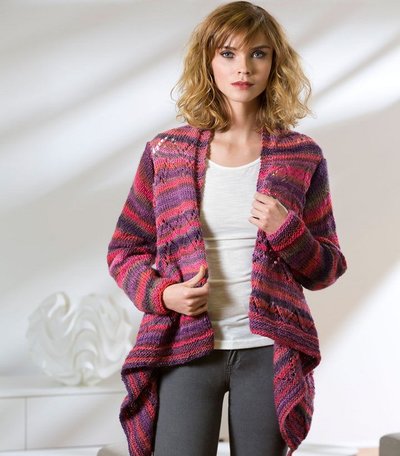
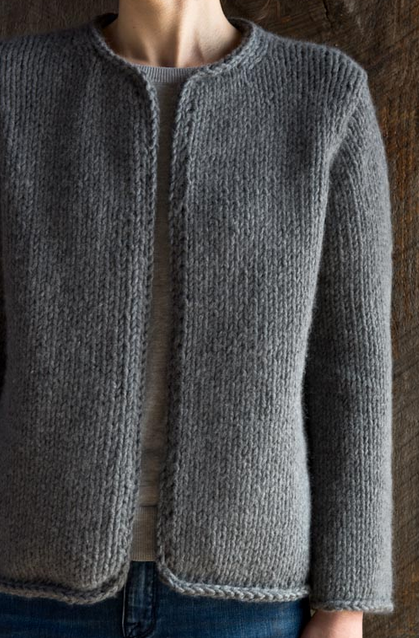
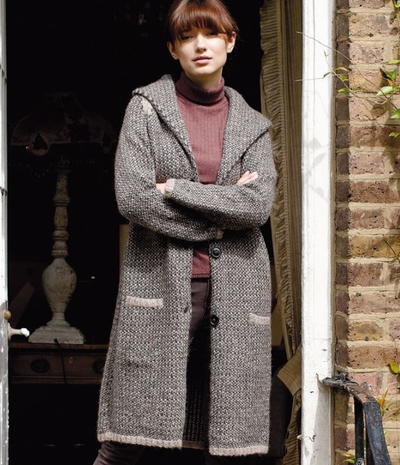
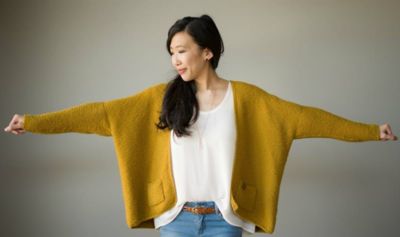
Drape Front Knit Cardigan
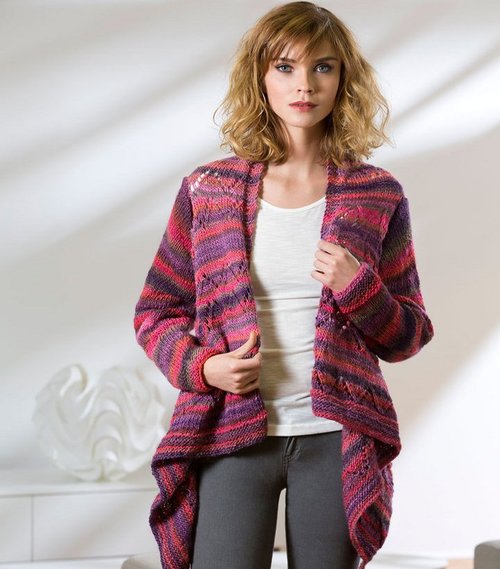
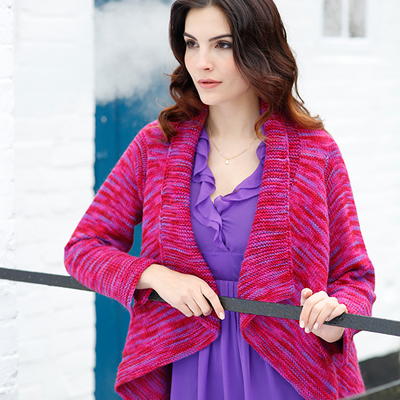
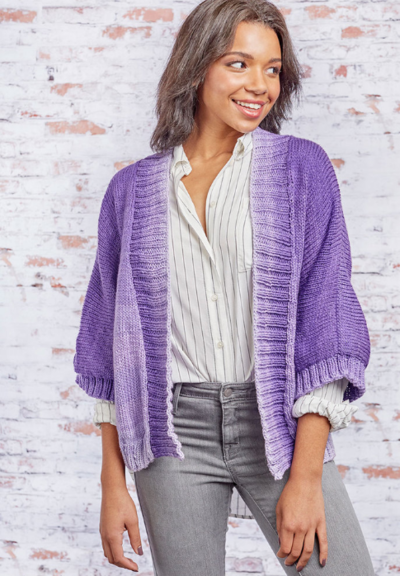
Stunning and slimming, the Drape Front Knit Cardigan is a unique piece you'll love pulling out any season of the year. This bohemian-chic knit cardigan pattern features a elongated, cascading front and a subtle lace design. Made with a combination of stockinette stitch and lace knitting, this elegant cardigan is sure to look incredible on anyone who wears it. Lovely in both solid and variegated yarn types, this artistic knit cardigan pattern is a go-to for creative dressers who crave comfort and style.

Knitting Needle Size8 or 5 mm, 9 or 5.5 mm, Circular Knitting Needles
Yarn Weight(4) Medium Weight/Worsted Weight and Aran (16-20 stitches to 4 inches)
Gauge16 stitches, 22 rows, 4 inches. Chevron Lace
Materials:
- RED HEART® Boutique Unforgettable® (® Art. E793 available in 3.5oz (100 g), 280 yd (256 m) balls) : 5 (5, 6, 7, 8) balls 3955 Winery
- Susan Bates® Knitting Needles: 5mm [US 8] and 5.5mm [US 9] circular needles, 20” (50cm) or longer
- Stitch markers
- yarn needle
GAUGE: 16 sts = 4” (10 cm); 22 rows = 4” (10 cm) in Chevron Lace pattern using larger needle.
CHECK YOUR GAUGE. Use any size needles to obtain the gauge
ABBREVIATIONS
k = knit; k2tog = knit next 2 sts together; p = purl; p2tog = purl next 2 sts together; st(s) = sttich(es); yo = yarn over; * = repeat whatever follows the * as indicated.
Directions are for size Small; changes for sizes Medium, Large, X-Large, and XX-Large are in parentheses.
To Fit Bust: 32 (36, 40, 44, 48)” [81.5 (91.5, 101.5, 112, 122) cm]
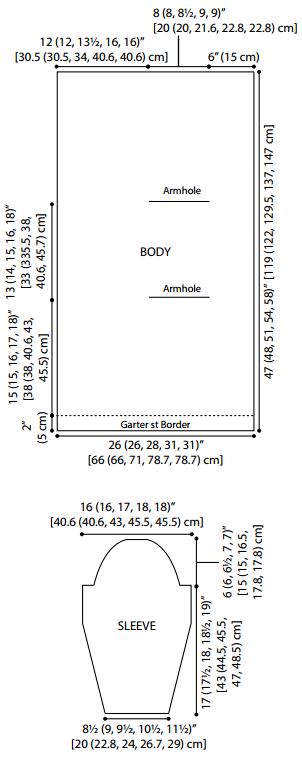
Finished Width of Cardigan Rectangle: 47 (48, 51, 54, 58)” [119.5 (122, 129.5, 137, 147.5) cm]
Finished Length: 26 (26, 28, 28, 31, 31)” [66 (66, 71, 71, 78.5) cm]
Special Stitches
M1 = Make 1 (Increase) – Lift strand between needles to left-hand needle and knit strand through the back loop, twisting it to prevent a hole.
sk2p = Slip next stitch as if to knit to right needle, k2tog, lift slipped st over the k2tog st and off needle.
ssk = Slip next 2 stitches, one at a time, as if to knit to right needle, insert point of left needle through front of sts, knit these sts together through back loop.
Pattern Stitch
Chevron Lace (multiple of 10 sts + 1)
Row 1 (right side): K5, yo, ssk, *k8, yo, ssk; repeat from * to last 4 sts, k4.
Row 2: Purl.
Row 3: K3, k2tog, yo, k1, yo, ssk, *k5, k2tog, yo, k1, yo, ssk; repeat from * to last 3 sts, k3.
Row 4: Purl.
Row 5: K2, k2tog, yo, k3, yo, ssk, *k3, k2tog, yo, k3, yo, ssk; repeat from * to last 2 sts, k2.
Row 6: Purl.
Row 7: *K1, k2tog, yo, k5, yo, ssk; repeat from * to last st, k1.
Row 8: Purl.
Row 9: K2tog, yo, k7, *yo, sk2p, yo, k7; repeat from * to last 2 sts, yo, ssk.
Row 10: Purl.
Repeat Rows 1–10 for Chevron Lace pattern.
Notes
1. Body of cardigan is worked from side to side, beginning at one front edge. Openings are made in body for armholes.
2. Sleeves are worked separately and sewn into armhole openings.
3. Circular needles are used to accommodate large number of stitches. Work back and forth in rows as if working with straight needles.
BODY
With smaller needle, cast on 103 (103, 113, 123, 123) sts.
Work in Garter st (knit every row) until piece measures about 2” (5cm) from beginning.
Change to larger needle.
Row 1 (right side): K6 (for Garter st border), place marker, knit to last 6 sts, place marker, k6 (for Garter st border).
Row 2: Knit to first marker, slip marker, purl to next marker, slip marker, knit to end of row.
Rows 3–12: Repeat last 2 rows 5 more times.
Begin Chevron Lace Pattern
Continue to slip markers as you come to them.
Row 1 (right side): Knit to first marker, work
Row 1 of Chevron Lace pattern to next marker, knit to end of row.
Row 2: Knit to first marker, work next row of
Chevron Lace pattern to next marker, knit to end of row.
Rows 3–20: Knitting first and last 6 sts and working Chevron Lace pattern between markers, work in established pattern until a
total of 20 rows (2 repeats) of Chevron Lace pattern have been worked.
Rows 21 and 22: Knit to first marker, work in Stockinette st (knit on right side, purl on wrong side) to next marker, knit to end of row.
Repeat Rows 1–22 until piece measures 17 (17, 18, 19, 20)” [43 (43, 45.5, 48.5, 51) cm] from beginning, end with a wrong side row
Shape First Armhole
Note: When instructed to work in pattern “as established”, work the next row of Rows 1–22 (the pattern you were working) ensuring that the stitches line up as previously.
Next Row (right side): Work in pattern as established over first 24 sts, bind off next 32 (32, 34, 36, 36) sts (for armhole), continue in pattern as established to end of row.
Next Row: Work in pattern as established to bound-off sts, cast on 32 (32, 34, 36, 36) sts over the bound-off sts, continue in pattern as established to end of row.
Continue Body
Continue working in pattern as established until piece measures 30 (31, 33, 35, 38)” [76 (78.5, 84, 89, 96.5) cm] from beginning, end with a wrong side row.
Shape Second Armhole
Next Row (right side): Work in pattern as established over first 24 sts, bind off next 32 (32, 34, 36, 36) sts (for armhole), continue in pattern as established to end of row.
Next Row: Work in pattern as established to bound-off sts, cast on 32 (32, 34, 36, 36) sts over the bound-off sts, continue in pattern as established to end of row.
Continue Body
Continue working in pattern as established until piece measures 45 (46, 49, 52, 56)” [114.5 (117, 124.5, 132, 142) cm] from beginning.
Change to smaller needle.
Work in Garter st for 2” (5cm).
Bind off.
Sleeves (make 2)
With smaller needle, cast on 34 (36, 38, 42, 46) sts.
Work in Garter st until piece measures 2” (5cm) from beginning.
Change to larger needle.
Shape Sleeve
Increase Row (right side): K1, M1, knit to last st, M1, k1—36 (38, 40, 44, 48) sts.
Next Row: Purl.
Repeat Increase Row—38 (40, 42, 46, 50) sts.
Repeat last 2 rows 7 (2, 3, 2, 0) more times—52 (44, 48, 50, 50) sts.
Work even in Stockinette st for 5 rows.
Repeat Increase Row—54 (46, 50, 52, 52) sts.
Repeat last 6 rows 5 (9, 9, 10, 10) more times—64 (64, 68, 72, 72) sts.
Work even in Stockinette st until piece measures 17 (17½, 18, 18½, 19)” [43 (44.5,
45.5, 47, 48.5) cm] from beginning, end with a wrong side row.
Shape Cap
Row 1 (right side): Bind off 5 (7, 8, 9, 10) sts, knit to end of row—59 (57, 60, 63, 62) sts.
Row 2: Bind off 5 (7, 8, 9, 10) sts, purl to end of row—54 (50, 52, 54, 52) sts.
Decrease Row (right side): K1, k2tog, knit to last 3 sts, ssk, k1—52 (48, 50, 52, 50) sts.
Next Row: Purl.
Repeat Decrease Row—50 (46, 48, 50, 48) sts.
Repeat last 2 rows 3 (4, 5, 10, 7) more times—44 (38, 38, 30, 34) sts.
Sizes S (M, L) Only
Next Row (wrong side): P1, p2tog through the back loops, purl to last 3 sts, p2tog, p1—42 (36, 36) sts.
Repeat Decrease Row—40 (34, 34) sts.
Repeat last 2 rows 3 (1, 0) more times—28 (30, 34) sts.
Next Row: Purl.
Repeat Decrease Row—26 (28, 32) sts.
Repeat last 2 rows 4 (5, 6)—18 (18, 20) sts.
Sizes 1X (2X) Only
Next Row (wrong side): Purl.
Next Row: Knit.
Next Row: P1, p2tog through the back loops, purl to last 3 sts, p2tog, p1—28 (32) sts.
Next Row: Knit.
Next Row: Purl.
Repeat Decrease Row—26 (30) sts.
Next Row: Purl.
Next Row: Knit.
Next Row: P1, p2tog through the back loops, purl to last 3 sts, p2tog, p1—24 (28) sts.
Next Row: Knit.
Repeat last 6 rows 0 (1) more time(s)—24 (24) sts.
All Sizes
Next Row (wrong side): Bind off 2 (2, 2, 3, 3), purl to end of row—16 (16, 18, 21, 21) sts.
Next Row: Bind off 2 (2, 2, 3, 3), knit to end of row—14 (14, 16, 18, 18) sts.
Repeat last 2 rows—10 (10, 12, 12, 12) sts.
Bind off.
FINISHING
Sew sleeve seams. Sew in sleeves. Weave in ends.
Read NextClassic Knit Jacket
Your Recently Viewed Projects
waywardwinns 40046 53
Jan 16, 2019
I have found after knitting about half the pattern that it does not match the photo. If you look at the schematic, you can see that the garter border is on the short end of the rectangle. It should be on the long end if you look at the photo. Therefore, the six-stitch edge will become the neck and bottom edge. Also following the pattern, the Chevron Lace will be sideways as opposed to the way it lays in the photo. The photo shows multiple stockinette rows between ten-row repeat of the Chevron Lace pattern. Tell me if I'm wrong. I don't think so though. I'm a seasoned knitter and believe that I can read a pattern. I had my "knitting mentor" read the pattern and she agrees with me. I'd love to hear back from you.
Lisa
Jan 19, 2019
I've made this pattern and it looks just like the photo, I think you and your mentor are misunderstanding the schematic.
Lisa
Aug 20, 2021
I believe you and your mentor are misunderstanding both the schematic and the pattern, this pattern is knit side to side, not bottom up or top down.
Morehouse17
Aug 31, 2017
I am still a knitting novice and I still have a long way to go before I feel like I am more than novice, but if I am reading these directions, I am essentially creating a rectangle with sleeves? I would love to use the pricey yarns to make this but I think I will stick to the bulk yarns that don't cost so much so when I have to pull out the stitching it will not be such a big deal.
Delphine Bryant
Jun 01, 2017
I agree with Susan. I have minimum experience but the directions are clear. The drape of the cardigan would allow some "forgiveness" in flaws. Thank you so much for providing directions to complete the project in larger sizes. Like the vest idea too.
schiebet
Mar 14, 2017
The stitch pattern of this makes it a really unique drape front sweater. I even think it would make a nice vest without the sleeves. I think if you added a few rows of ribbing around the armholes or some single crochet it would finish them off and be super cute too!
Susan S
Jan 16, 2017
At first glance, this sweater pattern looks long and complicated but as I read through it I do think I could do it. I don't have much experience knitting sweaters but this doesn't have much construction to it. It would be very flattering, I'm sure.
msdeb21
Dec 04, 2016
I haven't worn a sweater in this style yet, but it looks so flowing and beautiful. The color looks great with jeans, and I bet it would look nice with black or khakis for work. Winter is on the way, so I could use a warm sweater like this.
Linda
Dec 02, 2016
Ultimately in cardigan, the raging style for 2016! So easy to knit in three pieces or in one. In stripes or solid color yarn, this is a casual or elegant design with easy to follow pattern instructions.
tondastewart 73586 60
Feb 05, 2015
if they are so slimming please why do they not use full figure models doesn't appear to be slimming anything
Kez Kezooie
Aug 19, 2015
My friend knitted this and yes, it is very flattering for bigger sizes. It drapes well and looks good when moving or standing still.
The Designing Peng uin
Aug 17, 2016
this style does have a slimming effect - additionally it has a graceful floating effect gives an elegant appearance to the person wearing it too many sweaters make the wearer look dumpy. Not this one.
lakelandknitter
Aug 25, 2014
So easy to make. Everyone that sees it, loves the way it looks & are amazed that it's just a rectangle with sleeves! I love it!
Ddipsy
Aug 21, 2014
I have seen similar sweaters worn on tv shows. I like the way they look, hang, and seem to flow as the actress walks. This is a must have sweater for me!
Report Inappropriate Comment
Are you sure you would like to report this comment? It will be flagged for our moderators to take action.
Thank you for taking the time to improve the content on our site.

