Among the Moorlands Wrap
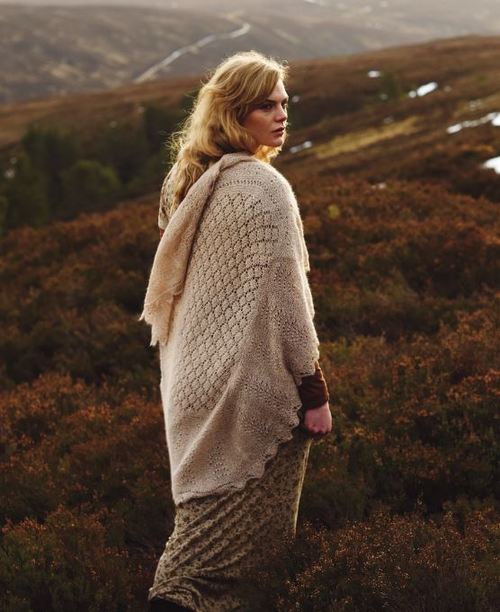
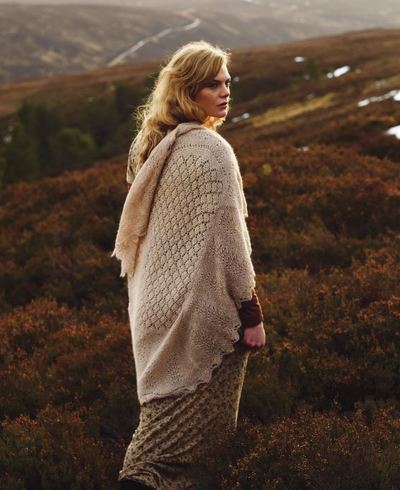
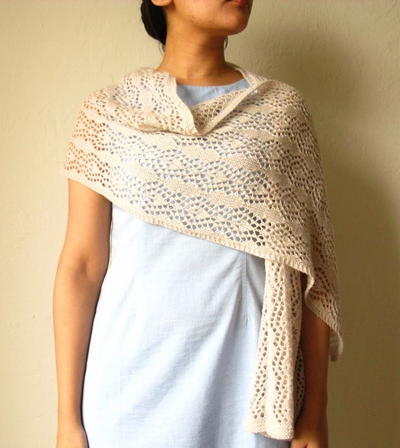
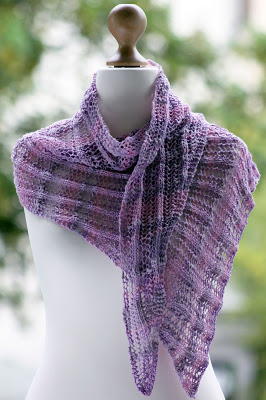
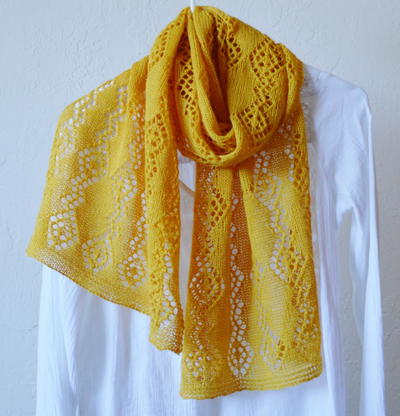
When we think of beautiful lace knitting patterns like this Among the Moorlands Wrap, we also think of romance. This lace shawl pattern captures everything our hearts say when we think of a romantic drama. We would certainly see this gorgeous knit shawl on any of our classic heroines like Jane from Jane Eyre if we were to be found roaming the moorlands and unexpectedly running into a handsome English gentleman. Anyway, this free knitting pattern is for those looking to add a little romance to their wardrobe, and it's the perfect, elegant throw-on layer for the changing seasons.

Knitting Needle Size10 or 6 mm
Yarn Weight(2) Fine (23-26 stitches to 4 inches)
Gauge1 stitches, 2 rows, 3 inches. stockinette stitch
Materials:
- Rowan Lace 3 x 50 gm
- 6 mm (no 4) (US 10) needles
Measurements:
Completed shawl measures approx 95 cm (37 1⁄2 in) square when pressed.
Gauge:
19 sts and 38 rows to 10 cm measured over border patt when pressed, using 6mm (US 10) needles.
Abbreviations:
Alt = Alternate(ing)
Beg = Beginning
Cont = Continue(ity)
Dec = Decrease(ing)
Foll = follow(s)(ing)
G st = garter stitch (knit every row)
Inc = Increase(ing)
K = Knit
K2tog = Knit next 2 stitches together
P = Purl
P2sso = pass 2 slipped stitches over
P2tog = Purl next 2 stitches together
P2togtbl = Purl next 2 stitches together through back loops
Patt(s) = pattern(s)
Rem = Remaining
Rep = Repeat
RS = Right side
Sl2tog = slip 2 together
Ssk = Slip next 2 stitches knitwise one at a time, pass them back onto left-hand needle, then knit through back loops together.
St(s) = Stitch(es)
WS = Wrong side
Yfwd = yarn forward
Instructions:
SHAWL
Edging
Using 6mm (US 10) needles cast on 11 sts.
Knit 1 row.
Now work edging patt as folls:
Row 1 (WS): yfwd, K2tog, K7, yfwd, K2.
12 sts.
Row 2: K1, K2tog, yfwd, K2tog, K6, K1 tbl. 11 sts.
Row 3: yfwd, K2tog, K4, K2tog, yfwd, K2tog, K1. 10 sts.
Row 4: K1, K2tog, yfwd, K2tog, K4, K1 tbl.
9 sts.
Row 5: yfwd, K2tog, K2, K2tog, yfwd, K2tog, K1. 8 sts.
Row 6: K1, K2tog, yfwd, K2tog, K2, K1 tbl.
7 sts.
Row 7: yfwd, K2tog, K2, K2tog, K1. 6 sts.
Row 8: K1, K2tog, K2, K1 tbl. 5 sts.
Row 9: yfwd, K2tog, K3.
Row 10: K4, K1 tbl.
Row 11: yfwd, K2tog, K1, yfwd, K2. 6 sts.
Row 12: K2, yfwd, K3, K1 tbl. 7 sts.
Row 13: yfwd, K2tog, K3, yfwd, K2. 8 sts.
Row 14: K2, yfwd, K5, K1 tbl. 9 sts.
Row 15: yfwd, K2tog, K5, yfwd, K2. 10 sts.
Row 16: K2, yfwd, K7, K1 tbl. 11 sts.
These 16 rows form edging patt.
Rep last 16 rows 14 times more.
Cast off.
Work border
With WS facing, using 6mm (US 10) needles, pick up and knit 120 sts evenly along straight row-end edge of edging, picking up 8 sts for each edging patt rep and working through the “yfwd” along side of edging.
Rows 1 and 2: Inc in first st, K to last st, inc in last st. 124 sts.
Rows 3 and 4: K n i t .
Rows 5 to 8: K n i t .
Row 9 (RS): K5, *K1, (K2tog) 3 times, (yfwd, K1) 5 times, yfwd, (sl1, K1, psso) 3 times, K1, rep from * to last 5 sts, K5.
Row 10: K n i t .
Rows 5 to 10 form border patt.
Work a further 46 rows in patt.
Now shape corners as folls:
Place markers 24 sts in from both ends of last row.
Row 57 (RS): K3, (K2tog) 5 times, (yfwd, K1) 4 times, yfwd, (sl 1, K1, psso) 3 times, K1, slip marker onto right needle, patt to next marker, slip marker onto right needle, K1, (K2tog) 3 times, (yfwd, K1) 4 times, yfwd, (sl 1, K1, psso) 5 times, K3. 118 sts.
Row 58: Knit.
Rows 59 to 62: Knit.
Row 63: K3, (K2tog) 4 times, (yfwd, K1) 3 times, yfwd, (sl 1, K1, psso) 3 times, K1, slip marker onto right needle, patt to next marker, slip marker onto right needle, K1, (K2tog) 3 times, (yfwd, K1) 3 times, yfwd, (sl 1, K1, psso) 4 times, K3. 112 sts.
Row 64: Knit.
Rows 65 to 68: Knit.
Row 69: K3, (K2tog) 3 times, (yfwd, K1) twice, yfwd, (sl 1, K1, psso) 3 times, K1, slip marker onto right needle, patt to next marker, slip marker onto right needle, K1, (K2tog) 3 times, (yfwd, K1) twice, yfwd, (sl 1, K1, psso) 3 times, K3. 106 sts.
Row 70: K to last 2 sts, K2tog. 105 sts.
Work in g st for 6 rows, dec 1 st at each end of every row and ending with RS facing for next row. 93 sts.
Cast off loosely.
Make a further edging and border in this way. These 2 sections form side borders of centre section.
Now make a further 2 edging and border sections in exactly the same way but do NOT cast off at ends of these sections. Slip sts of one of these sections onto a holder – this forms top border.
Centre section
Working on 93 sts still on needles after 4th edging and border section is complete, cont as folls:
Row 1 (RS): K1, *yfwd, K2tog, rep from * to end. 93 sts.
Row 2: As row 1.
Work in g st for 8 rows, ending with RS facing for next row.
Now work in centre lace patt as folls:
Row 1 (RS): K4, *K2tog, yfwd, K1, yfwd, sl 1, K1, psso, K3, rep from * to last st, K1.
Row 2 and every foll alt row: Knit.
Row 3: K3, *K2tog, yfwd, K3, yfwd, sl 1, K1, psso, K1, rep from * to last 2 sts, K2.
Row 5: K2, K2tog, yfwd, *K5, yfwd, sl 1, K2tog, psso, yfwd, rep from* to last 9 sts, K5, yfwd, sl 1, K1, psso, K2.
Row 7: K3, *yfwd, sl 1, K1, psso, K3, K2tog, yfwd, K1, rep from * to last 2 sts, K2.
Row 9: K4, *yfwd, sl 1, K1, psso, K1, K2tog, yfwd, K3, rep from * to last st, K1.
Row 11: K5, *yfwd, sl 1, K2tog, psso, yfwd, K5, rep from * to end.
Row 12: As row 2.
These 12 rows form centre lace patt.
Rep last 12 rows 13 times more.
Work in g st for 6 rows, ending with RS facing for next row.
Join sts of this section to sts of top border by grafting sts together.
MAKING UP
Sew side border sections to row-end edges of centre section, then join corners of border and edging sections.
Pin out to measurement given, cover with damp cloths and leave to dry naturally.
Read NextPrimavera Wrap
Your Recently Viewed Projects
tallulah41
Apr 02, 2021
I'm using #2 fingering yarn, and 6mm needles. It's taking 400grams just to do the edging borders. I'll have to use another 200grams just for the center. No way that 150grams is enough for this 37 1/2" wrap. I should have known better, as a knitter of 60 years, but now I'm having to use different dye lots for the different section. It will be beautiful unique to me, but it certainly isn't the right amount of yarn as stated.
scotbelle
Apr 26, 2017
I noticed the confusion for what yarn and needle size.... and went to the ROWAN site for the "BRESSAY HAP WRAP" ............which shows the exact same lovely photo. DIRECT from the ROWAN Pattern YARN Rowan Lace 3 x 50gm NEEDLES 6 mm (no 4) (US 10) needles I am an intermediate lace knitter, but...I want this one! S
melissasea22
Apr 14, 2017
You must log in or become a free member of Rowan, I love their designs Original Pattern Name Bressay Hap Wrap Link to ORIGINAL PATTERN http//www.knitrowan.com/designs-and-patterns/patte == rns/bressay-hap-wrap
RachelAnne
Feb 03, 2017
Such a gorgeous pattern and shawl. Hope to have the skills to make it one day!
The Designing Peng uin
May 30, 2016
I am not interested in getting into the argument about the origins of the pattern - knit on 4mm needles it is coming up nicely - of course it makes for five projects on the go ( shall have to stop reading my e-mail LOL). This project has great appeal - that soft look as if one just stepped off the English moors
Member 8660958
Nov 05, 2015
No, the previous commenter is correct. http//www.ravelry.com/patterns/library/bressay-hap == -wrap This is the same shawl. And it does indeed say to use 4mm needles.
x
Sep 06, 2015
Needle size is incorrect here and on the Rowan website where the pattern originates from. This pattern is posted on Ravelry as "Bressay Hap Wrap". Ravelry says to use US size 6 (4.0 mm).
Lisa
Oct 09, 2015
The pattern you are referencing from Ravelry is NOT the same pattern as this, the pattern you are referencing takes almost 3000 yards of fingering weight yarn, entirely different size needles and gauge. The pattern is owned by Rowan and everything on here is identical to what Rowan states in their pattern. To reference ravelry over the pattern owner as being correct is just ridiculous!
katya 1056238
Nov 06, 2015
This is the wrap that X is referring to http//www.ravelry.com/patterns/library/bressay == -hap-wrap THIS pattern calls for 4mm needles and 1100 - 1311 yards of yarn.
Lisa
Jul 12, 2015
I did the same thing, and wasn't sure, so I checked the Rowan site and found that it is indeed Rowan Fine Lace Yarn that is needed to complete this pattern.
rmccamont 7051615
Jul 21, 2015
Is the size 10 needle correct, also, do you know? I've done a swatch with some Rowan Fine Lace yarn, and it seems way too "open". Doesn't look like the photo at all. I'm pretty new to lace knitting, though, so I'm very unsure here...! Thanks!
Lisa
Jul 10, 2021
It's a size 6 needle that is needed, which is incorrectly labelled a 6mm on this website, the gauge cannot be achieved with a 6mm, I expect that is why other knitters are running out of yarn to complete the project. Happy knitting
claudiakeeley 5718 579
Jul 02, 2015
The pattern calls for Rowan Lace yarn and size 10 needles. The yarn I am finding is called Rowan Fine Lace yarn and calls for a size 2 needle. Are these yarns one in the same and the effect is gained by using the 10 needles or should I continue to look for Rowan Lace?? This pattern is SO gorgeous!
daltman2009 223729 0
Jul 26, 2015
I have the same question. Feels like the 10 needle is too big. Anxious to get started as the pattern is lovely.
Report Inappropriate Comment
Are you sure you would like to report this comment? It will be flagged for our moderators to take action.
Thank you for taking the time to improve the content on our site.

