Knitting Tension Problems and How to Fix Them
Whether you're knitting too loose or knitting too tight, we have a solution!
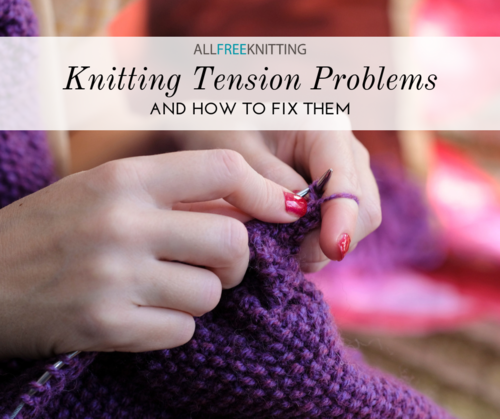
For a lot of people, knitting tension problems go away after they've been knitting for a while and their hands start to get used to how tight the yarn should feel when they pull their stitches through. However, for others, "practice and wait" isn't such sound advice. I've been knitting for years now, and I still have problems with my tension. Whether I'm knitting too tightly or too loosely seems to vary with the weather, and it's nothing short of frustrating. Perhaps with projects like scarves and hats it's not so critical, but when you start to move into the more-fitted-clothing territory, this suddenly becomes a concern.
I knew I had to address my knitting tension problems when I knit a pair of mittens for my fiancé for the holidays. I'd used a pattern that I knit before, and the size turned out just fine, but tweaked it with a new colorwork chart and used three-stranded colorwork as opposed to two. On the left, you can see one of the original mittens that I knit years ago. On the right, you can see one of the new pair I knit for him. Yikes! I can barely squeeze my tiny hand into that thing, so he's a goner. My uneven knitting tension was finally starting to affect things.
For more great projects like this, subscribe to our free email newsletter!
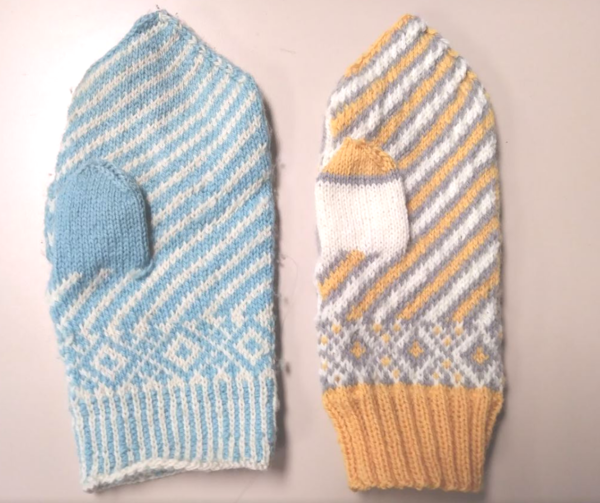
Rather than wallow over the lost hours (and the uselessness of a really cute pair of mittens), I decided to do some research to learn how to fix my tension, and ended up down a rabbit hole. It turns out everyone is different (shocker!) and some people have different knitting tension problems than others. I'll explore every problem I've come across and what we can do to combat them rather than just "practicing and waiting."
You're Knitting Too Loose
How Do You Know You're Knitting Too Loose?
The diagnosis of loose stitches is a pretty easy one. If all of the "v"s in your stockinette stitch appear to pop out of the project a little bit, like bent knees rather than flat legs, you may have a loose knitting problem. You may additionally see gaps between those legs and the legs beneath them, which would be particularly strange if your project wasn't meant to be loose and lacy. The best way to be certain of whether or not you're knitting too loose is to knit up a gauge swatch for your project, or a simple, small square of the stitch that your pattern uses the most and compare it to the given gauge. If you have fewer stitches per inch in that swatch than the pattern's gauge gives, you may need to go down a needle size or two, or you may simply need to knit more tightly.
How Can We Fix This?
Firstly, be sure you're actually holding your working yarn, be it in your dominant hand (English) or around the fingers holding the stationary needle (Continental). This may seem obvious, but some knitters simply scoop the loose yarn up with their working needle and pull it through, which will just not produce the tightness you need for a nice, clean, smooth-looking piece of fabric.
If that's not your problem, you'll simply want to try and pull your yarn a little bit tighter every time you wrap it around your working needle to knit. This will feel unnatural and like a whole lot of extra time and work for something that used to be lightning-fast, but you may find that you prefer the feeling of control that tighter stitches gives you. You'll certainly prefer the better fit of that cardigan you've been wanting to knit! While the advice definitely comes down to "just knit tighter," I don't take this lightly and realize that it's a big change to make, especially when you've been knitting for years. Consider knitting up a practice swatch with yarn you don't care about, on needles you don't plan on using, and pick those up to practice for a couple of minutes before moving onto your real project, making sure you're focusing on tightening up your knitting. When you skip the adjustment, you don't risk ruining your serious project, and you get yourself 'in the groove' for knitting a bit tighter.
You're Knitting Too Tight
How Do You Know You're Knitting Too Tight?
While you can certainly see if you're knitting too tightly, this issue is one that you feel above all else. When you insert your working needle into the next stitch, do you have to wiggle that sucker around just to get him to go through? Do you feel like you're doing needlepoint with your work rather than knitting sometimes? Does your garter stitch, or the wrong side of your stockinette stitch, look more like seed stitch because the purl bumps are so rounded? The surefire way to tell if you're knitting too tightly is to knit a gauge swatch, as well; this time, you'll know you're knitting too tightly (or need to go up a needle size or two) if you have more stitches per inch than the given gauge of your project.
How Can We Fix This?
First, make sure that you are knitting your stitches not at the tips of your needles, but around the legs of them. When you think about it, it becomes obvious: you might be more dextrous with the tips of your needles because they're easier to control, but they're tapered and smaller than the actual size of your needles and will produce smaller stitches.
Once you've ruled out improper stitch placement, the one remaining solution is to just relax. That sounds patronizing and obvious, but once I started to actually take this piece of advice seriously, it significantly improved my knitting. Take some time to knit up a small swatch of stockinette stitch, and loosen your grip on your yarn in your right hand (or around your left hand's fingers, if you're knitting using the continental method). Don't pull much, or at all, on your yarn once you've wrapped it around your needle, and just pull it through. This will take some practice, and it will feel very wrong, and that's why we're using a swatch! You may find that you move too far in the opposite direction and that your tension is starting to look rather loose (see above), so use this swatch to correct yourself and play around with how much you pull your working yarn when you wrap it around your needle. You may find only the slightest adjustment was needed.
Your Tension is All Over the Place
How Do You Know Your Tension is Uneven?
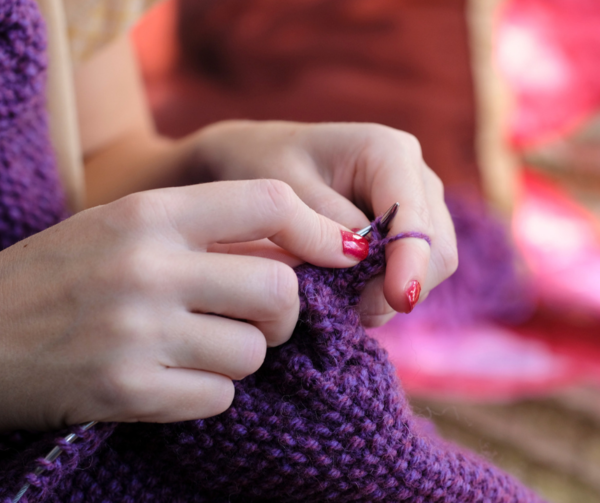
Uneven tension is one of the most common problems in knitting. All this means is that you don't necessarily always knit too loosely or too tightly, but you find yourself doing both of those things at different times, and sometimes within the same project! Perhaps your seed stitch is loose and floppy, with the purl bumps appearing more like dripping paint than little pebbles, but your stockinette stitch is so tight that it slopes inward from the cast-on edge. Another way you can tell you have uneven tension is if you knit a few rows of a project, put it down until the next day, and knit a few more rounds, and there's a visible difference in both the width of the project and the look of the stitches. Perhaps you knit tighter yesterday because you had more energy, or were more stressed out about something. Maybe you knit looser today because you started closer to bedtime. No matter what the cause of your uneven tension, it's a tough nut to crack.
How Can We Fix This?
Much of sporadic tension problems can be corrected through blocking, but if the transition between too-tight and too-loose stitches is more frequent than that, you're going to need to adjust your tension from the source: your hands. Just like with too-tight and too-loose knitting, that's easier said than done, but aside from practicing evening out your tension on a swatch, there are a few steps you can take to make sure that your tension is as even as possible across the board:
- Have fewer, longer knitting sessions. The more knitting you can get done while sitting in the same position, at the same time, with the same mindset, will mean longer blocks of knitting in your work which are knit with the same tension. As mentioned above, anything from stress level to the time of day may be affecting your tension.
- Try changing up your needles. NobleKnits explains here that different needles may cause stitches to stick or become too slippery, which can affect certain types of stitches, such as lace stitches, more than others.
- Switch up your knitting style. Perhaps your current style makes for inconsistent tension because it simply gives you too much control. Portuguese knitting is a fun style to try because the tension of the yarn is controled by the way it hangs around your neck, and might be a good solution for you. Bonus point: purling is easier with this style.
Stranded Knitting Tips
Does Your Stranded Knitting Need a Tension Doctor?
Wise knitters will tell you that the wrong side of your stranded knitting project should look just as even and beautiful as the right side for it to be a success. Whether you agree or disagree with this (which is perfectly valid!), an 'ugly' wrong side of your work can be very telling on whether or not you need some help evening out your tension with stranded colorwork.
You're Knitting Your Stranded Colorwork Too Tightly
This is my problem, so this is an issue that's close to my heart. You know you're knitting your stranded colorwork too tightly if you see puckering on the right side of your work, which means that your project will look 'bumpy' rather than smooth and even. While a lot of this puckering can be corrected with a good wet block, blocking won't fix everything. Luckily, tight stranded knitting is a common problem and there are an array of solutions.
How Can We Fix This?
Paper Tiger has some excellent tips on loosening up your tight colorwork, and was my saving grace when working through my own tight-knitting issues. Dianna explains here that stretching out the stitches that were just worked along your working needle so they're spaced out significantly, before you work too far along in the project, will really help lengthen your floats to a proper tightness and reduce puckering. She also suggests trying using a stranding guide (a little device which connects to your finger and holds each strand for you on either side), knitting with one color in each hand, or both colors in one hand if you've been knitting just one way.
Additionally, you can try knitting inside out, if you're knitting in the round. This isn't something I've personally tried, but by flipping your knitting so the wrong side is out means your yarn will be forced to travel farther to get from one stitch to the other, inadvertently lengthening your stitches, because the thickness of your project will increase the circumference of your work. This technique takes a bit of practice to perfect, but it comes with the added benefit of having a better view of your floats.
My personal recommendation is to make sure that you're catching your floats in as even of intervals as possible. I've found the most puckering on my projects comes from those where I haphazardly caught my floats whenever I felt they were perhaps getting too long, rather than setting an exact number of stitches to knit before catching any floats. It's also important to keep in mind previous rows and to not catch your floats in the exact stitch above where you might have caught them in the previous row; you'll find this becomes visible on the right side of your work and creates more puckering.
You're Knitting Your Stranded Colorwork Too Loosely
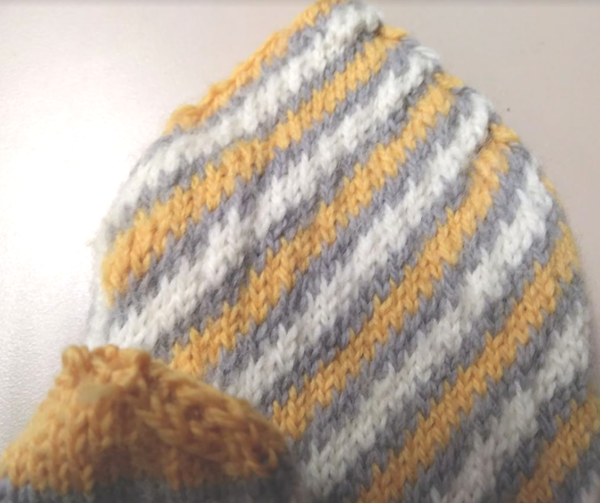
While this problem is a bit rarer than knitting colorwork too tightly, it's not unheard of. Visually, stranded colorwork that is too loose will look a lot like single-color knitting that's too loose, with the stitches appearing too far apart from one another and popping out of the work. You might find that your contrasting color specifically is the culprit, and that when you stretch your work out, suddenly, the stitches look normal. This is a temporary fix, however, and nothing other than a tension correction will fix loose colorwork knitting permanently.
How Can We Fix This?
Catch your floats! If you don't know how to do this yet, unsurprisingly, Paper Tiger has a great guide on trapping floats. Remember to always keep a
'pecking order' of color in your stranded knitting, where one color is always worked over the other color, and this post will teach you how to trap a float whether it belongs behind the color you're working next, or in front of it. Trapping your floats will not only force you to knit more tightly, because it will leave less give on the last stitch before the float, but will also keep your project from having too many loose bits in which to catch your fingers.
Another good rule of thumb is to make sure that when you're switching colors, you're pulling the new color over to your working needle, rather than just scooping under and grabbing it. If you find your last worked stitch has a float that appears to flop downward, rather than create a satisfying slight-arch, you can still pull on that color of yarn to tighten it up a little bit. Tightening up your colorwork might mean individually tightening each stitch for a while until you get used to how tightly you should be pulling it while working.
Your Purl Stitches are Looser Than the Knit Stitches
How Do You Know Your Purl Stitches are Too Loose?
I'm really exposing my flaws, here, but this is yet another issue of mine, and yet another very common issue. You'll know that your purl stitches are too loose if 1x1 ribbing looks funky. That is to say, if the vertical line of "vs" looks more like a vertical line of "H"s, with the legs of the stockinette portion hanging loosely away from each other. You may also see this problem in seed stitch, where at least half of the purl bumps in your work stick out from the project.
How Can We Fix This?
Consider how you wrap your yan. If you wrap it counter-clockwise both when you're knitting and you're purling (or the Western method), you'll find that you're using more yarn on your purl stitch than your knit stitch, and the problem isn't a loose purl stitch at all—it's just the nature of your knitting method. NonaKnits explains this problem in greater detail, as well as a couple of proposed solutions to this problem.
If this isn't your knitting method, the solution comes down to knitting your knit stitches as usual, but pulling the working yarn tightly towards yourself when you purl. If it feels as though you may be overcompensating and purling too tightly, I offer up the same piece of advice as for every problem: knit a swatch with yarn and needles you don't care about and practice there. It's better to have an ugly, useless swatch (or perhaps an ugly dishcloth if you're not keen on wasting yarn) rather than an ugly sweater or mittens.
For more tips on fixing tension problems, check out this article on Uneven Tension.
Note: This project is from I Like Knitting digital magazine. Non-members can access 3 free patterns every month. Subscribe to the I Like Knitting Gold Club for unlimited access to their entire pattern archive, featuring hundreds of exclusive patterns.
Read NextHow to Make Yarn Tassels

