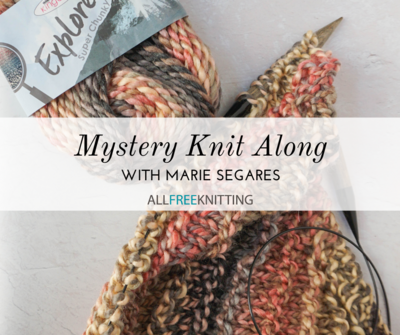
Fall 2021 Mystery Knit Along
Join us every week in October for a mysterious knit along for a cozy, autumn-inspired project!
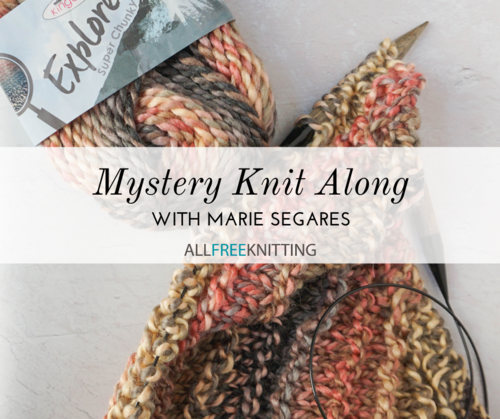
We're excited to share our October 2021 Mystery Knit Along! With this fun event, we'll release the instructions for a mystery pattern over 4 weeks. By the end of the month, you'll have knitted a brand new (and awesome!) pattern.
We've joined forces with the incredibly talented Marie Segares from Underground Crafter to bring you this knit along, so you know the end result will be as gorgeous as it is fun to knit.
But here's the twist: you won't know what you're knitting right away! Looking for a hint? It's a piece that your fall wardrobe has been waiting for!
Our mystery knit along is not one to miss. Join us every Wednesday in October for each exciting new installment of an exclusive pattern by the wonderfully skilled Marie Segares.
How do I join? In order to be updated with the latest set of instructions every week, make sure that you're subscribed to the Knit Picky Patterns newsletter from AllFreeKnitting, and keep an eye on your inbox! We'll be sure to send you an email each week to bring you the next step in the knit along.
PLUS! Don't forget to share with us your progress every week in the comments down below. We can't wait to see how yours turn out!
Week 1: Supply List and Gauge Swatch
I’m Marie from Underground Crafter and I’m excited to be joining you for another mystery knit along! In this post, I’m including a complete supply list and schedule for the knit along, with instructions for checking your gauge.
At the end of our knit along, you will have experimented with different increases and different stitches, and you will have a beautiful project that you can wear, gift, or donate!
This is a beginner-friendly project, or a relaxing knit for a more experienced knitter. To complete this project, you’ll need to know:
-How to cast on. I used the Long-Tail Cast On, but you can use another method of your choice.
-Basic knitting stitches including knit, purl, and slip stitch.
-How to bind off. I used the Standard Bind Off.
Supplies Needed:
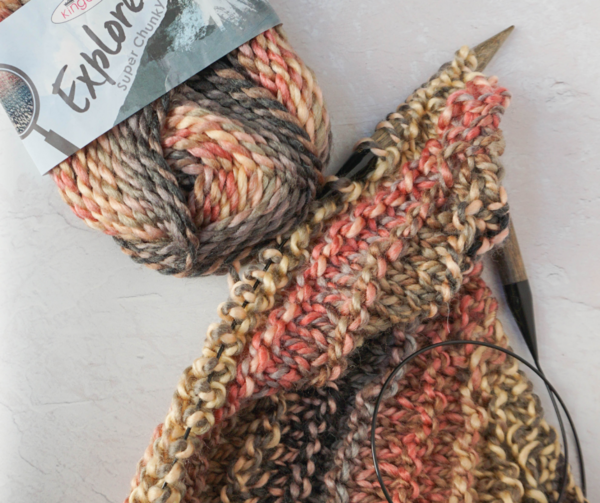
- Approximately 522 yards (477.5 meters) in any super bulky yarn – I used 6 skeins in King Cole Explorer Super Chunky yarn in 4302 Earhart. I used a marled yarn, but that isn’t necessary
- US Size 15/10 mm 40”/100 cm circular knitting needles, or size needed to obtain gauge.
- Locking stitch marker (optional).
- Yarn needle.
- Tools for blocking, measuring, and cutting.
10 sts = 4” (10 cm) in stockinette stitch
To work gauge swatch, CO 10 sts.
Row 1: Knit across.
Row 2: Purl across.
Repeat Rows 1-2 until swatch measures approximately 4” (10 cm) long. Bind off in pattern for Row 1.
Exact gauge is not critical for this project.
Your stitches should create a loose fabric that drapes nicely, but should not have holes or gaps between stitches. Pin your swatch flat without stretching to measure.
Troubleshooting Your Swatch Gauge:
-If your swatch is much wider than 4” (10 cm), your stitches may be too large. You may want to go down a needle size to a US Size 13/9 mm needle. Or, you can continue with the needles and tension you have, but your project will be larger than the sample and your yarn requirements may be different.
-If your swatch is much narrower than 4” (10 cm), your stitches may be too small. You may want to go up a needle size to a US Size 17/12 mm needle. Or,
you can continue with the needles and tension you have, but your project will be narrower than the sample and your yarn requirements may be different.
-You can find out more about knitting gauge here and needle sizes here.
Knit Along Schedule:
Week 1: Supply List and Gauge Swatch (you are here)
Week 2: Pattern Part 1
Week 3: Pattern Part 2
Week 4: Pattern Part 3 and Finishing
Week 2: Pattern Part 1
Welcome back to the mystery knit along. I’m Marie from Underground Crafter and I’m excited to be sharing the first part of this pattern!
Abbreviations Used In This Pattern:
CO – cast on
k – knit
kfb – knit in front and back (increase) – You can find a video tutorial for this increase here.
p – purl
rep – repeat
RS – right (front) side
st(s) – stitch(es)
yo – yarn over (increase) – You can find a video tutorial for this increase here.
[] – Repeat instructions within brackets as indicated
Pattern Notes:
If you have difficulty “reading” your stitches, place a locking stitch marker on the front of Row 2 to mark the right/front side.
Part 1:
CO 2 sts.
Row 1: K across.
Row 2: (RS) Kfb twice. – 4 sts
Row 3: Rep Row 1.
Row 4: Kfb twice, k1, kfb. – 7 sts
Row 5: K2, p to last 2 sts, k2.
Row 6: K2, yo, k to last 2 sts, yo, k2. – Increases by 2 sts to an odd number of sts.
Row 7: Rep Row 5.
Rows 8-9: Rep Row 6 twice.
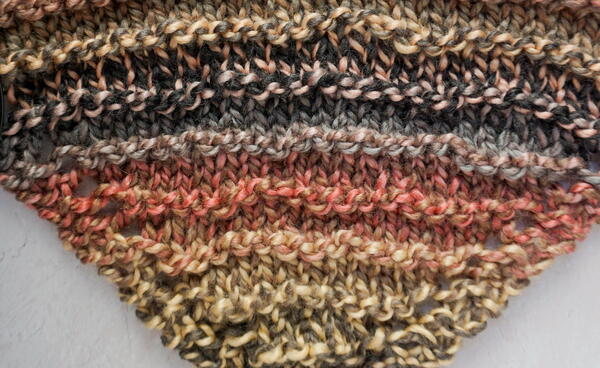
Rep Rows 6-9, 8 more times (32 rows) or until angled edge measures approximately 14” (35.5 cm) long.
Do not fasten off.
Week 3: Pattern Part 2
Welcome back to the mystery knit along. In this post, I’m sharing the second part of the pattern.
Abbreviations Used In This Pattern:
k – knit
p – purl
rep – repeat
RS – right (front) side
st(s) – stitch(es)
yo – yarn over (increase) – You can find a video tutorial for this increase here.
[] Repeat instructions within brackets as indicated
Pattern Notes:
If you have difficulty “reading” your stitches, place a locking stitch marker on the front of Row 10 to mark the right/front side.
Part 2:
Row 10: (RS) Rep Row 6.
Row 11: Rep Row 5.
Rows 12-17: Rep Rows 10-11, 3 more times.
Row 18: Rep Row 10.
Row 19: K2, [p1, k1] to last 3 sts, p1, k2.
Rows 20-25: Rep Rows 18-19, 3 more times.
Rep Rows 10-25 once more (32 rows for Part 2) or until angled edge measures approximately 28” (71 cm) long. Do not fasten off.
Week 4: Pattern Part 3
Welcome to the final clue of the mystery knit along!
Abbreviations Used In This Pattern:
BO – bind off – You can find a tutorial for the binding off here.
k – knit
p – purl
p2tog – purl 2 stitches together – You can find a video tutorial for this decrease here.
rep – repeat
RS – right (front) side
st(s) – stitch(es)
yo – yarn over (increase) – You can find a video tutorial for this increase here.
[] – Repeat instructions within brackets as indicated
Part 3:
Row 26 (RS): K2, yo, p2tog, p to last 2 sts, yo, k2. – Increases by 2 sts to an even number of sts.
Row 27: K across.
Row 28: Rep Row 6. – Increases by 2 sts
Rows 29-32: Rep Rows 27-28, twice.
Row 33: Rep Row 27.
Row 34: K2, yo, [p1 in next st, k1 in next st] across to last 2 sts, yo, k2. – Increases by 2 sts
Row 35: K2, [p1 in next st, k1 in next st] across to last 2 sts, k2.
Row 36: K2, yo, [k1 in next st, p1 in next st] across to last 2 sts, yo, k2. – Increases by 2 sts
Row 37: K2, [k1 in next st, p1 in next st] across to last 2 sts, k2.
Row 38: K2, yo, p to last 2 sts, yo, k2. – Increases by 2 sts
Rep Rows 27-37 once more or until angled edge measures approximately 36” (91.5 cm) long. (If you want to increase the size, Rep Row 38, then Rep Rows 27-37).
BO in pattern for Row 6.
Fasten off.
With yarn needle, weave in ends.
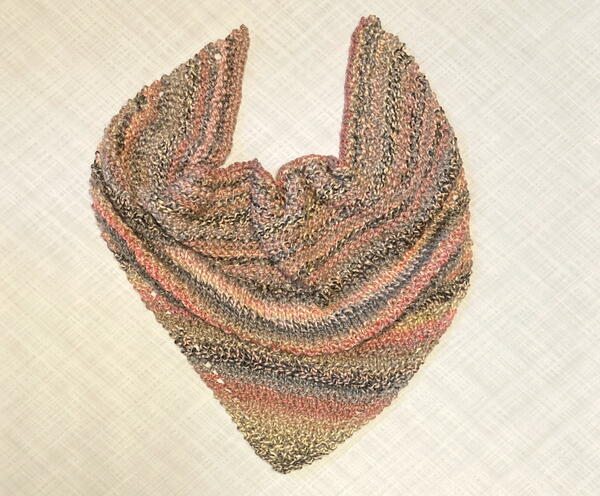
By now, you’ve probably guessed that this is a triangular shawl! My final shawl measurements (before blocking) were 47” (119.5 cm) across the wingspan and 26” (66 cm) down the spine. You may find spray blocking helpful. You can learn more about blocking here.
Your Recently Viewed Projects
peacnluv2101
Oct 21, 2021
I'm missing something, my Part 1 looks nothing like the above picture. mine is a stockinette stitch.
Lisa
Oct 23, 2021
Part 1 is not and should not look like stockinette stitch, rows 1-4 are knit rows, row 5 is a purl row, row 6 is knit, row 7 is purl, rows 8 9 are knit rows.
sdolan700 2870396
Oct 23, 2021
Mine is stockinette too. Row 9 is a repeat of row 7, which is a repeat of row 5, which is a purl row, so 8 9 are a knit then purl rows.
Lisa
Oct 27, 2021
You appear to be misreading the pattern, only rows 5 and 7 are purl rows the rest of the series of 9 rows are all knit rows. The pattern reads-Rows 8-9 Rep Row 6 twice., this means rows 8 9 are knit rows since row 6 is a knit row. Honestly, nothing you said in your comment is accurate, if the comment was intended for this pattern. Rows1, 2 ,3 4 are knit, row 5 is purl, row 6 is knit, Row 7 is purl, Rows 8 9 are knit. Just looking at the picture shows that this is a ridge pattern not stockinette. To complete the pattern correctly you must follow the row by row pattern.
mrjsutherland 1748 121
Oct 27, 2021
I printed out the pattern each week it was published. I have it on paper that Rows 8-9 Rep Rows 6-7 once. It must have been changed after I printed it because mine is stockinette also. I have it printed that way.
sdolan700 2870396
Oct 27, 2021
Thank you! I printed the instructions each week also. It was changed after I left my comment above on 10/23/2021. I don't understand why the author couldn't just admit that there was an error.
beakmom24 4110017
Oct 14, 2021
So far, so good. Using leftover yarn from a crop sweater I made this summer for my daughter. I'm thinking this will be Yule gift for my daughter-in-law. I am woefully behind in my gift projects.
Report Inappropriate Comment
Are you sure you would like to report this comment? It will be flagged for our moderators to take action.
Thank you for taking the time to improve the content on our site.

