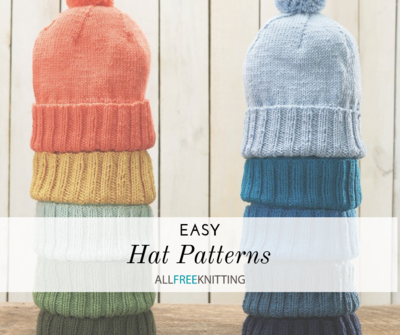
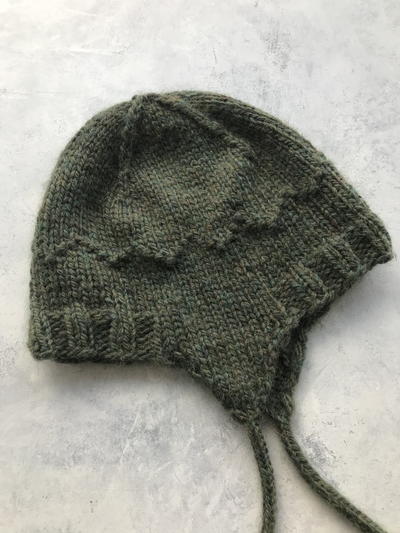
Mountain Ridges Earflap Hat Pattern

This stunning hat pattern is perfect for your next mountain hike. The cozy warm ear flaps and tassels on this hat are a little bit of extra work, but they're totally worth it when you put the hat on and feel how warm it is.
If you're not used to knitting ear flaps, it can be a big challenging at first, but with a little bit of carefully placed increasing, you'll have a hat that's more than just a quick beanie.
Whether you're camping in the great outdoors or simply wearing this hat to keep those ears warm in the winter, this pattern makes a perfect hat that you'll want to wear on the chilliest of days.

Knitting Needle Size10 or 6 mm, 8 or 5 mm, Circular Knitting Needles, Double-Pointed Knitting Needles (DPNs)
Yarn Weight(5) Bulky/Chunky (12-15 stitches for 4 inches)
Materials List
- Bulky Yarn (Weight 5) | Cascade Yarns Baby Alpaca Chunky
- US Size 8 DPNs
- US Size 10 straight needles
- US size 10 circular needles (16-inches)
- US Size 10 DPNs
- Tapestry Needle
Pattern
Ear Flaps (Make 2)
I-Cord:
CO3 sts onto a size 8 DPN.
Move the stitches to the right side of the needle, bring the yarn tightly around the back, and knit the three stitches onto a second DPN.
Repeat this until your i-cord measures approximately 9 inches.
Ear Flap:
Move the stitches from the i-cord to size 10 straight needles.
Row 1 (WS): S1, pfb, p1. (4 sts)
Row 2 (RS): S1, k all sts
Row 3: S1, p all sts
Row 4: S1, m1l, k2, m1r, k1. (6 sts)
Row 5: S1, p all sts
Row 6: S1, m1l, k4, m1r, k1. (8 sts)
Row 7: S1, p all sts
Row 8: S1, m1l, k6, m1r, k1. (10 sts)
Row 9: S1, p all sts
Row 10: S1, k all sts. (10 sts)
Row 11: S1, p all sts
Row 12: S1, m1l, k8, m1r, k1. (12 sts)
Row 13: S1, p all sts
Ribbing
Joining:
From the first ear flap, CO 22 more stitches using the knit on cast on method. (Total of 34 sts, including the ear flap. This will be the left ear flap.)
From the second ear flap, CO 26 more stitches using the knit on cast on method. (Total of 38 sts, including the ear flap. This will be the right ear flap.)
Note: The two sides of this hat are intentionally uneven. The front of the hat is the side that has the 26 cast on stitches. The back of the hat is the side that has the 22 cast on stitches. This is done in order to push the ear flaps further back on the hat so that they more properly cover the ears.
Switch to your 16” circular needles, positioning both ear flaps and cast on stitches in order.
Rnds 1-6: K12, (p2, k2), repeat ( ) until 2 sts before the start of the next ear flap, p2, k12, (p2, k2), repeat ( ) until you’ve reached two stitches before the end of the round, p2
Body of the Hat
Rnds 7-13: K all sts
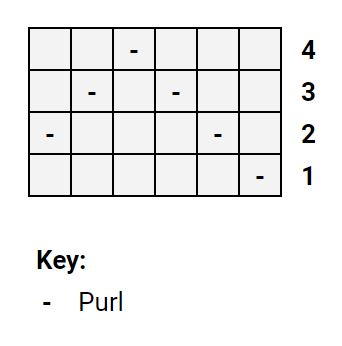
Rnds 14-17: Continue as in the chart below. (Rnds 14-17 correspond to rnds 1-4 in the chart)
Rnds 18-24: K all sts
Shaping
Slip stitches evenly among 4 DPNs
Rnd 25: (K8, cdd, k7), repeat ( ) around
Rnds 26-27: K all sts
Rnd 28: (K7, cdd, k6), repeat ( ) around
Rnds 29-30: K all sts
Rnd 31: (K6, cdd, k5), repeat ( ) around
Rnd 32: K all sts
Rnd 33: (K5, cdd, k4), repeat ( ) around
Rnd 34: K all sts
Rnd 35: (K4, cdd, k3), repeat ( ) around
Rnd 36: K all sts
Rnd 37: (K3, cdd, k2), repeat ( ) around
Rnd 38: (K2, cdd, k1), repeat ( ) around
Rnd 39: (K1, cdd), repeat ( ) around
Rnd 40: Cut a tail of yarn and thread it through all remaining sts to bind off.
Up Next
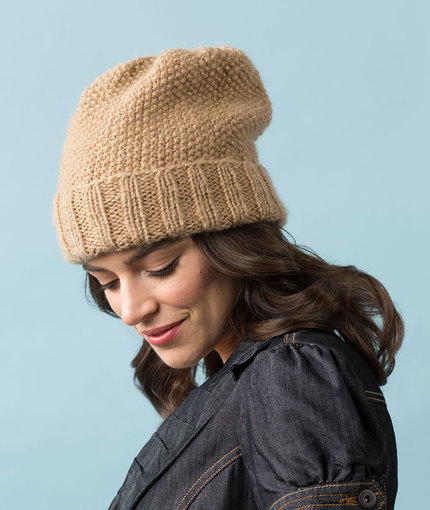
Read NextCamel Seed Stitch Slouchy Hat
Your Recently Viewed Projects
Thanks for your comment. Don't forget to share!
banshee 0933060
Jun 16, 2019
What does cdd mean?
Lisa
Aug 10, 2021
CDD means central double decrease-slip 2 stitches from left to right at the same time, go into them as if to knit 2 together, then knit 1 stitch and pass the 2 slipped stitches over the knit stitch, this type of decrease will create a column of raised stitches, it's a great shaping technique. Hope this helps, happy knitting!
Dana N
Apr 17, 2019
Love this pattern! It's so woodsy and has just the right amount of texture. Forest green is one of my favorite colors. Love it!
Mark
Apr 17, 2019
I made this for my friend for his birthday, and he loves it! Connecting the ear flaps together was a little tricky at first, but I got it after a while )
Report Inappropriate Comment
Are you sure you would like to report this comment? It will be flagged for our moderators to take action.
Thank you for taking the time to improve the content on our site.