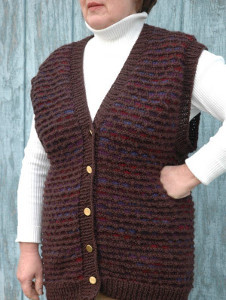
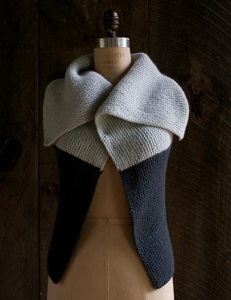
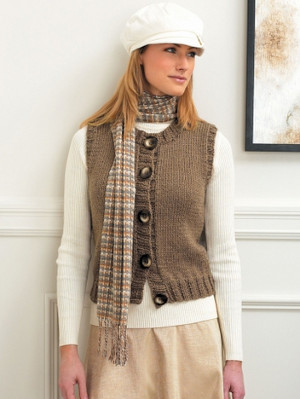
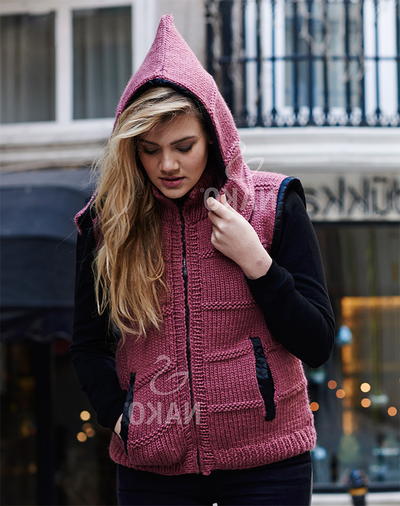
Black Smoke Cable Knit Vest

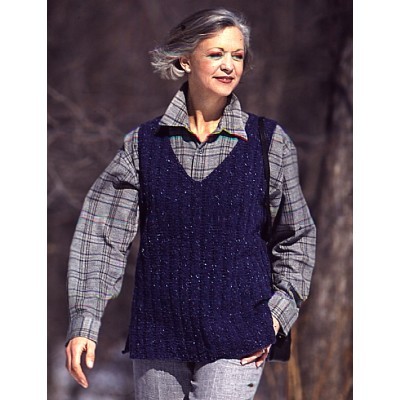
Fall is the perfect season for layering. It's getting colder, but there are days when that Indian summer creeps back. Be prepared for chilly or warm weather with the Black Smoke Cable Knit Vest. This beautiful, cable knit vest pattern is perfect for layering. It's big enough to fit over a long sleeve shirt, but fitted enough to look great under a jacket. The Black Smoke Cable Knit vest is a classic, making it the perfect addition to you fall wardrobe for years to come.

Knitting Needle Size9 or 5.5 mm
Yarn Weight(4) Medium Weight/Worsted Weight and Aran (16-20 stitches to 4 inches)
Materials:
- Bernat® Super Value (197 g/7 oz/389 m/426 yds) or Bernat® Berella 4 (100 g/3.5 oz/197 m/216 yds) or Bernat® Satin (100 g/3.5 oz/149 m/163 yds)
- Size XS/S: 615 m/675 yds
- Size M: 660m/725 yds
- Size L/XL: 755m/825 yds
- Size 2/3XL: 850 m/930 yds
- Size 4/5XL: 950 m/1040 yds
- Size 5.5 mm (U.S. 9) knitting needles or size needed to obtain gauge
- Cable needle
Black Smoke Cable Knit Vest Chart
GAUGE
17 sts and 24 rows = 4 ins [10 cm] in stocking st.
ABBREVIATIONS
Alt = Alternate(ing).
Beg = Beginning.
C4B = Slip next 2 stitches onto cable needle and leave at back of work. K2 then K2 from cable needle.
C4F = Slip next 2 stitches onto cable needle and leave at front of work. K2 then K2 from cable needle.
Cont = Continue(ity).
Inc = Increase 1 stitch by knitting into front and back of next stitch.
K = Knit.
P = Purl.
Pat = Pattern.
Rem = Remaining.
Rep = Repeat.
RS = Right side.
St(s) = Stitch(es).
WS= Wrong side.
SIZES
To fit bust measurement
Extra-Small/Small 28-34 ins [71-86.5 cm]
Medium 36-38 ins [91.5-96.5 cm]
Large 40-42 ins [101.5-106.5 cm]
Extra-Large 44-46 ins [112-117 cm]
2/3 Extra-Large 48-54 ins [122-137 cm]
4/5 Extra-Large 56-62 ins [142-157.5 cm]
Finished bust
X-Small/Small 36 ins [91.5 cm]
Medium 40 ins [101.5 cm]
Large 43 ins [109 cm]
X-Large 47 ins [119.5 cm]
2/3 X-Large 56 ins [142 cm]
4/5 X-Large 63 ins [160 cm]
INSTRUCTIONS
The instructions are written for smallest size. If changes are necessary for larger sizes the instructions will be written thus ( ). When only one number is given, it applies to all sizes. For ease in working, circle all numbers pertaining to your size.
BACK
**Cast on 82 (90-98-106-126-142) sts.
1st row: (RS). K2. *P2. K2. Rep from * to end of row.
2nd row: P2. *K2. P2. Rep from * to end of row.
Rep last 2 rows 5 times more, inc 6 (6- 6-6-10-10) sts evenly across last row. 88 (96-104-112-136-152) sts.
Proceed in Shadow Cable Pat as follows:
1st row: (RS). (K2. P2) 3 (3-3-3-4-4) times. Knit to last 12 (12-12-12-16- 16) sts. (P2. K2) 3 (3-3-3-4-4) times.
2nd and alt rows: (P2. K2) 3 (3-3-3- 4-4) times. Purl to last 12 (12-12- 12-16-16) sts. (K2. P2) 3 (3-3-3-4-4) times.
3rd row: As 1st row.
5th row: (K2. P2) 3 (3-3-3-4-4) times. *C4B. K4. Rep from * to last 12 (12- 12-12-16-16) sts. (P2. K2) 3 (3-3-3- 4-4) times.
7th and 9th rows: As 1st row.
11th row: (K2. P2) 3 (3-3-3-4-4) times. *K4. C4F. Rep from * to last 12 (12-12-12-16-16) sts. (P2. K2) 3 (3- 3-3-4-4) times.
12th row: As 2nd row.
Rep last 12 rows of pat until work from beg measures 15 (15-16-17-17- 18) ins [38 (38-40.5-43-43-45.5) cm], ending with a WS row.
Place markers on side edges 5 ins [12.5 cm] up from cast on edge for slits.**
Shape armholes: Cast off 8 (8-8-8- 12-12) sts beg next 2 rows. 72 (80- 88-96-112-128) sts.
Cont even in pat until armhole measures 5½ (6-6½-7-7½-8) ins [14 (15-16.5-18-19-20.5) cm], ending with a WS row.
Next row: *K1. P1. Rep from * to end of row.
Next row: *P1. K1. Rep from * to end of row.
Rep last 2 rows twice more. Cast off in pat.
Place markers along last row 3½ (3½- 4-4½-5½-6½) ins [9 (9-10-11.5- 14-16.5) cm] in from armhole edges for shoulders.
FRONT
Work from ** to ** as given for Back.
Shape armholes: 1st row: (RS). Cast off 8 (8-8-8-12-12) sts. K2 (including st on needle after cast off ). P2. Pat 28 (32-36-40-48-56) sts. P2. K4. P2. Pat to end of row. 80 (88-96-104-124- 140) sts.
2nd row: Cast off 8 (8-8-8-12-12) sts. P2 (including st on needle after cast off ). K2. P28 (32-36-40-48-56). K2. P4. K2. Pat to end of row. 72 (80-88- 96-112-128) sts.
Divide for fronts: 1st row: (RS). K2. P2. Pat 28 (32-36-40-48-56) sts. P2. K2. Turn. Leave rem sts on a spare needle.
2nd row: P2. K2. P28 (32-36-40-48- 56). K2. P2.
3rd row: K2. P2. Pat 28 (32-36-40-48- 56) sts. P2. K2.
4th row: As 2nd row.
Cont even in pat until armhole measures 5½ (6-6½-7-7½-8) ins [14 (15-16.5- 18-19-20.5) cm], ending with a WS row.
Next row: *K1. P1. Rep from * to end of row.
Next row: *P1. K1. Rep from * to end of row.
Rep last 2 rows twice more. Cast off in pat.
Place markers along last row 3½ (3½- 4-4½-5½-6½) ins [9 (9-10-11.5- 14-16.5) cm] in from armhole edge for shoulder.
With RS of work facing, join yarn to rem 36 (40-44-48-56-64) sts on spare needle and proceed as follows:
1st row: K2. P2. Pat 28 (32-36-40-48- 56) sts. P2. K2.
2nd row: P2. K2. P28 (32-36-40-48- 56). K2. P2.
Cont even in pat until armhole measures 5½ (6-6½-7-7½-8) ins [14 (15-16.5-18-19-20.5) cm], ending with a WS row.
Next row: *K1. P1. Rep from * to end of row.
Next row: *P1. K1. Rep from * to end of row.
Rep last 2 rows twice more. Cast off in pat.
Place markers along last row 3½ (3½- 4-4½-5½-6½) ins [9 (9-10-11.5-14- 16.5) cm] in from side edges for shoulders.
FINISHING
Pin garment pieces to measurements. Cover with a damp cloth, leaving cloth to dry.
Sew shoulder seams from markers to armhole edge. Sew side seams from armhole to markers, leaving last 5 ins [12.5 cm] open of side slits.
Read NextEasy V-Neck Vest
Your Recently Viewed Projects
valjrmiller 810747 7
Feb 01, 2018
I have nearly finished the back and noticed when reading through the pattern that there is no finish to the armholes or neck. Is there something missing?? surely there should be some ribbing to these edges? Looks nice but not really ready to rate it yet
KathrynAllison
Feb 01, 2018
Hi valjrmiller, we checked the original source of the pattern and it looks as if all available information is included. Here is the original pattern listing if you would like to leave your question on their page or contact the designer directly: http://www.yarnspirations.com/patterns/cable-vest-2.html?id=188684. Hope this helps! -Editors of AllFreeKnitting
mistie45 7853380
Aug 18, 2016
I started this pattern only to find the openings did not have finishing instructions. I love the pattern although done in a lighter color would show off the pattern better.
mistie45 7853380
Sep 15, 2016
Finally made this great pattern. No further instructions needed. I put it on a circular needle and knitted in the round from the slits to the armholes. Very pretty, even in black.
neckel1 2401844
Aug 10, 2015
I've read the directions for this - is there no finishing edge to the armholes and neck? I'm not sure it would lay as nicely as the photo without something a bit stiffer on those edges. Thoughts? Thanks.
ctomlin 8791810
Apr 27, 2014
I still trying to figure out how to print it ? Why are these patterns getting so difficult to print ?
ahuggett4282014 35 72818
Apr 28, 2014
Thanks for your message. There is a print button at the top of the pattern you can click to get a simple printable version. Alternatively, you can highlight the text, then right-click on it. You'll get a window that gives you the option to "copy." Do that, and then paste the text into a word document. You should be able print that document that way. Another option is to highlight exactly what you would like to be printed. Then, select print from your drop-down menu, and change your print range from all to selection. Editors of AllFreeKnitting
theltaylor 7936216
Aug 07, 2015
You can always hit "Control Print" to print this and you will get the screen that allows you to format and determine number of copies.
Report Inappropriate Comment
Are you sure you would like to report this comment? It will be flagged for our moderators to take action.
Thank you for taking the time to improve the content on our site.

